Create your first workspace and start collaborating with full control in Drumee
As with any team collaboration, you often end up switching between multiple tools just to manage files, chat, schedule meetings, and control permissions. This constant context-switching slows everyone down and creates fragmented data. The objective is to keep everything in one secure place and move forward efficiently while maintaining full sovereignty over your information.
Drumee eliminates the need to jump between apps. Now that we have the basics down for getting started, it’s time to get the ball rolling on your first workspace.
Section Overview
In this section you will learn:
- How to start with Drumee
- Create a workspace
- Upload real work + search for files and folders
- Invite members
- Chat with your team
- Schedule a meeting with your team
- Grant permissions
- Try out the AHA features
1. How to start with Drumee
Step 1: Go to app.drumee.com
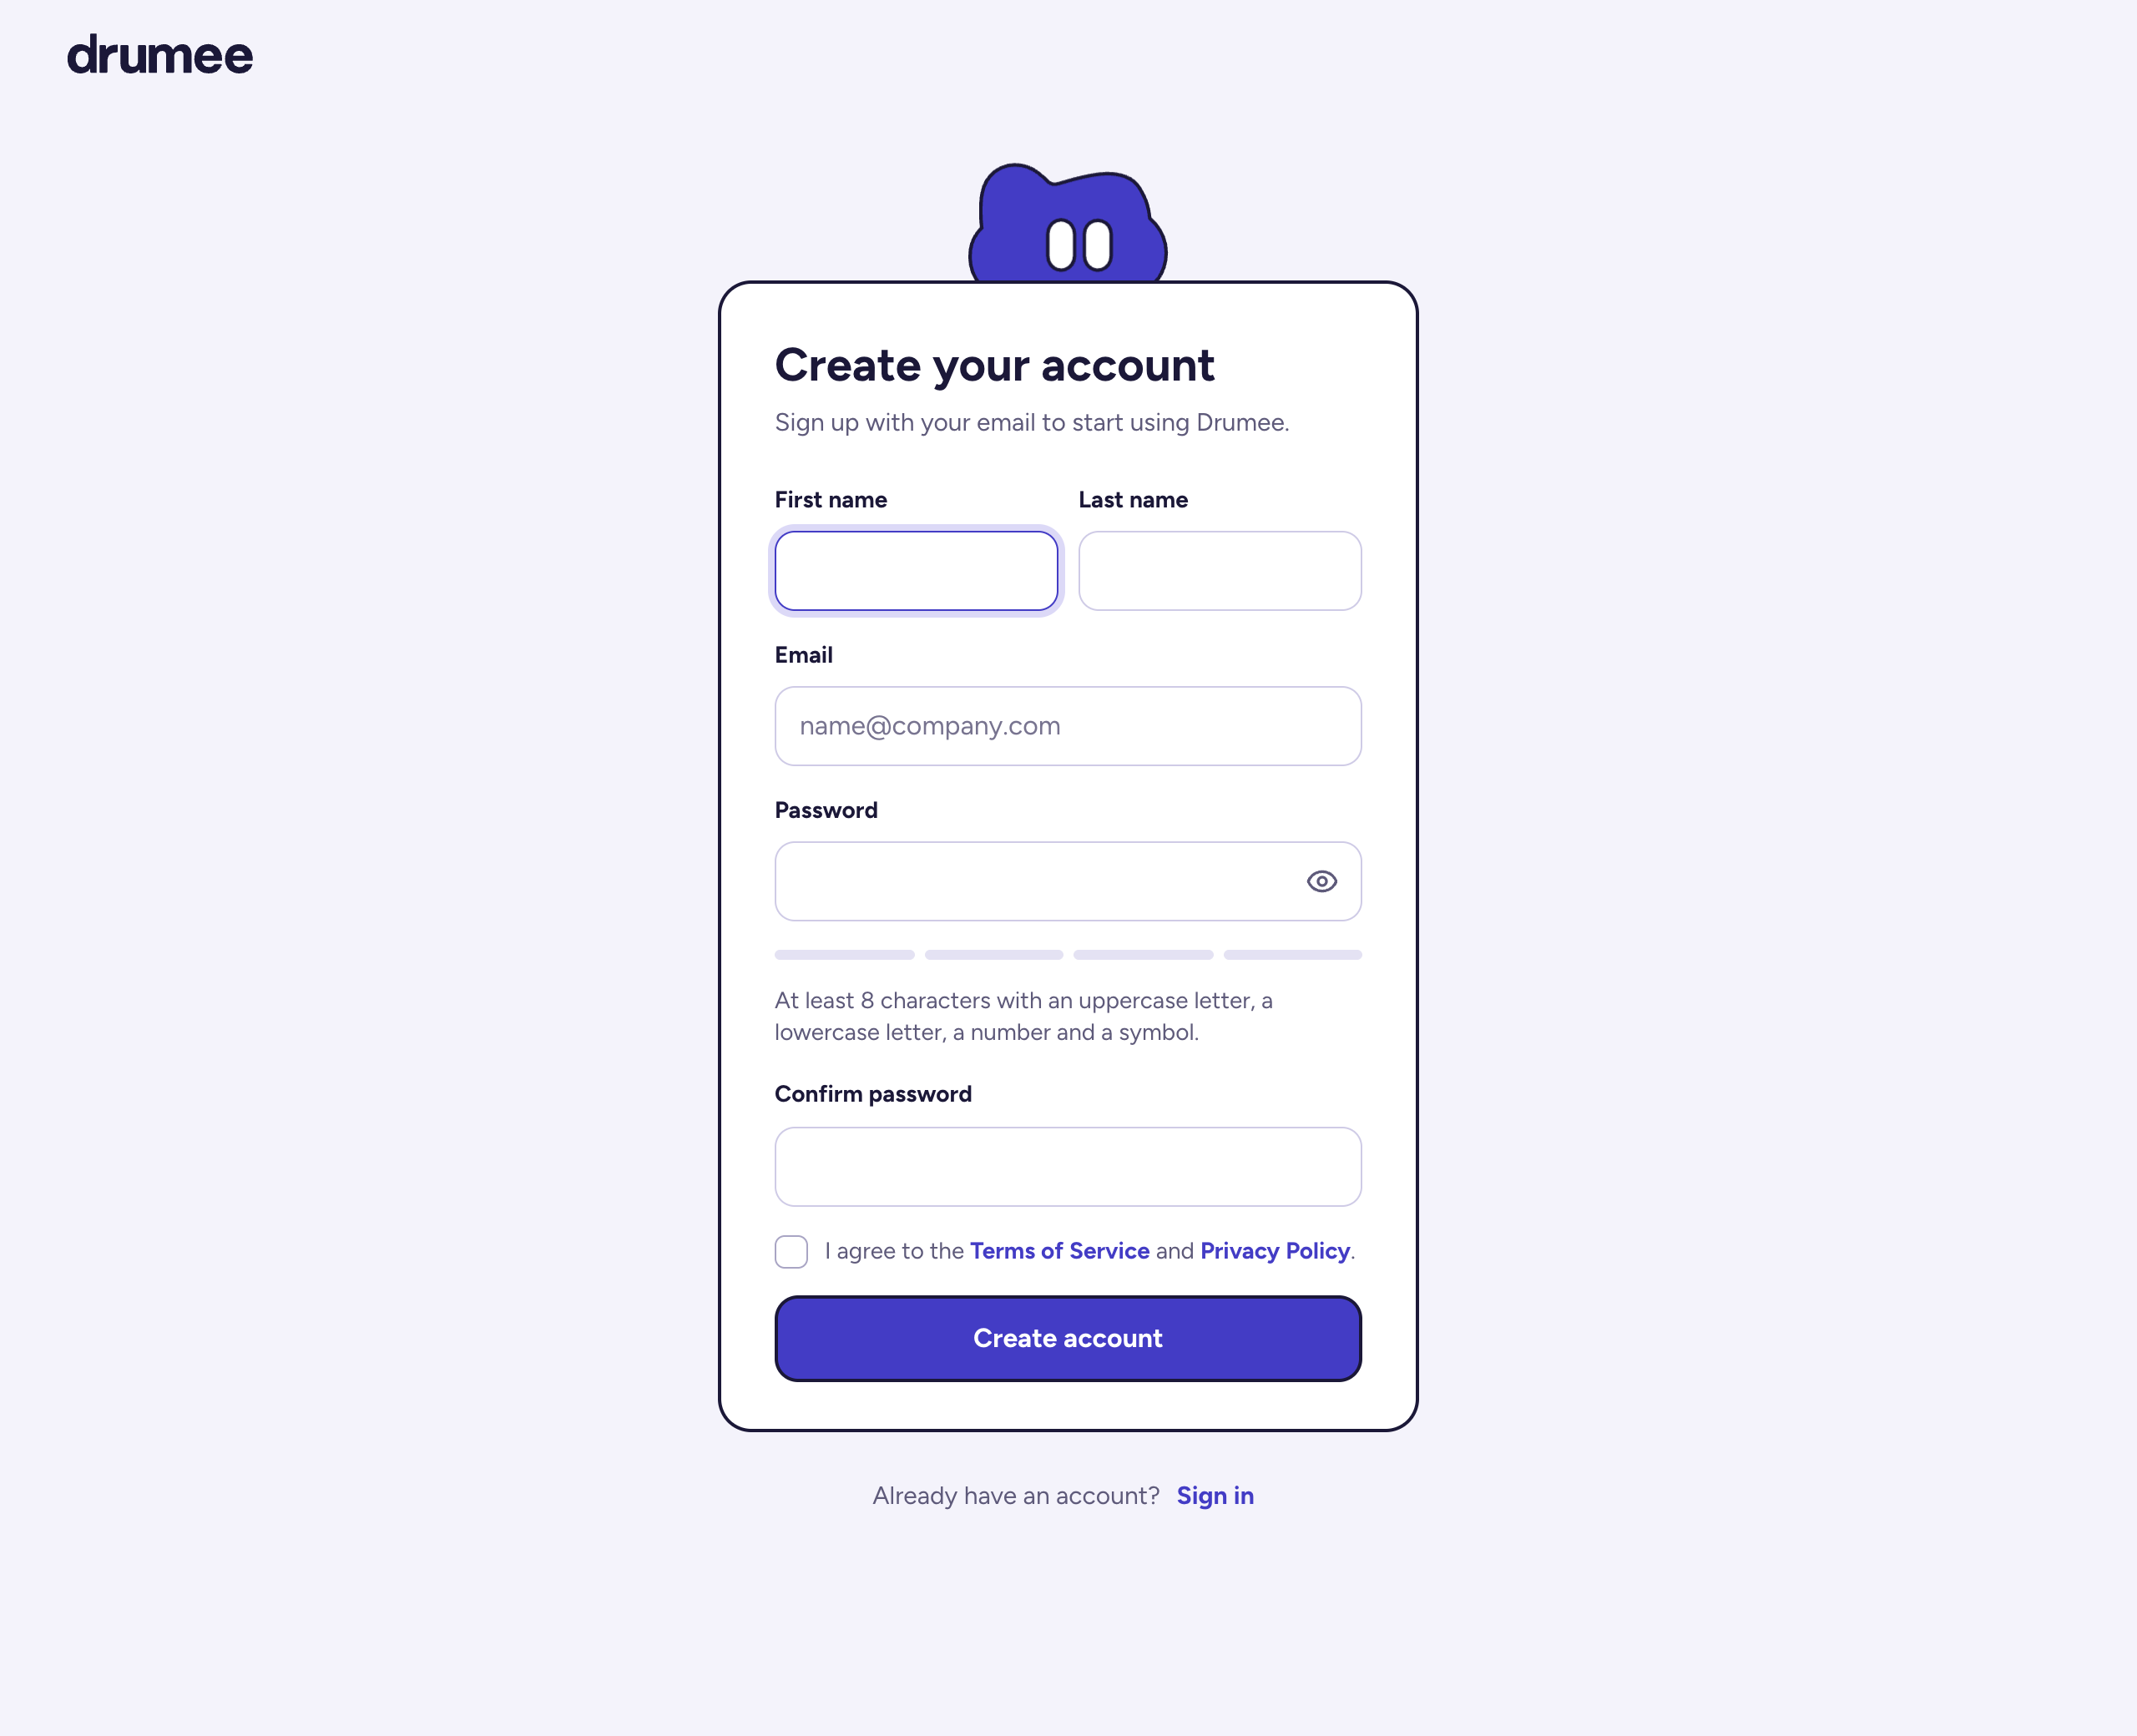
Step 2: If you don’t have an account yet:
=> Click Create one, fill in your name, email and a password, then click Create account.
=> Confirm your email address with the message Drumee sends you.
Step 3: If you already have an account:
=> Enter your email + password.
=> Then click Sign in.
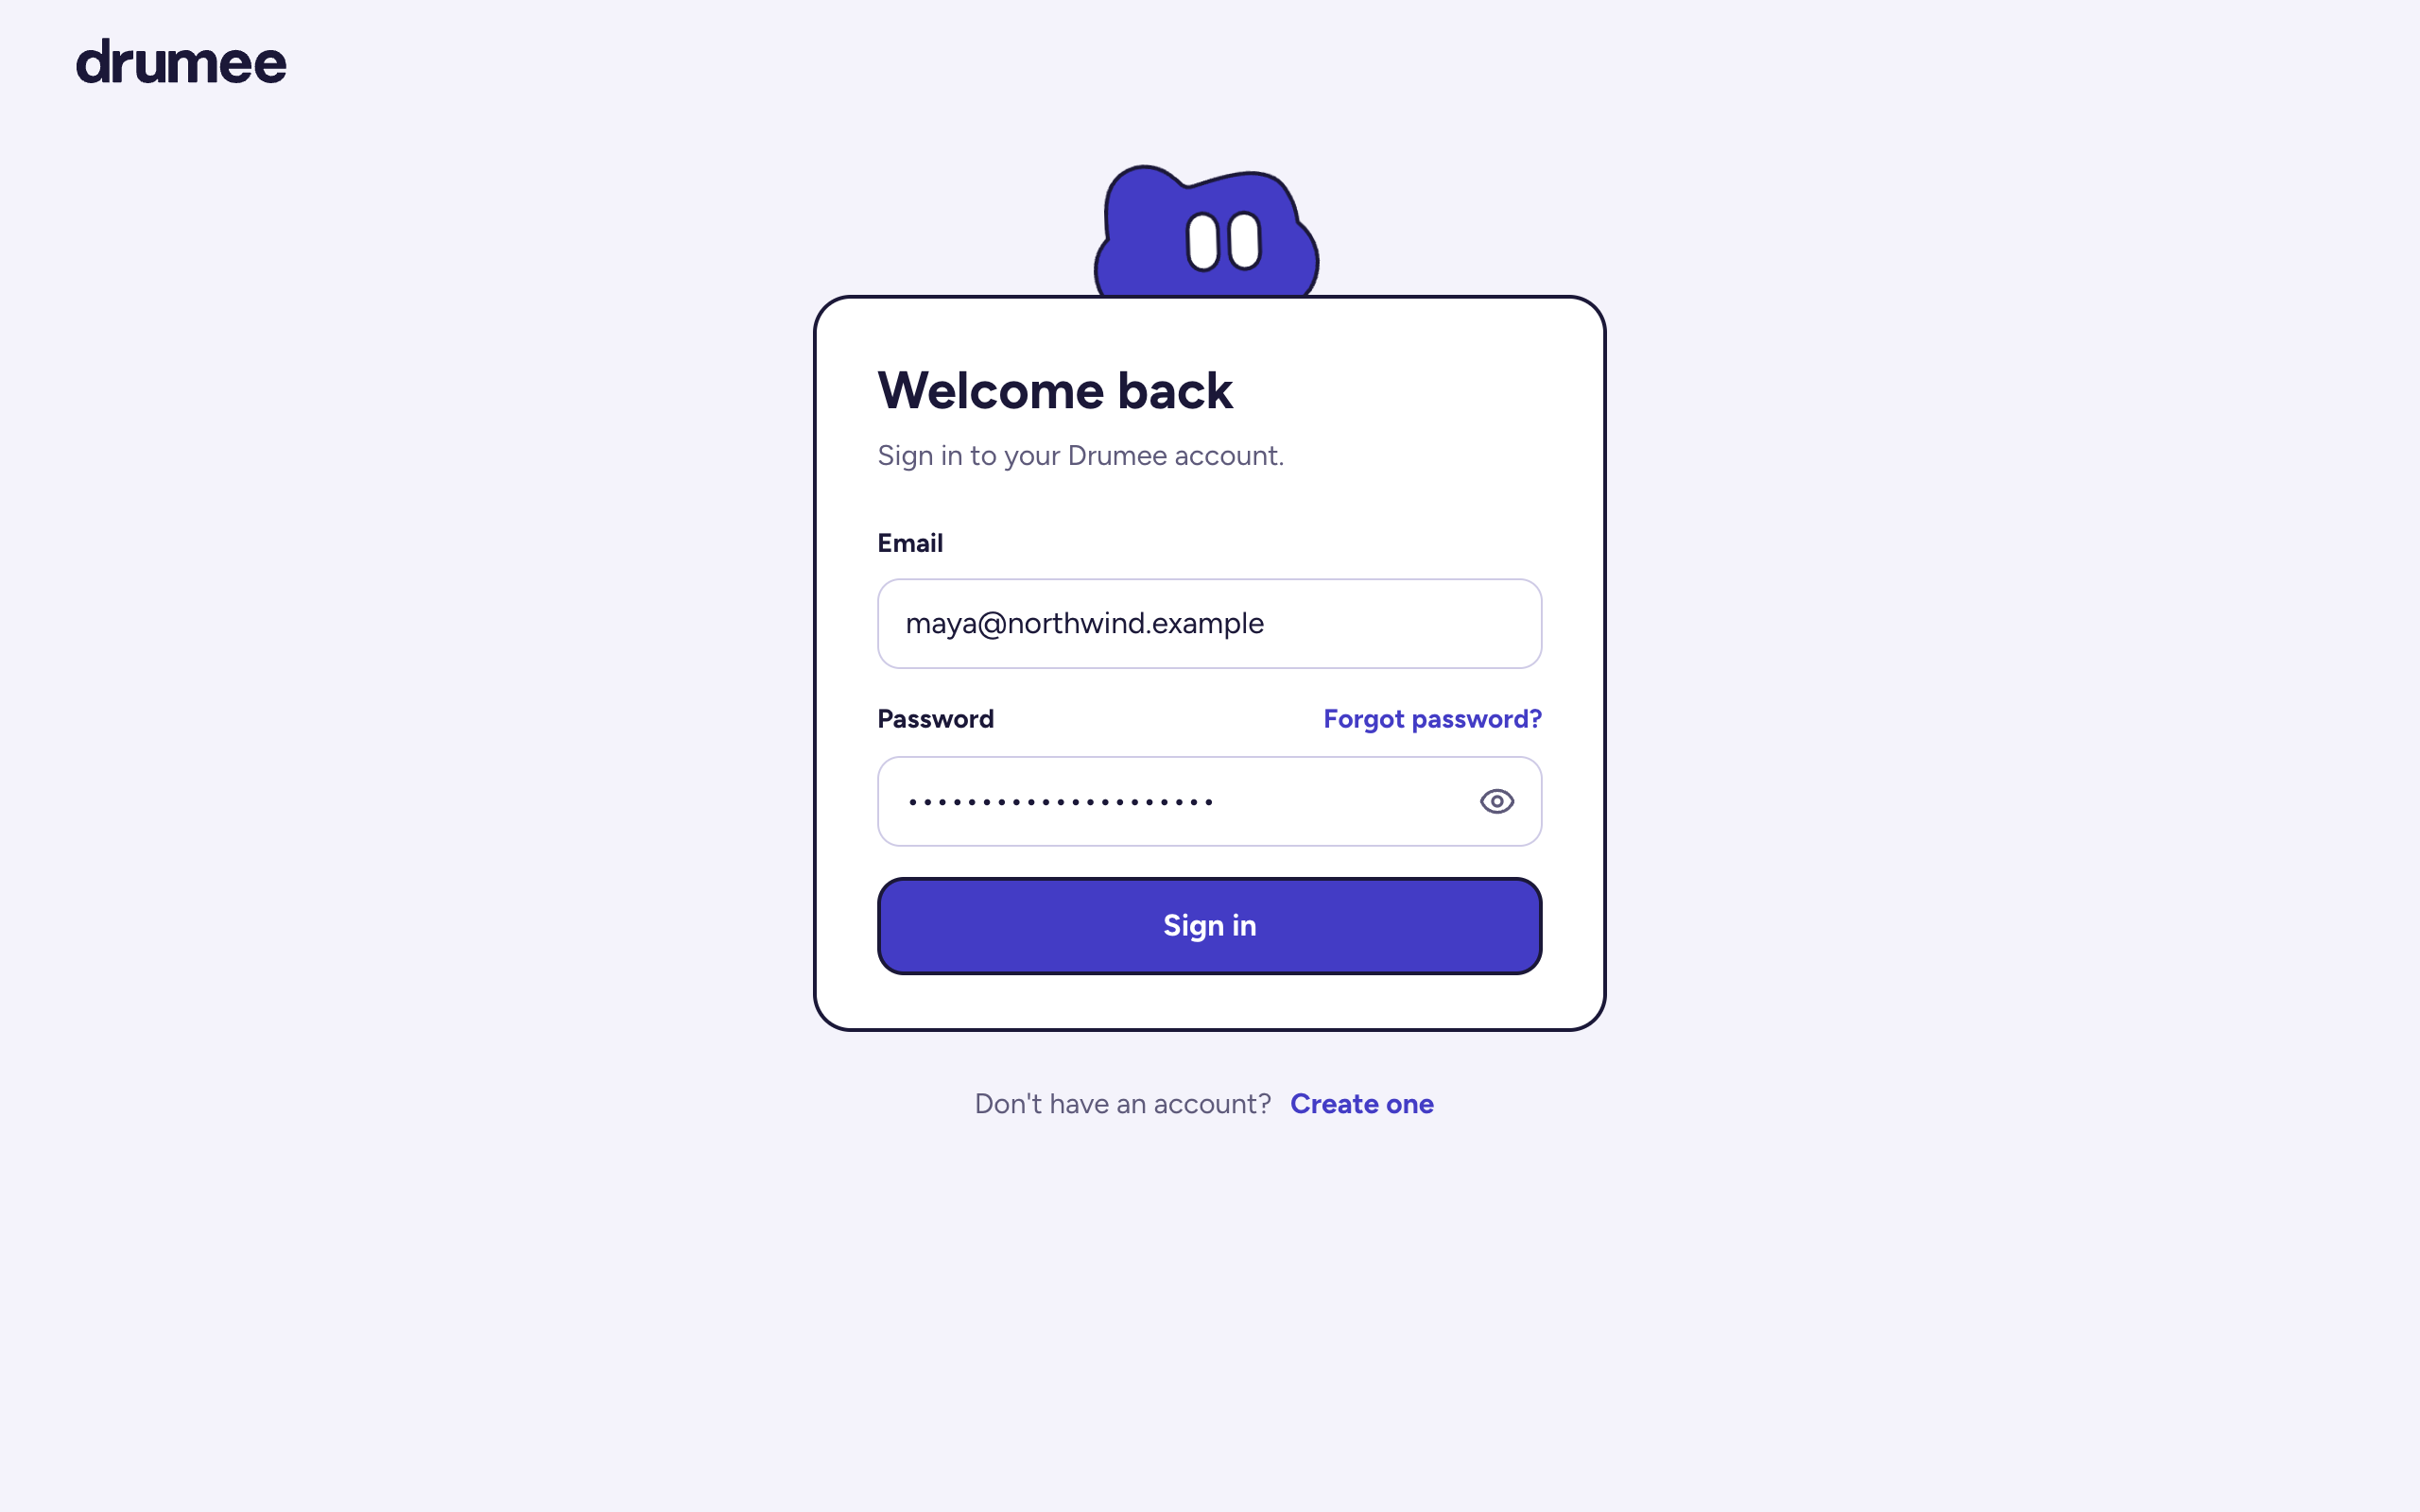
Once you’re inside, you land in your personal workspace — ready to create your first shared one.
2. Create Your First Workspace
Step 1: In the sidebar, click + next to Workspaces.
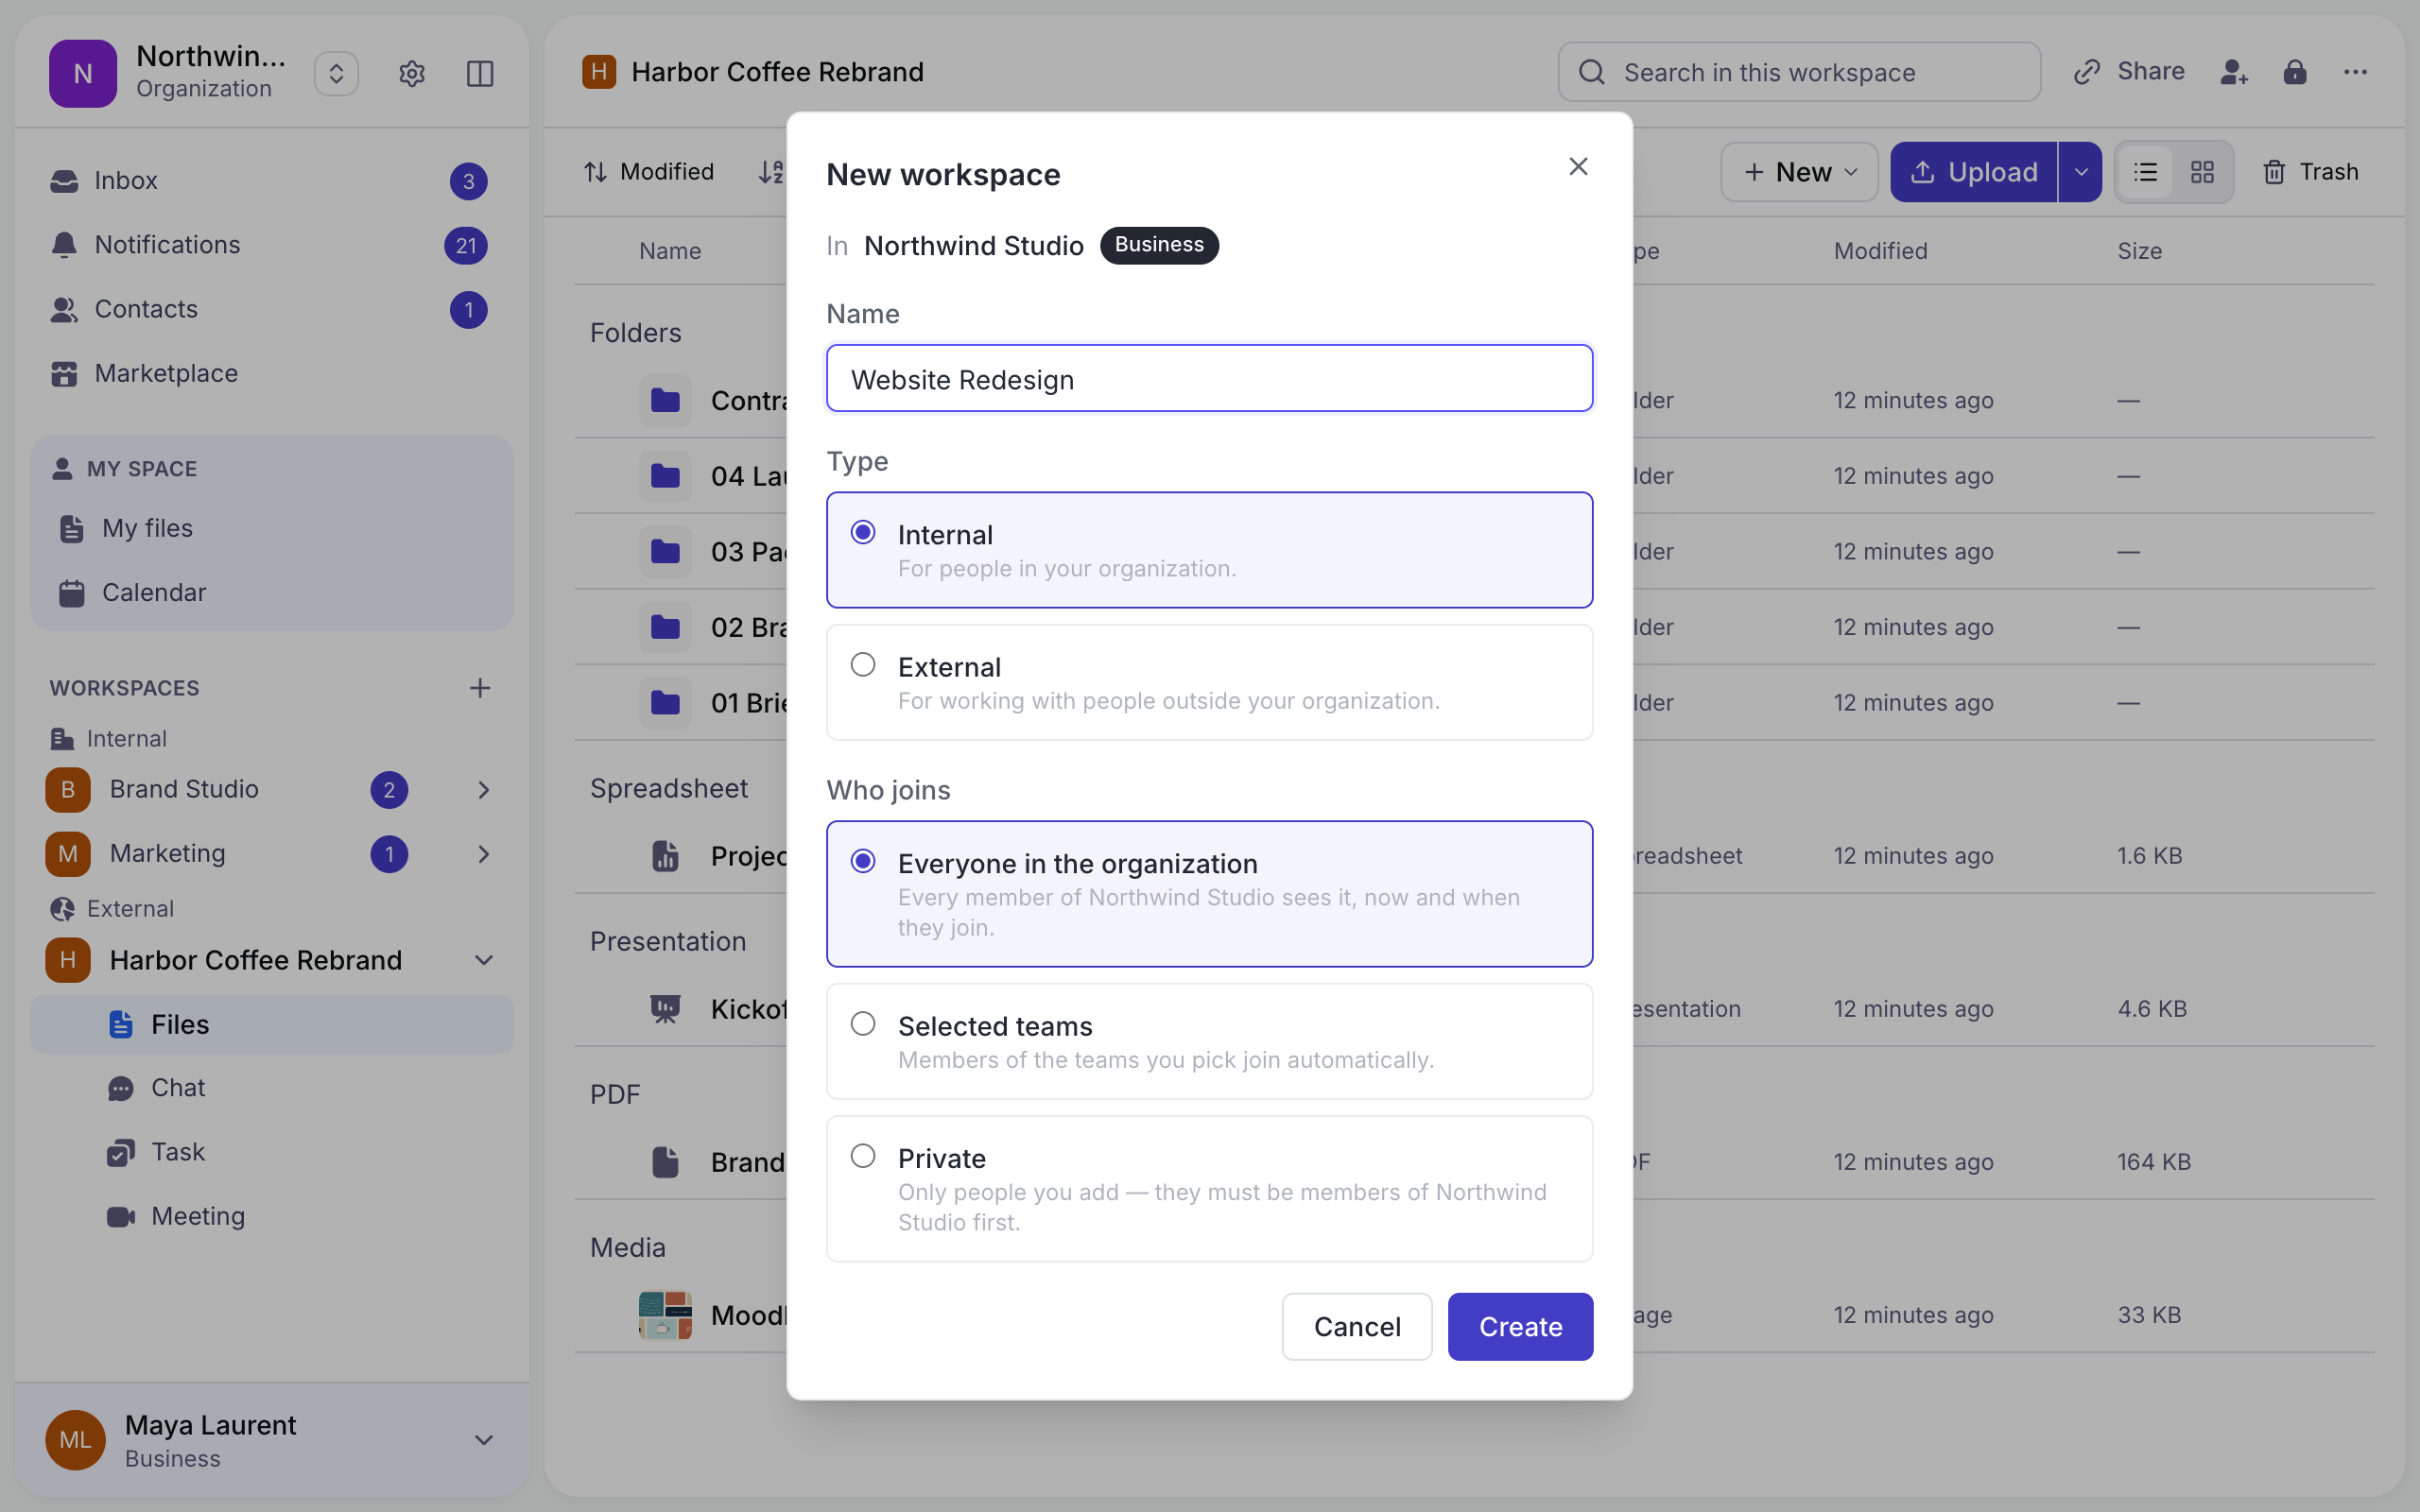
Step 2: Give the workspace a name and choose its type.
There are 3 types of workspace in Drumee:
-
Personal — My files: You already have this one. Use it to manage your personal work, including drafts, private research, notes, temporary files, and personal knowledge. Only you can see it.
-
Internal: Use this workspace to collaborate securely with your internal teams on ongoing projects: Marketing, Sales, Product, Finance, and other organizational workstreams. Choose who joins: everyone in the organization, selected teams, or only the people you add.
- External: Use this workspace to collaborate with clients and partners while securely sharing proposals, deliverables, review materials, and other external resources. People from outside your organization can be invited here.
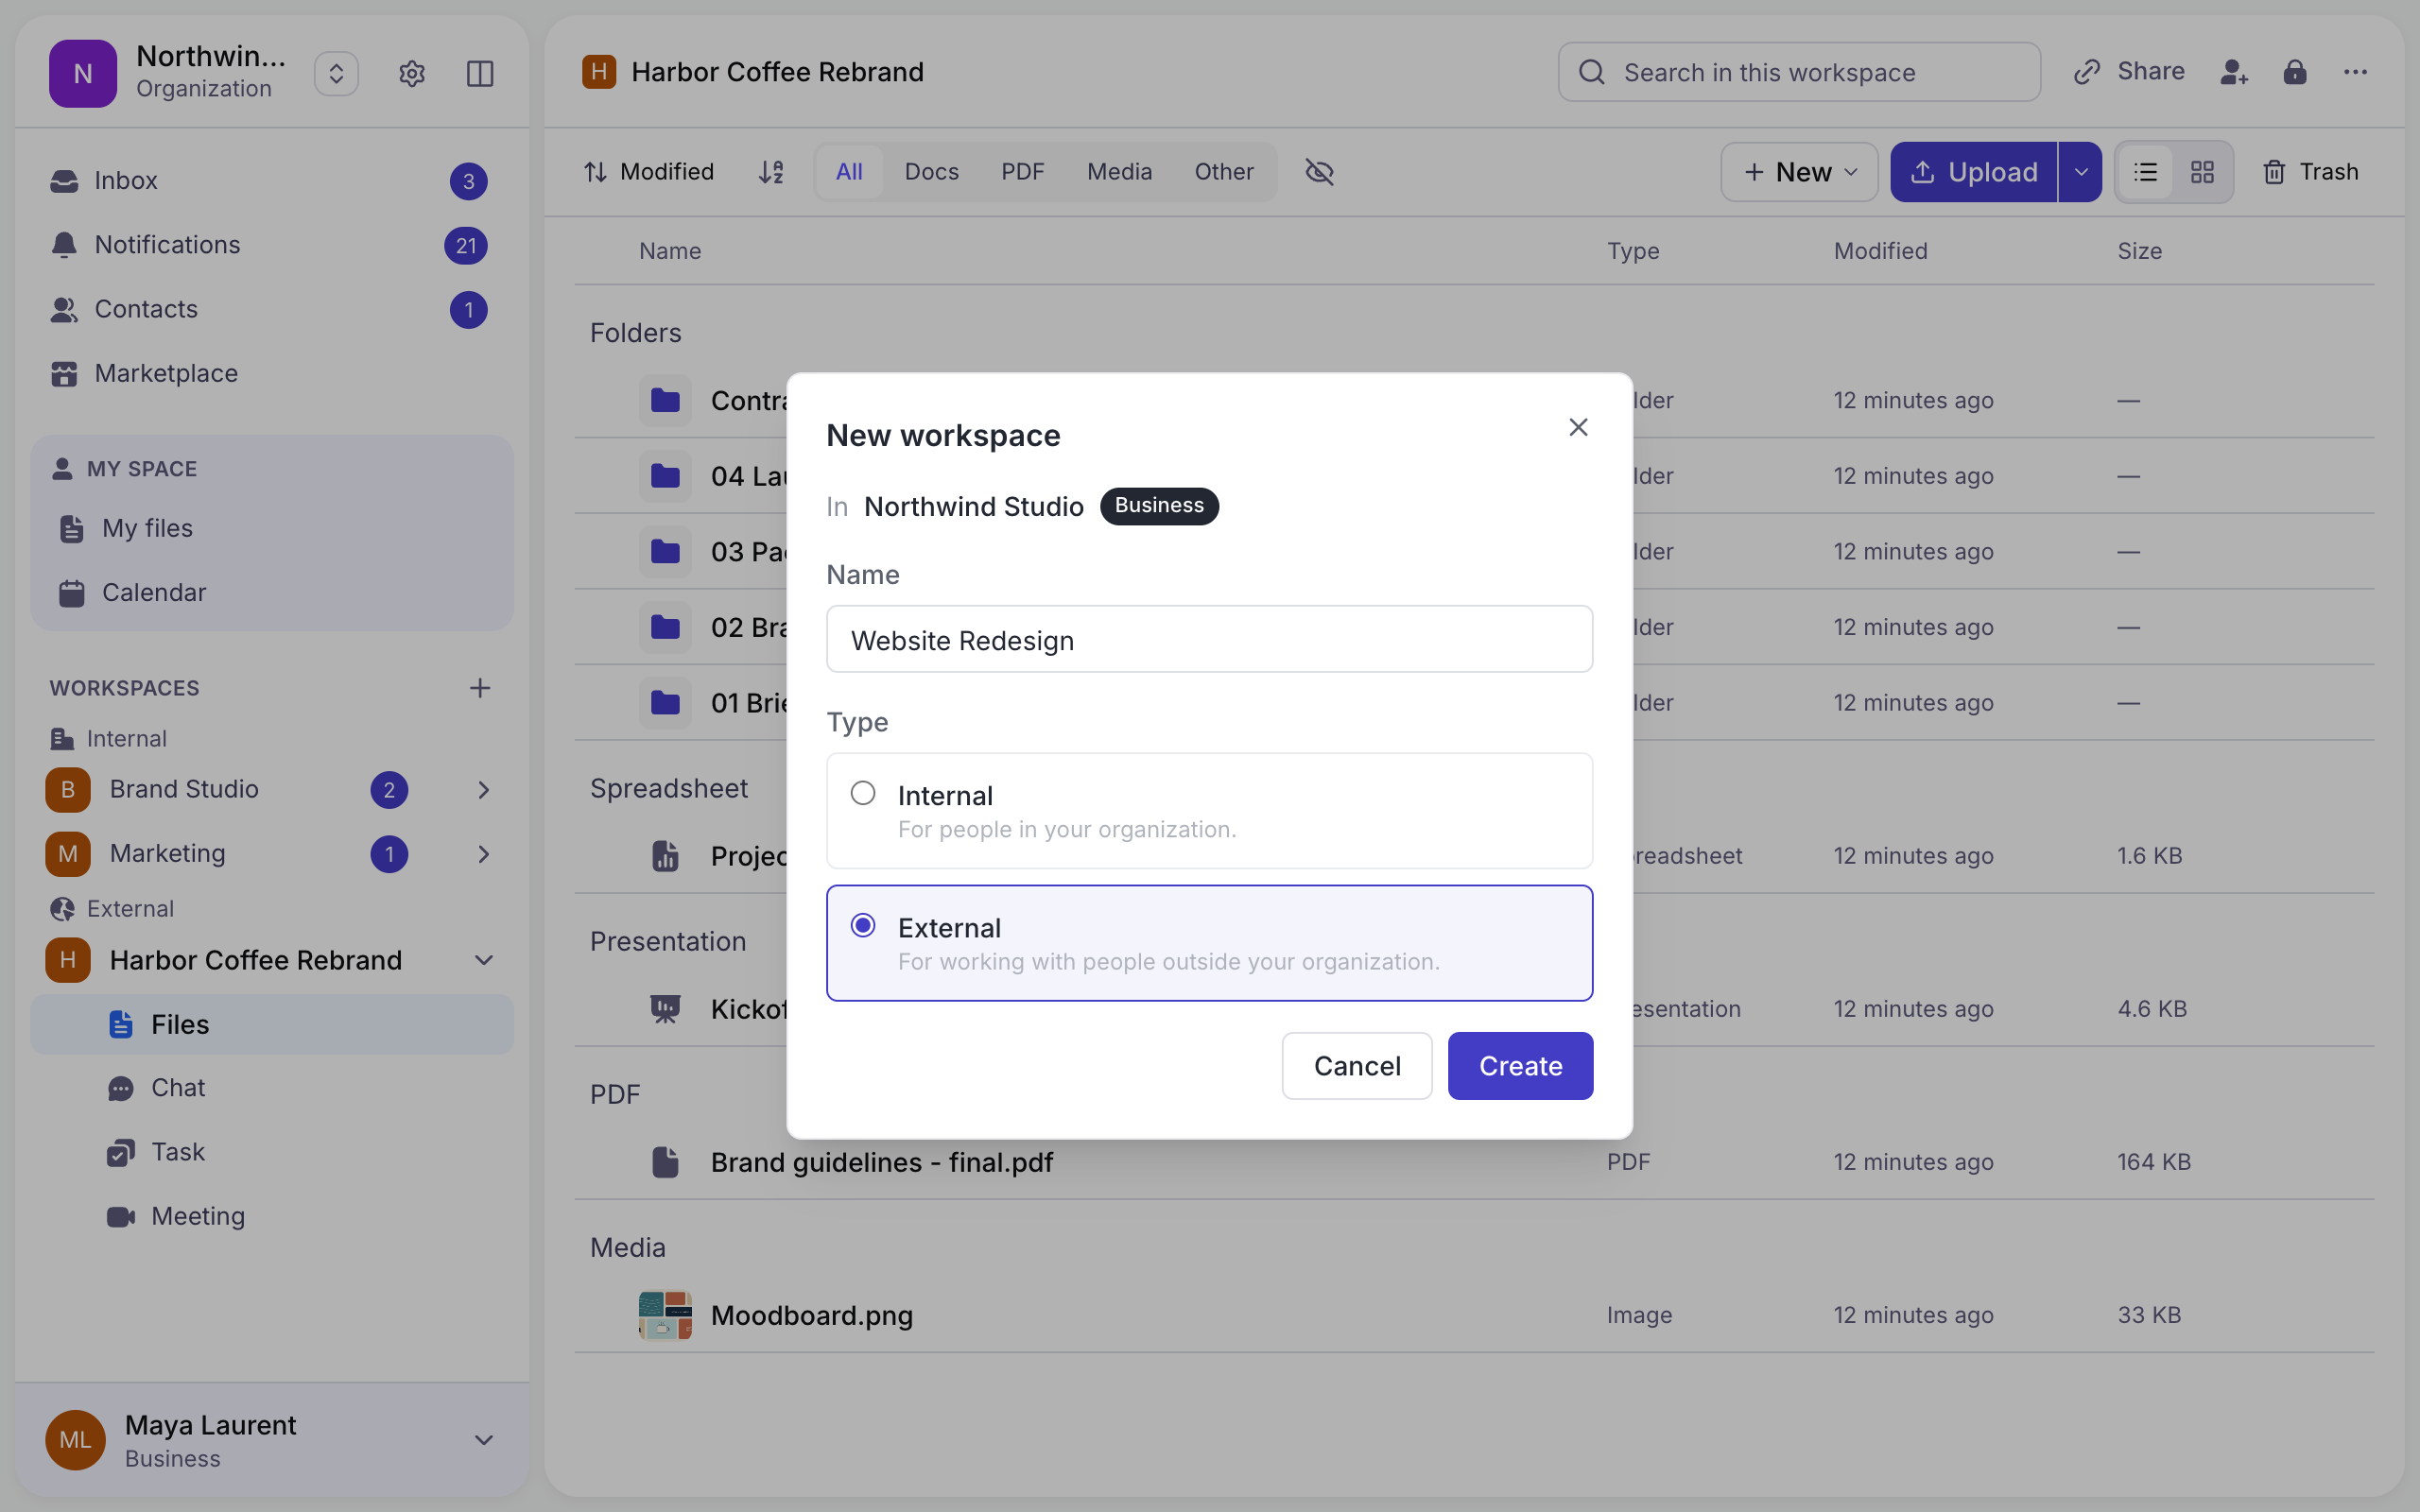
Step 3: Click Create => your workspace is ready instantly, and appears in the sidebar.
3. Upload + Search for files
3.1 Upload New Files
Step 1: Open the workspace => Click Upload. The arrow next to it lets you choose between Upload files and Upload folder. You can also drag files and folders from your computer into the window.
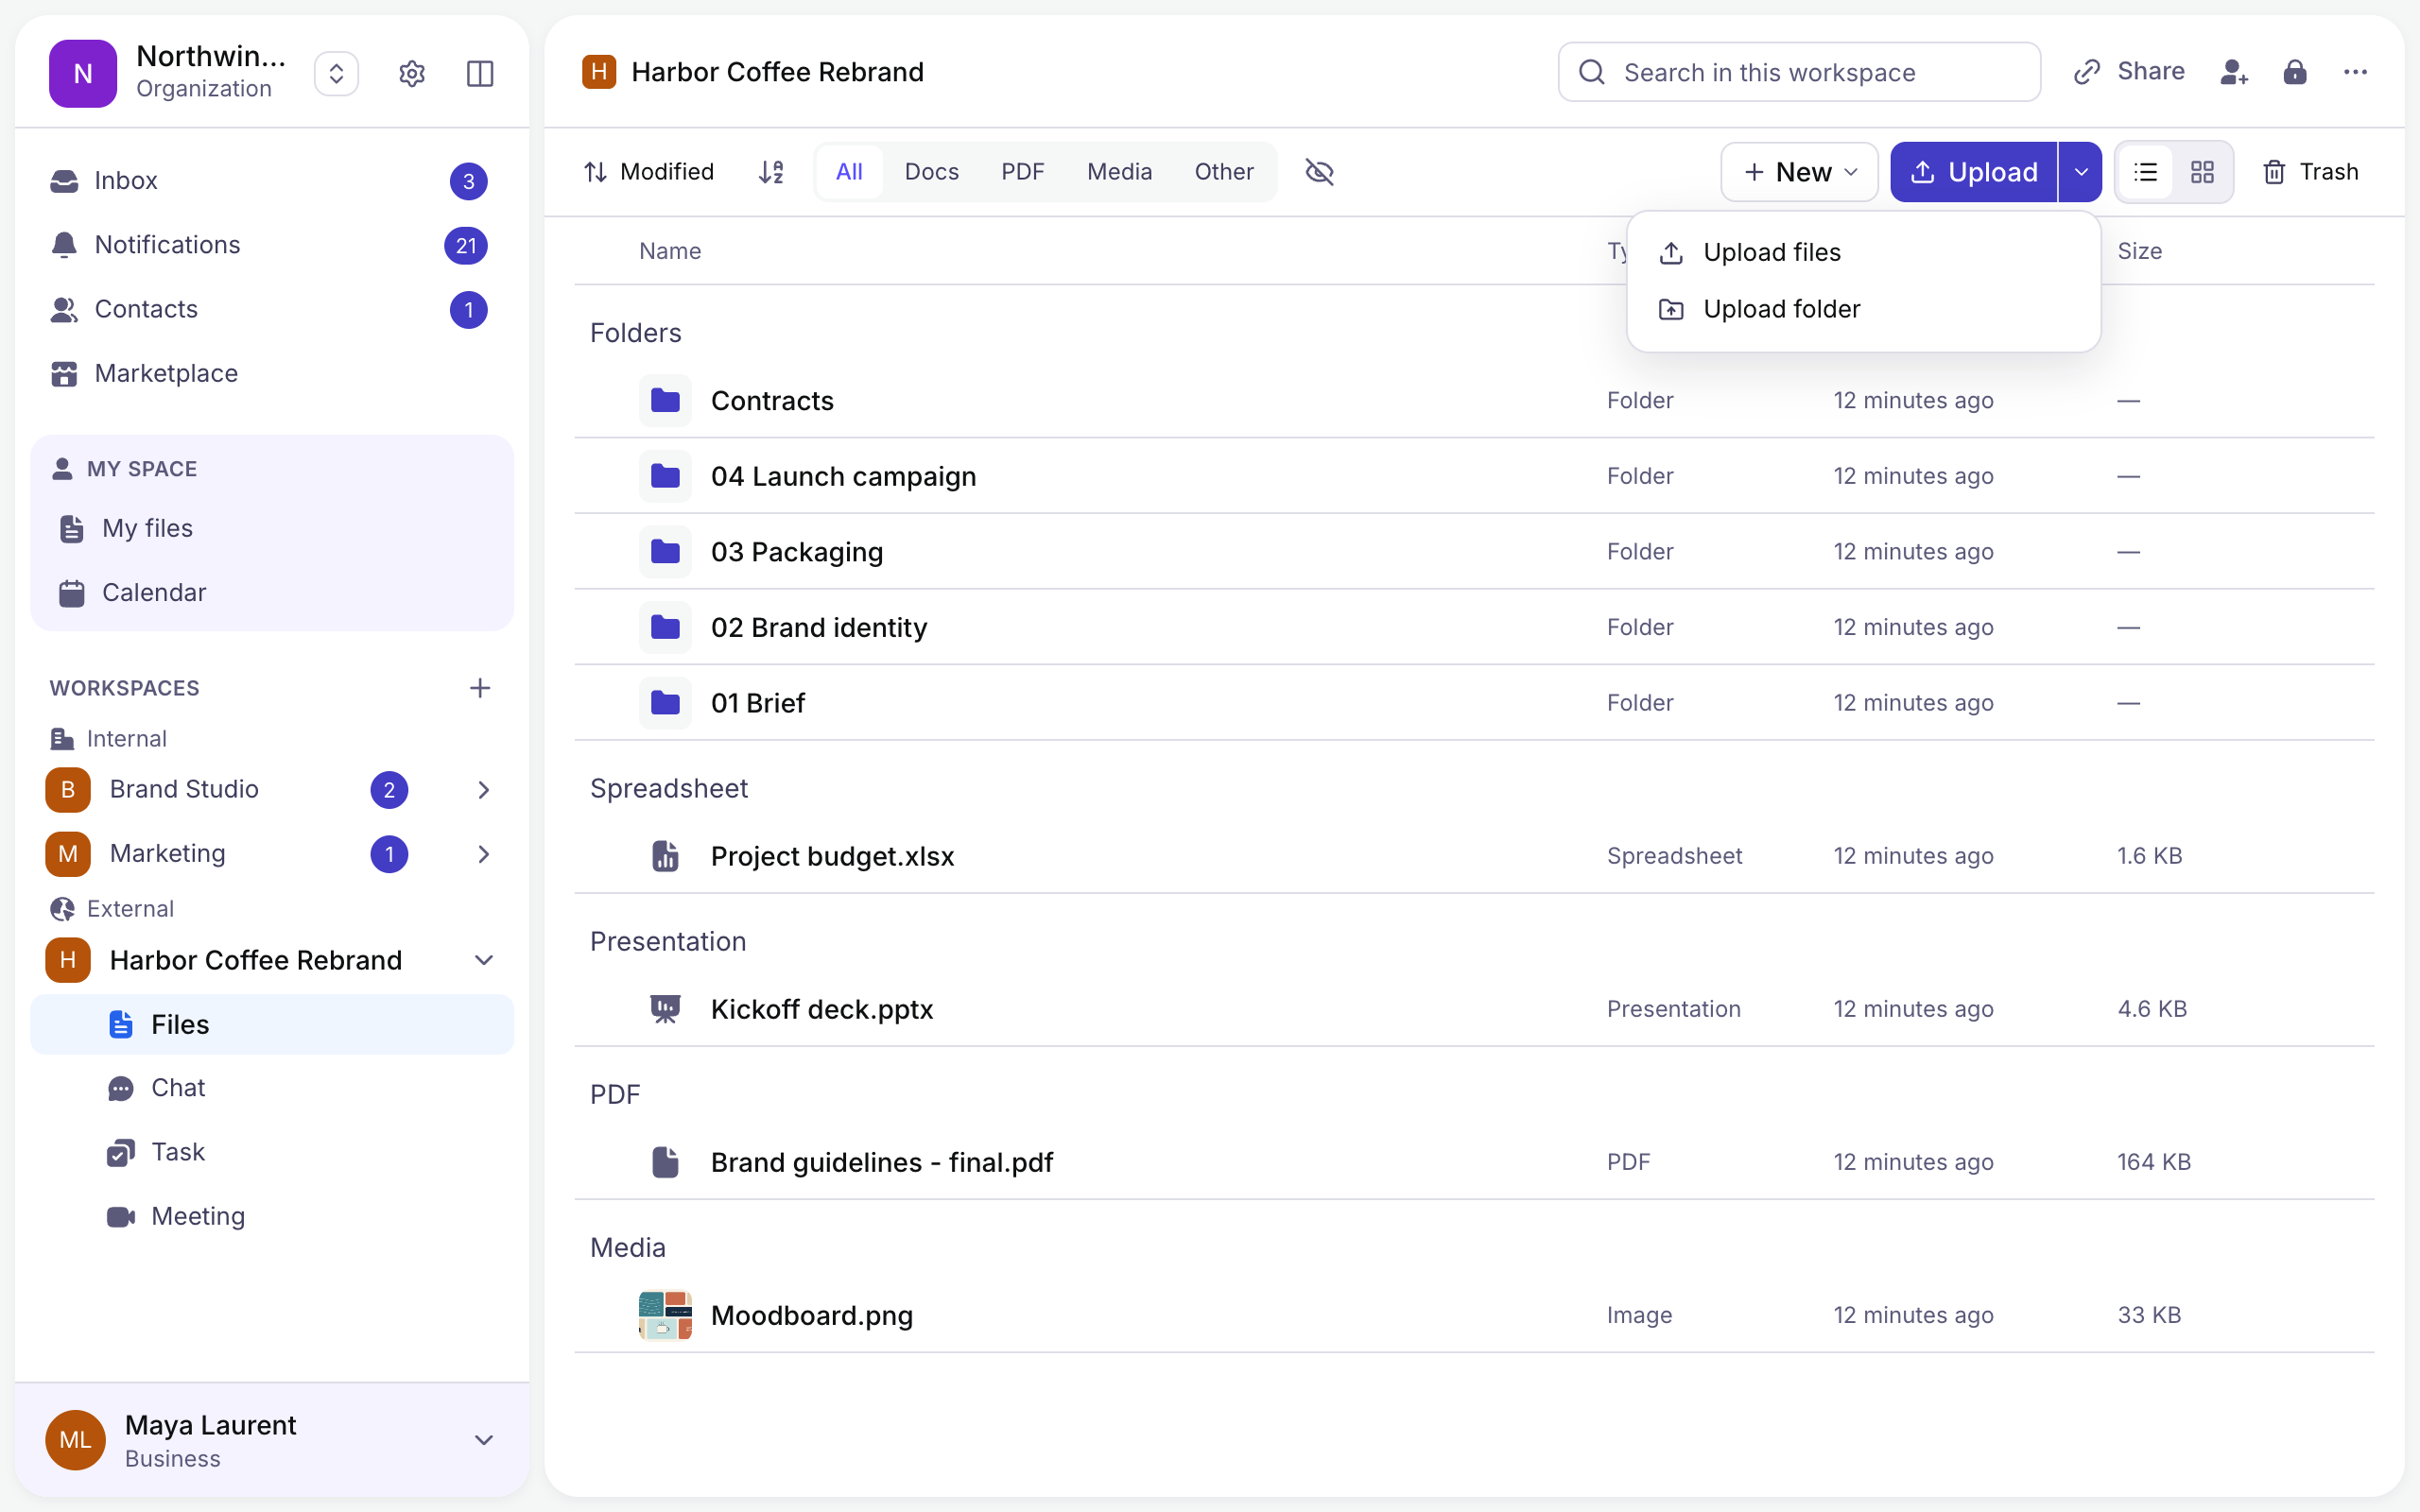
Step 2: Choose files from your device. Large files are sent in parts, and an interrupted upload picks up where it stopped.
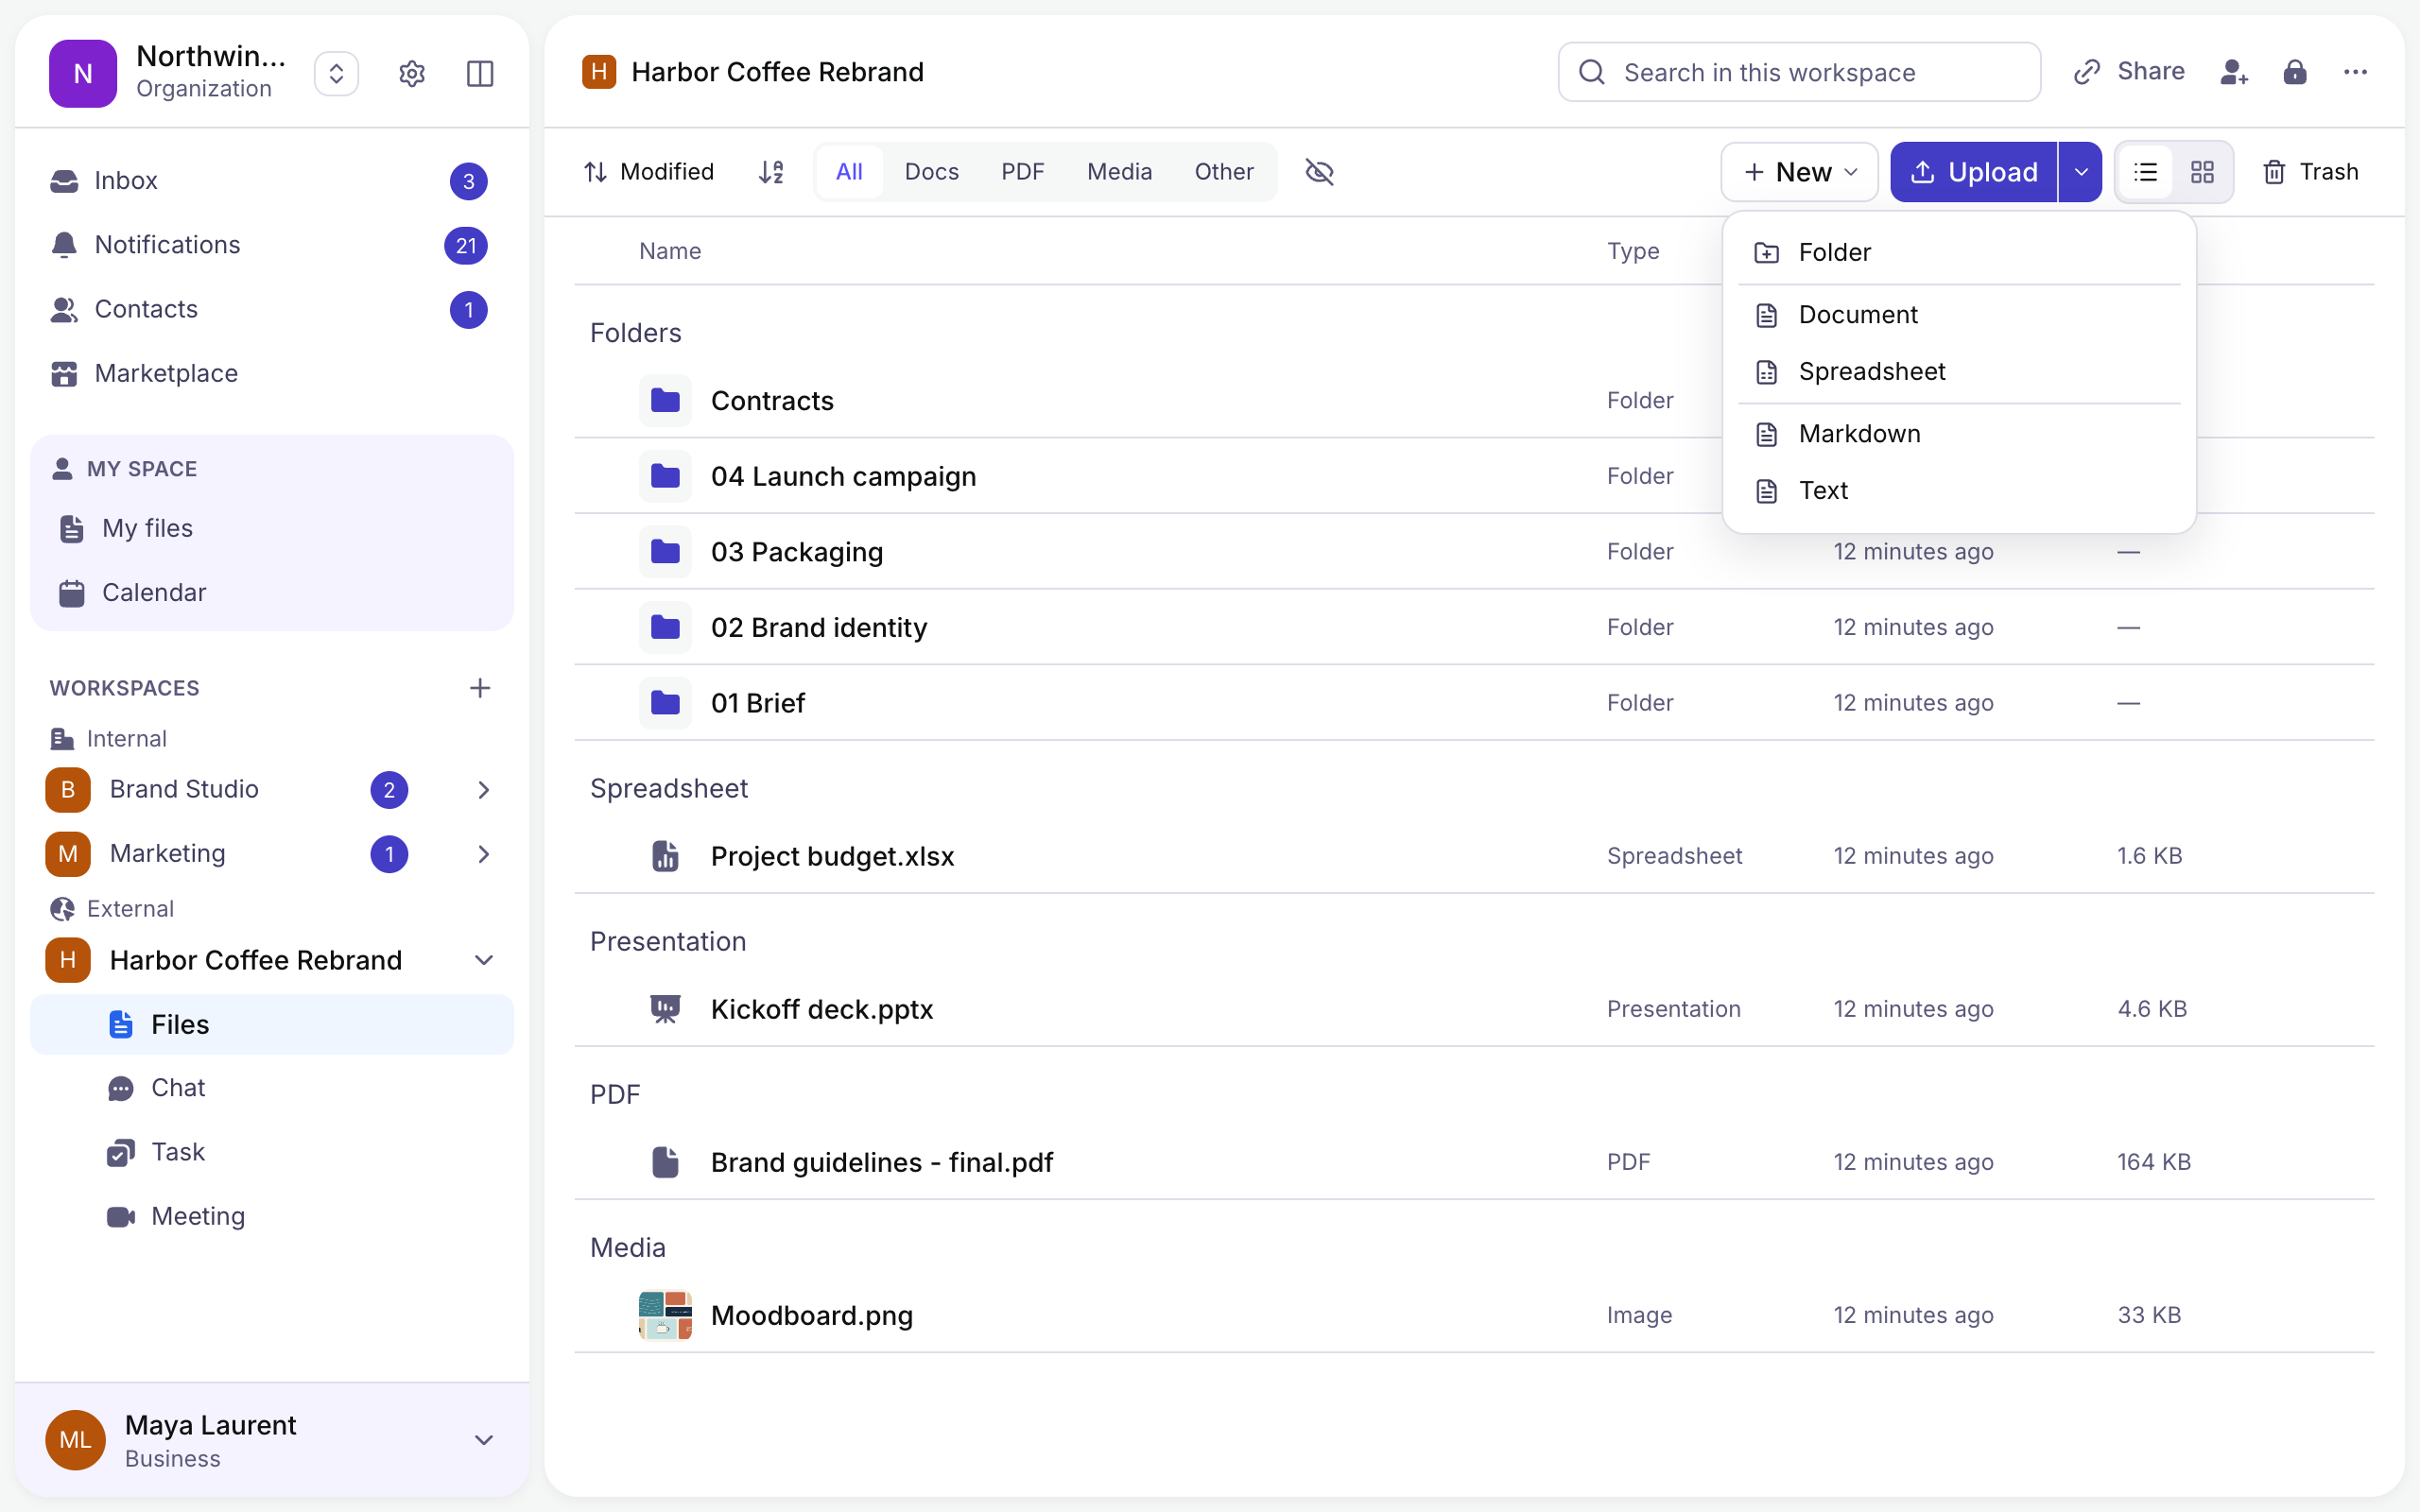
Step 3: Need a new document instead? Click New to create a folder, a document, a spreadsheet, a Markdown note or a text file directly in the workspace.
3.2 Search Your Files
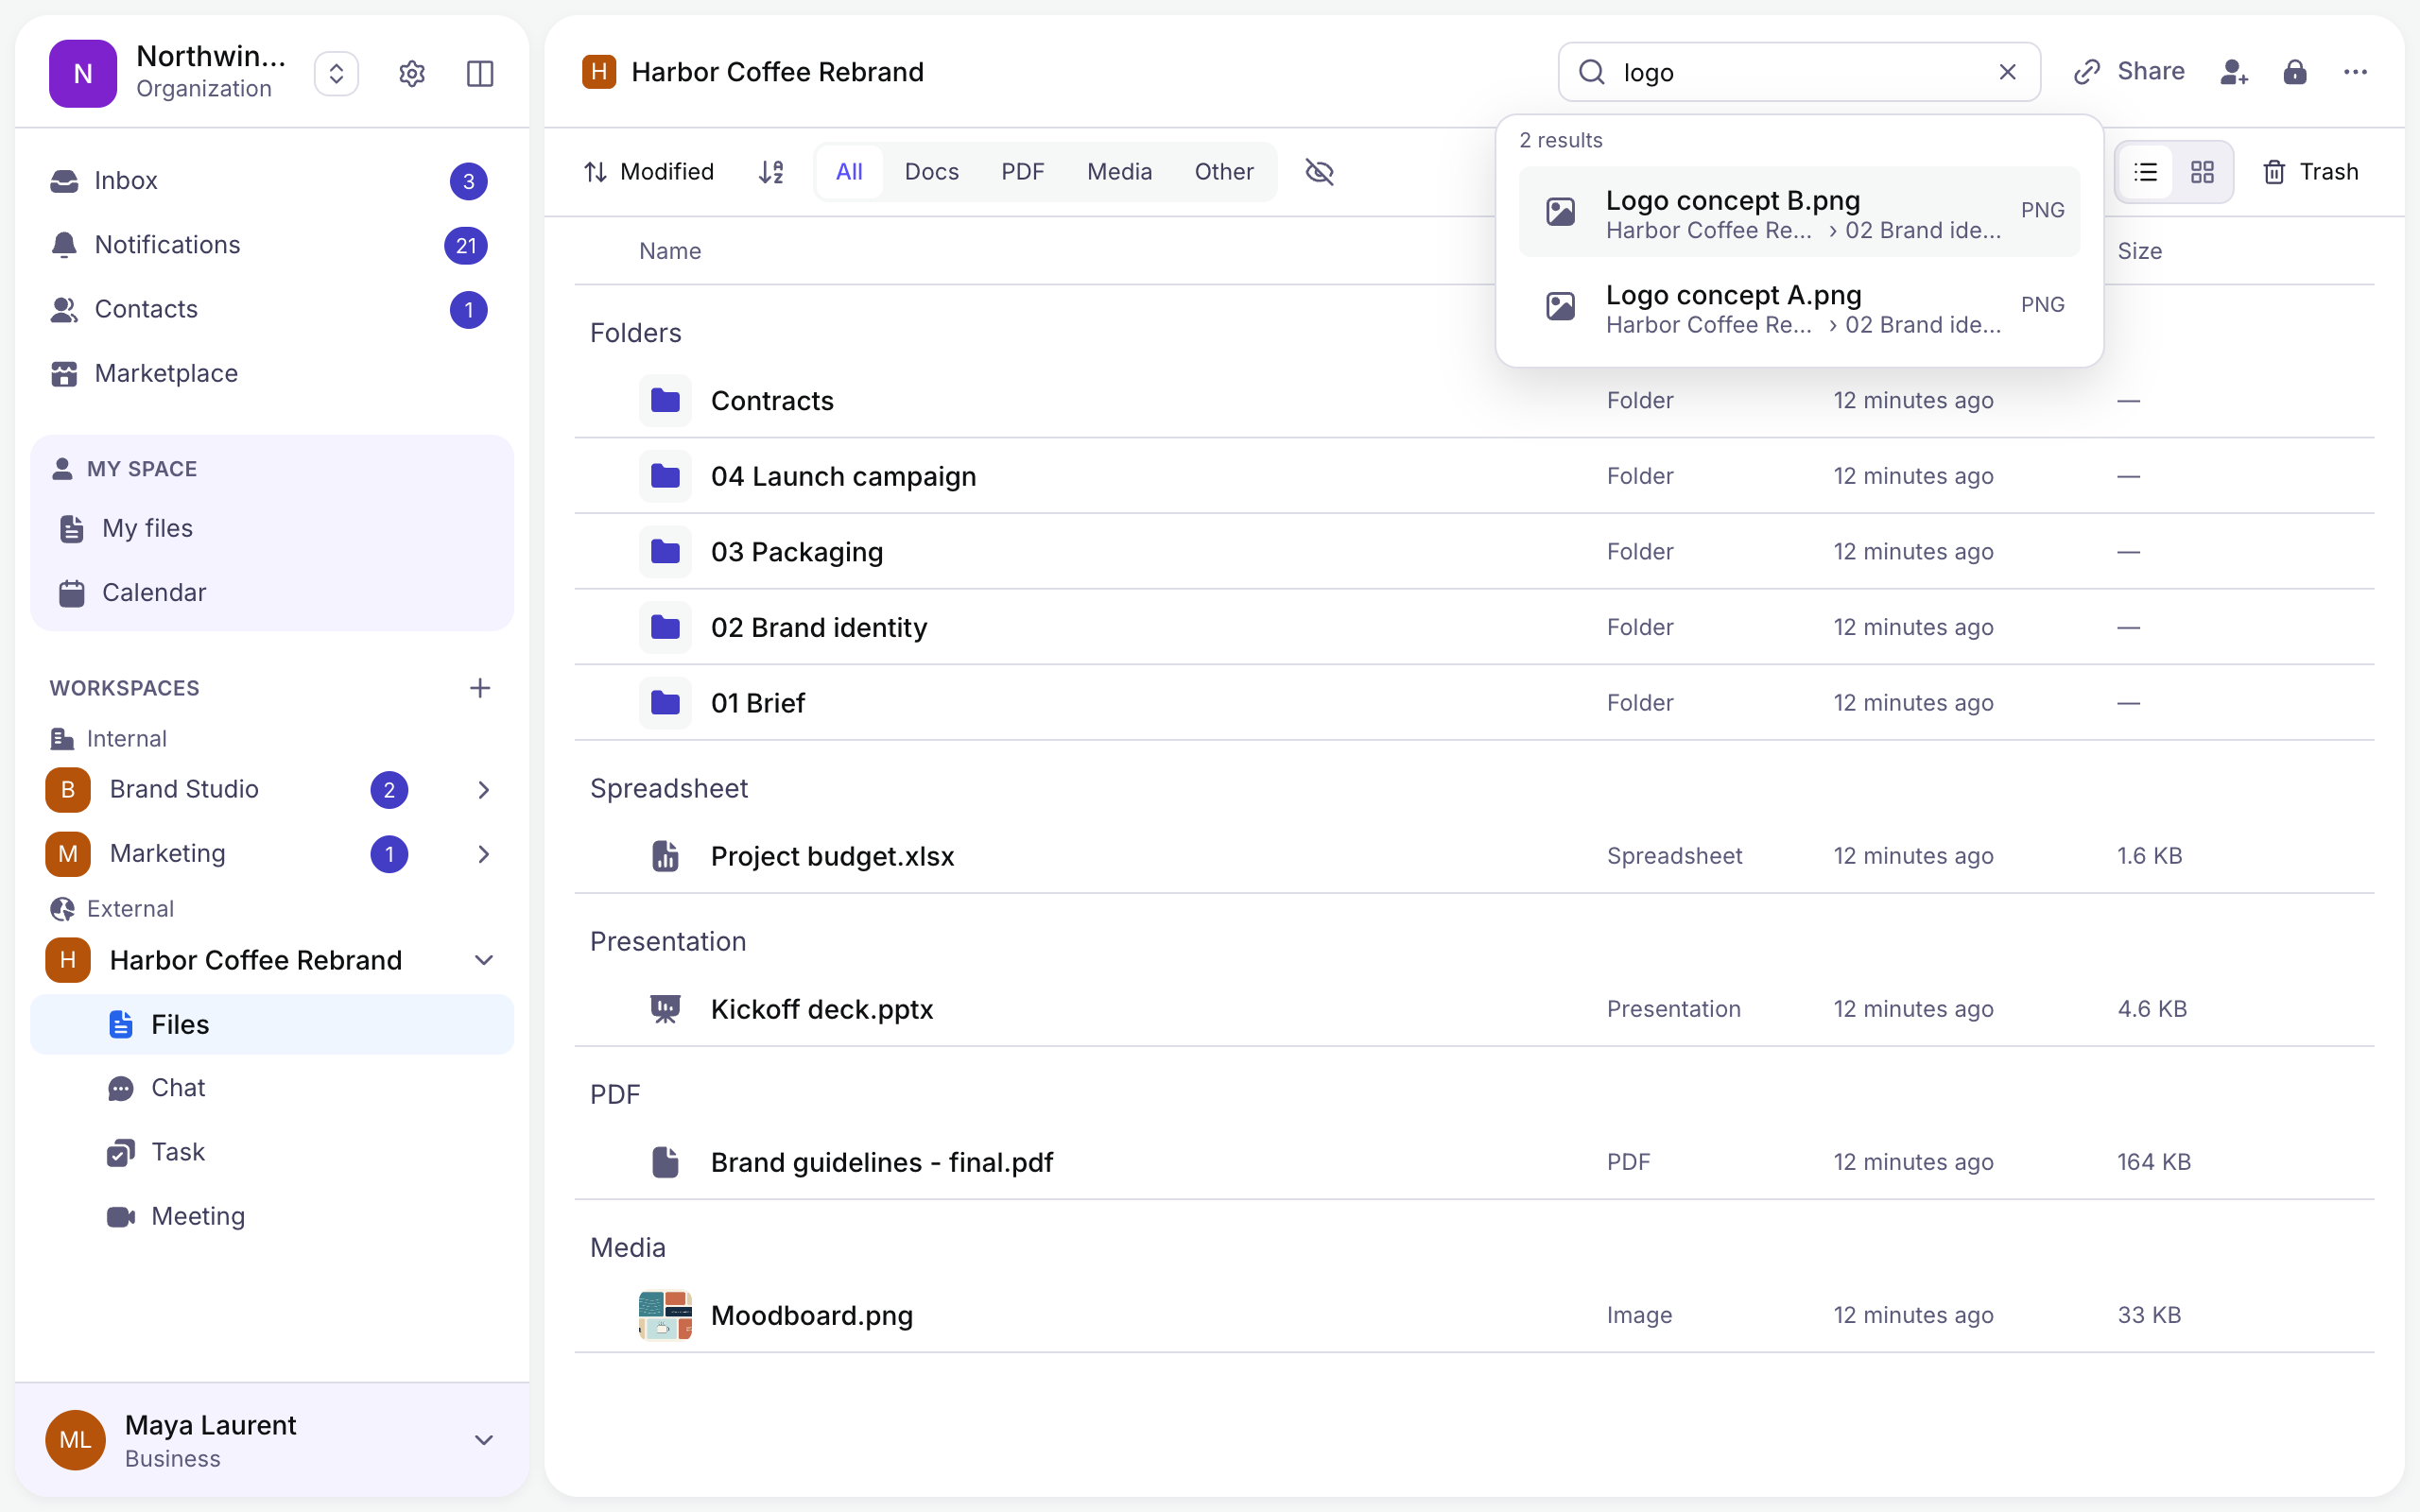
Step 1: Type in the Search in this workspace bar.
Step 2: Results appear as you type, with the folder each one is in.
Step 3: Choose the file or folder you’re looking for.
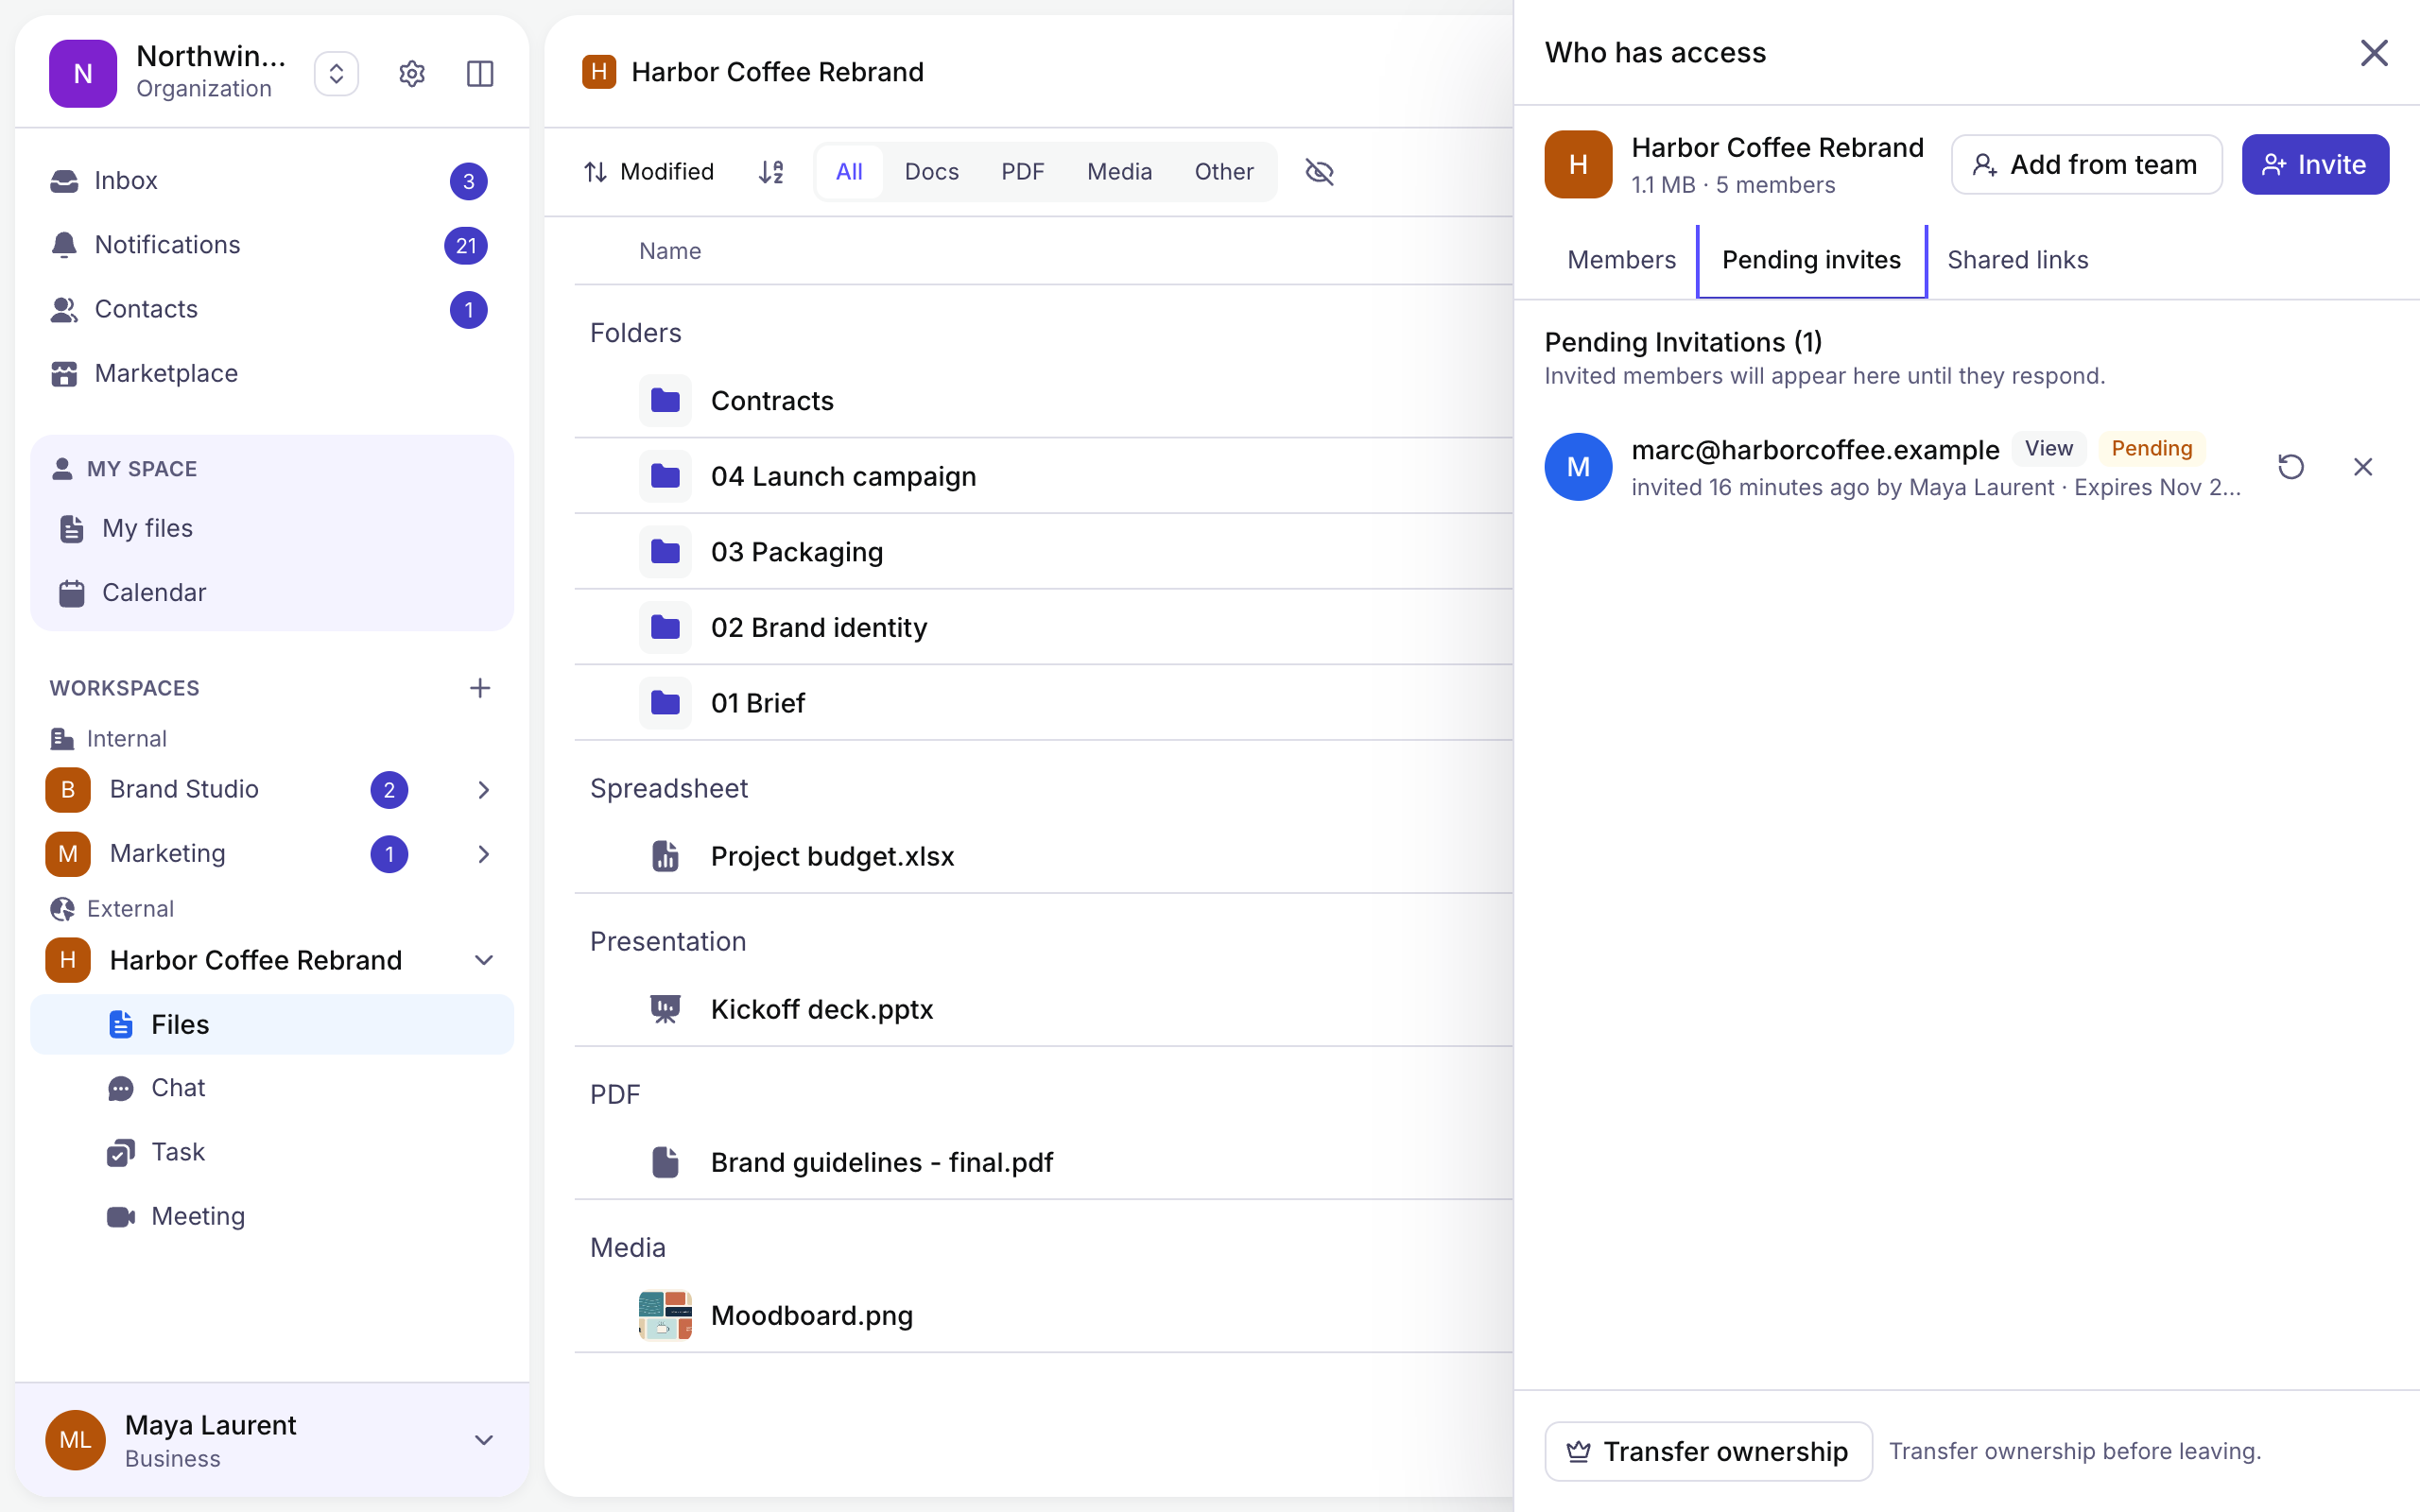
4. Invite Members
Step 1: Open the workspace => Click the Invite button at the top right.
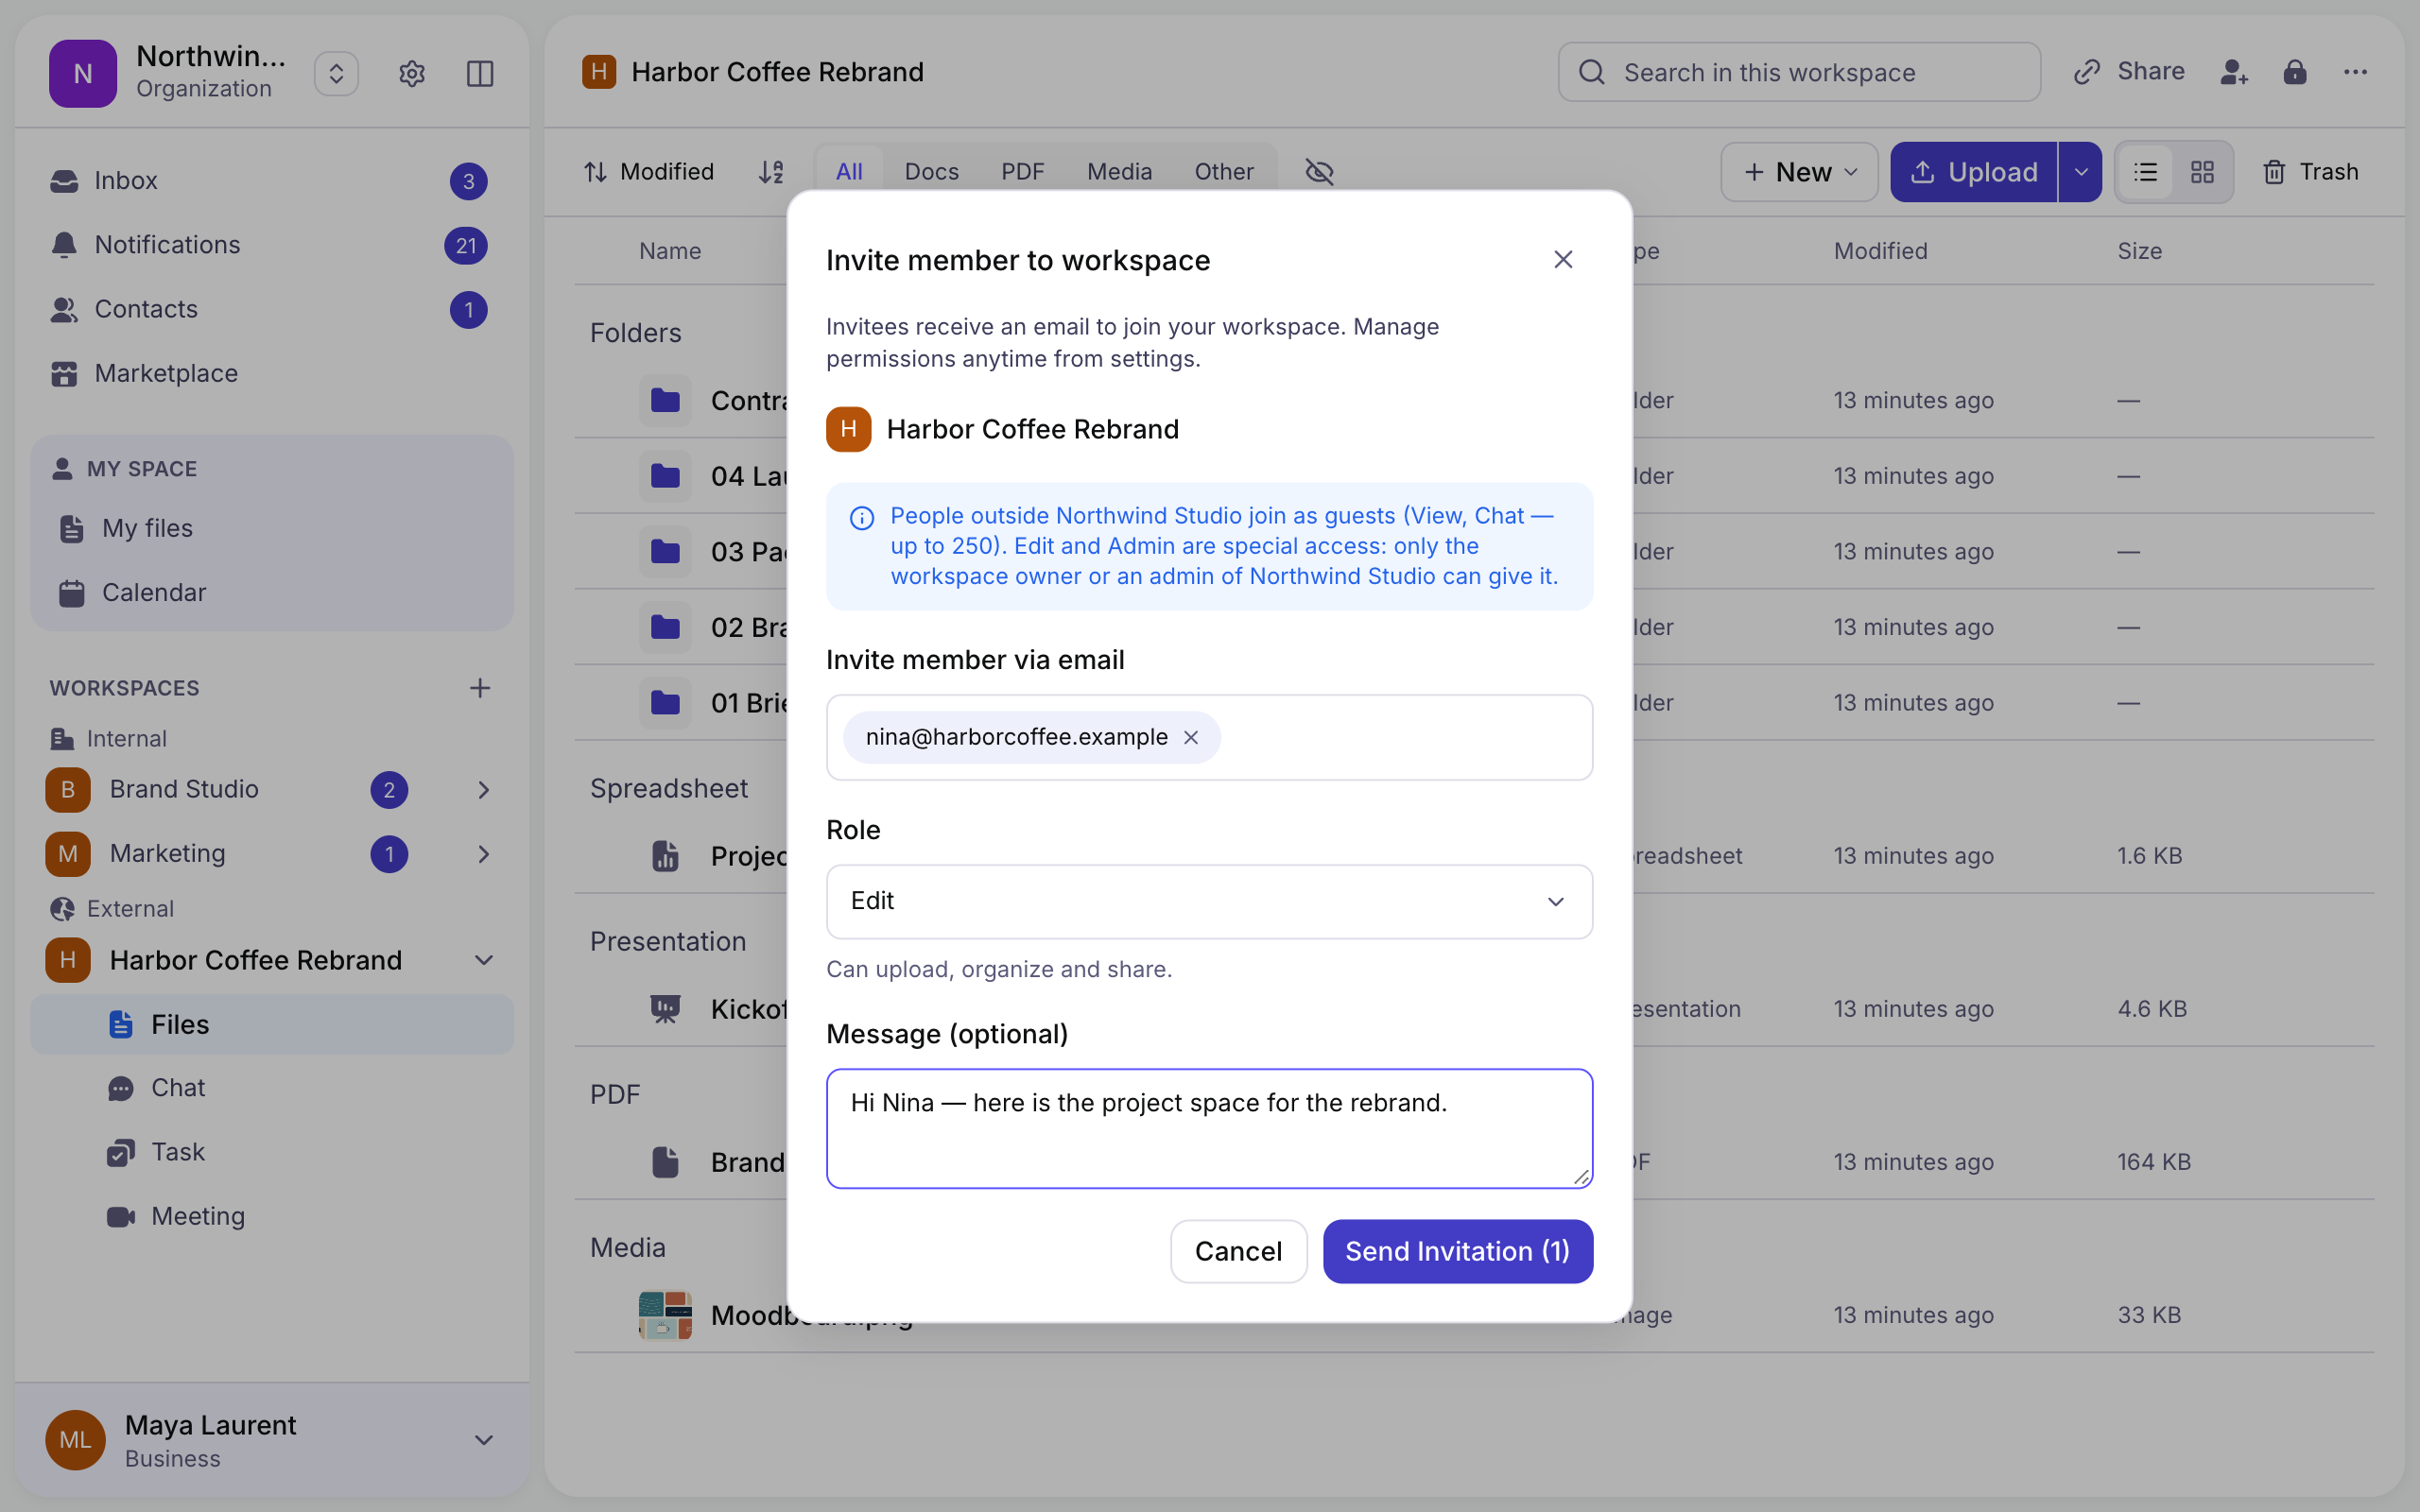
Step 2: Enter the email address, choose the role, and add a personal note if you like.
Step 3: Click Send Invitation.
Invitations that have not been answered yet are listed under Pending invites, where you can resend or cancel them.
5. Chat with your team
Keep conversations attached to the work, no context lost between apps.
| Feature | What it does |
|---|---|
| Folder chat | Every folder has its own conversation, next to its files. |
| Topics | Split a conversation into subjects with # topics. |
| File threads | Discuss one file in a thread of its own. |
| Reply, react, forward | Answer a message, react to it, or forward it. |
| Create task | Turn a message into a task in one click. |
| Calls | Start a voice or video call from the conversation. |
| Export history | Download the chat history when needed. |
5.1 Chat in folders
Step 1: Open the workspace => Select Chat. The conversation opens beside the files of the folder you are in. Drag the divider between the two to give the conversation more room, or collapse the sidebar.
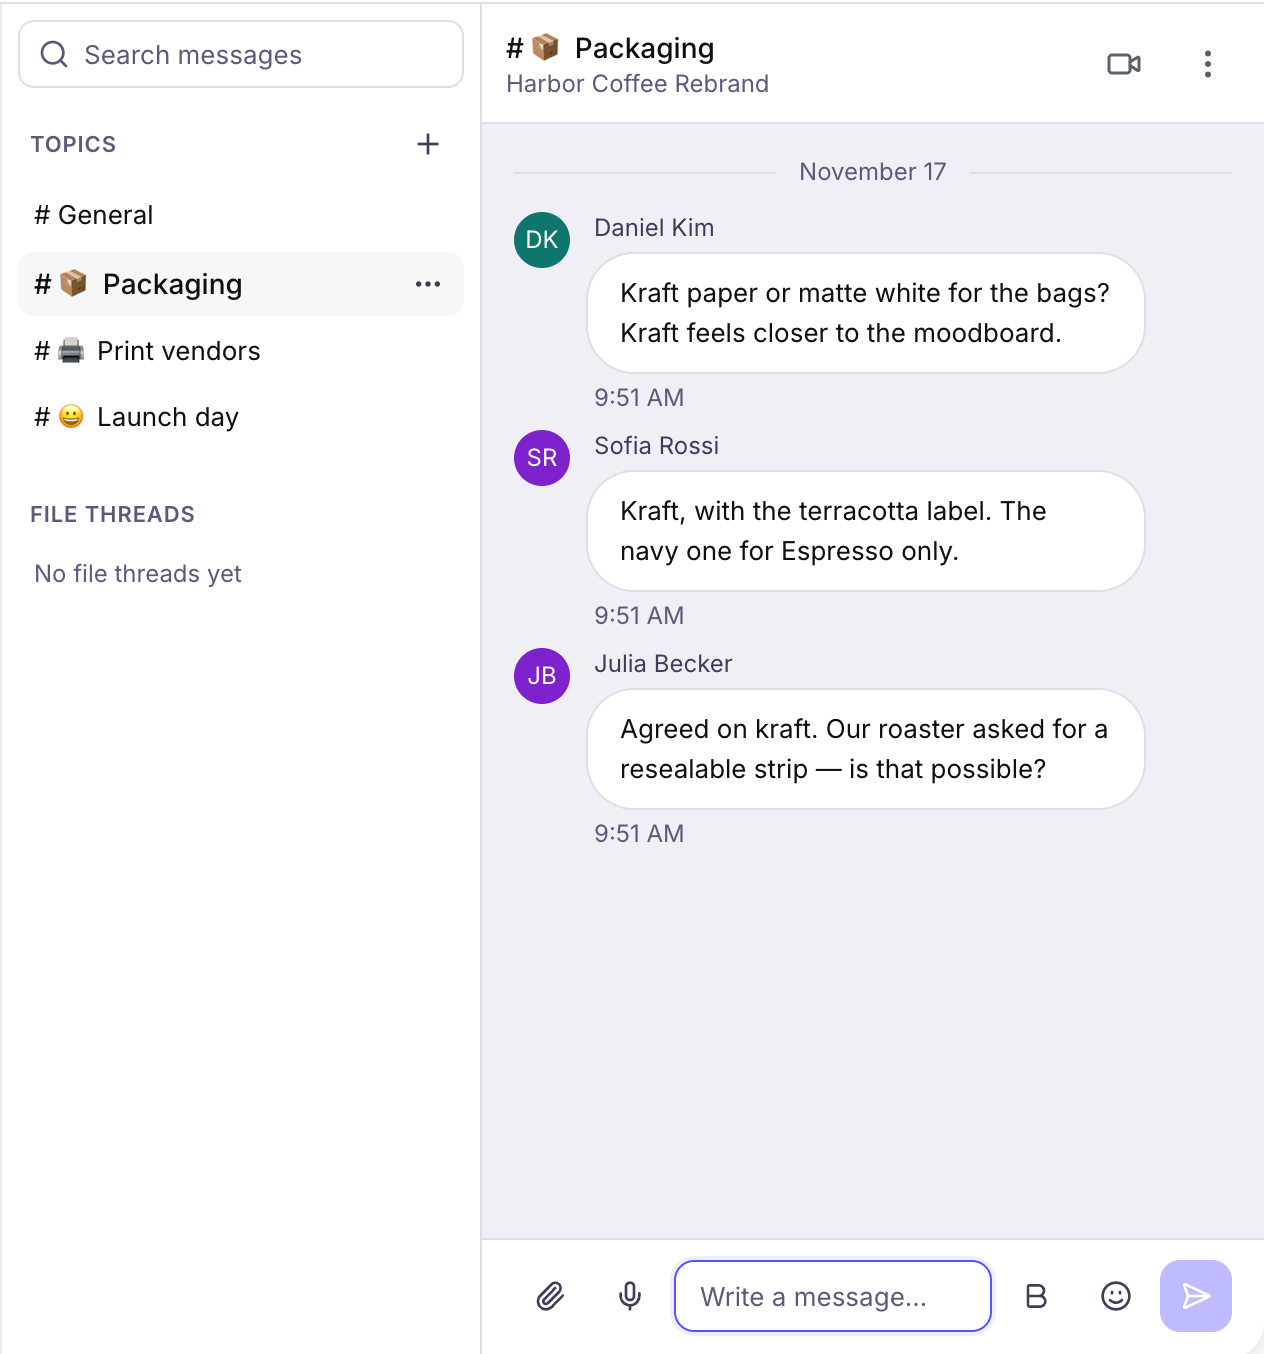
Step 2: Write in # General, or click + next to Topics to open a topic for a subject of its own.
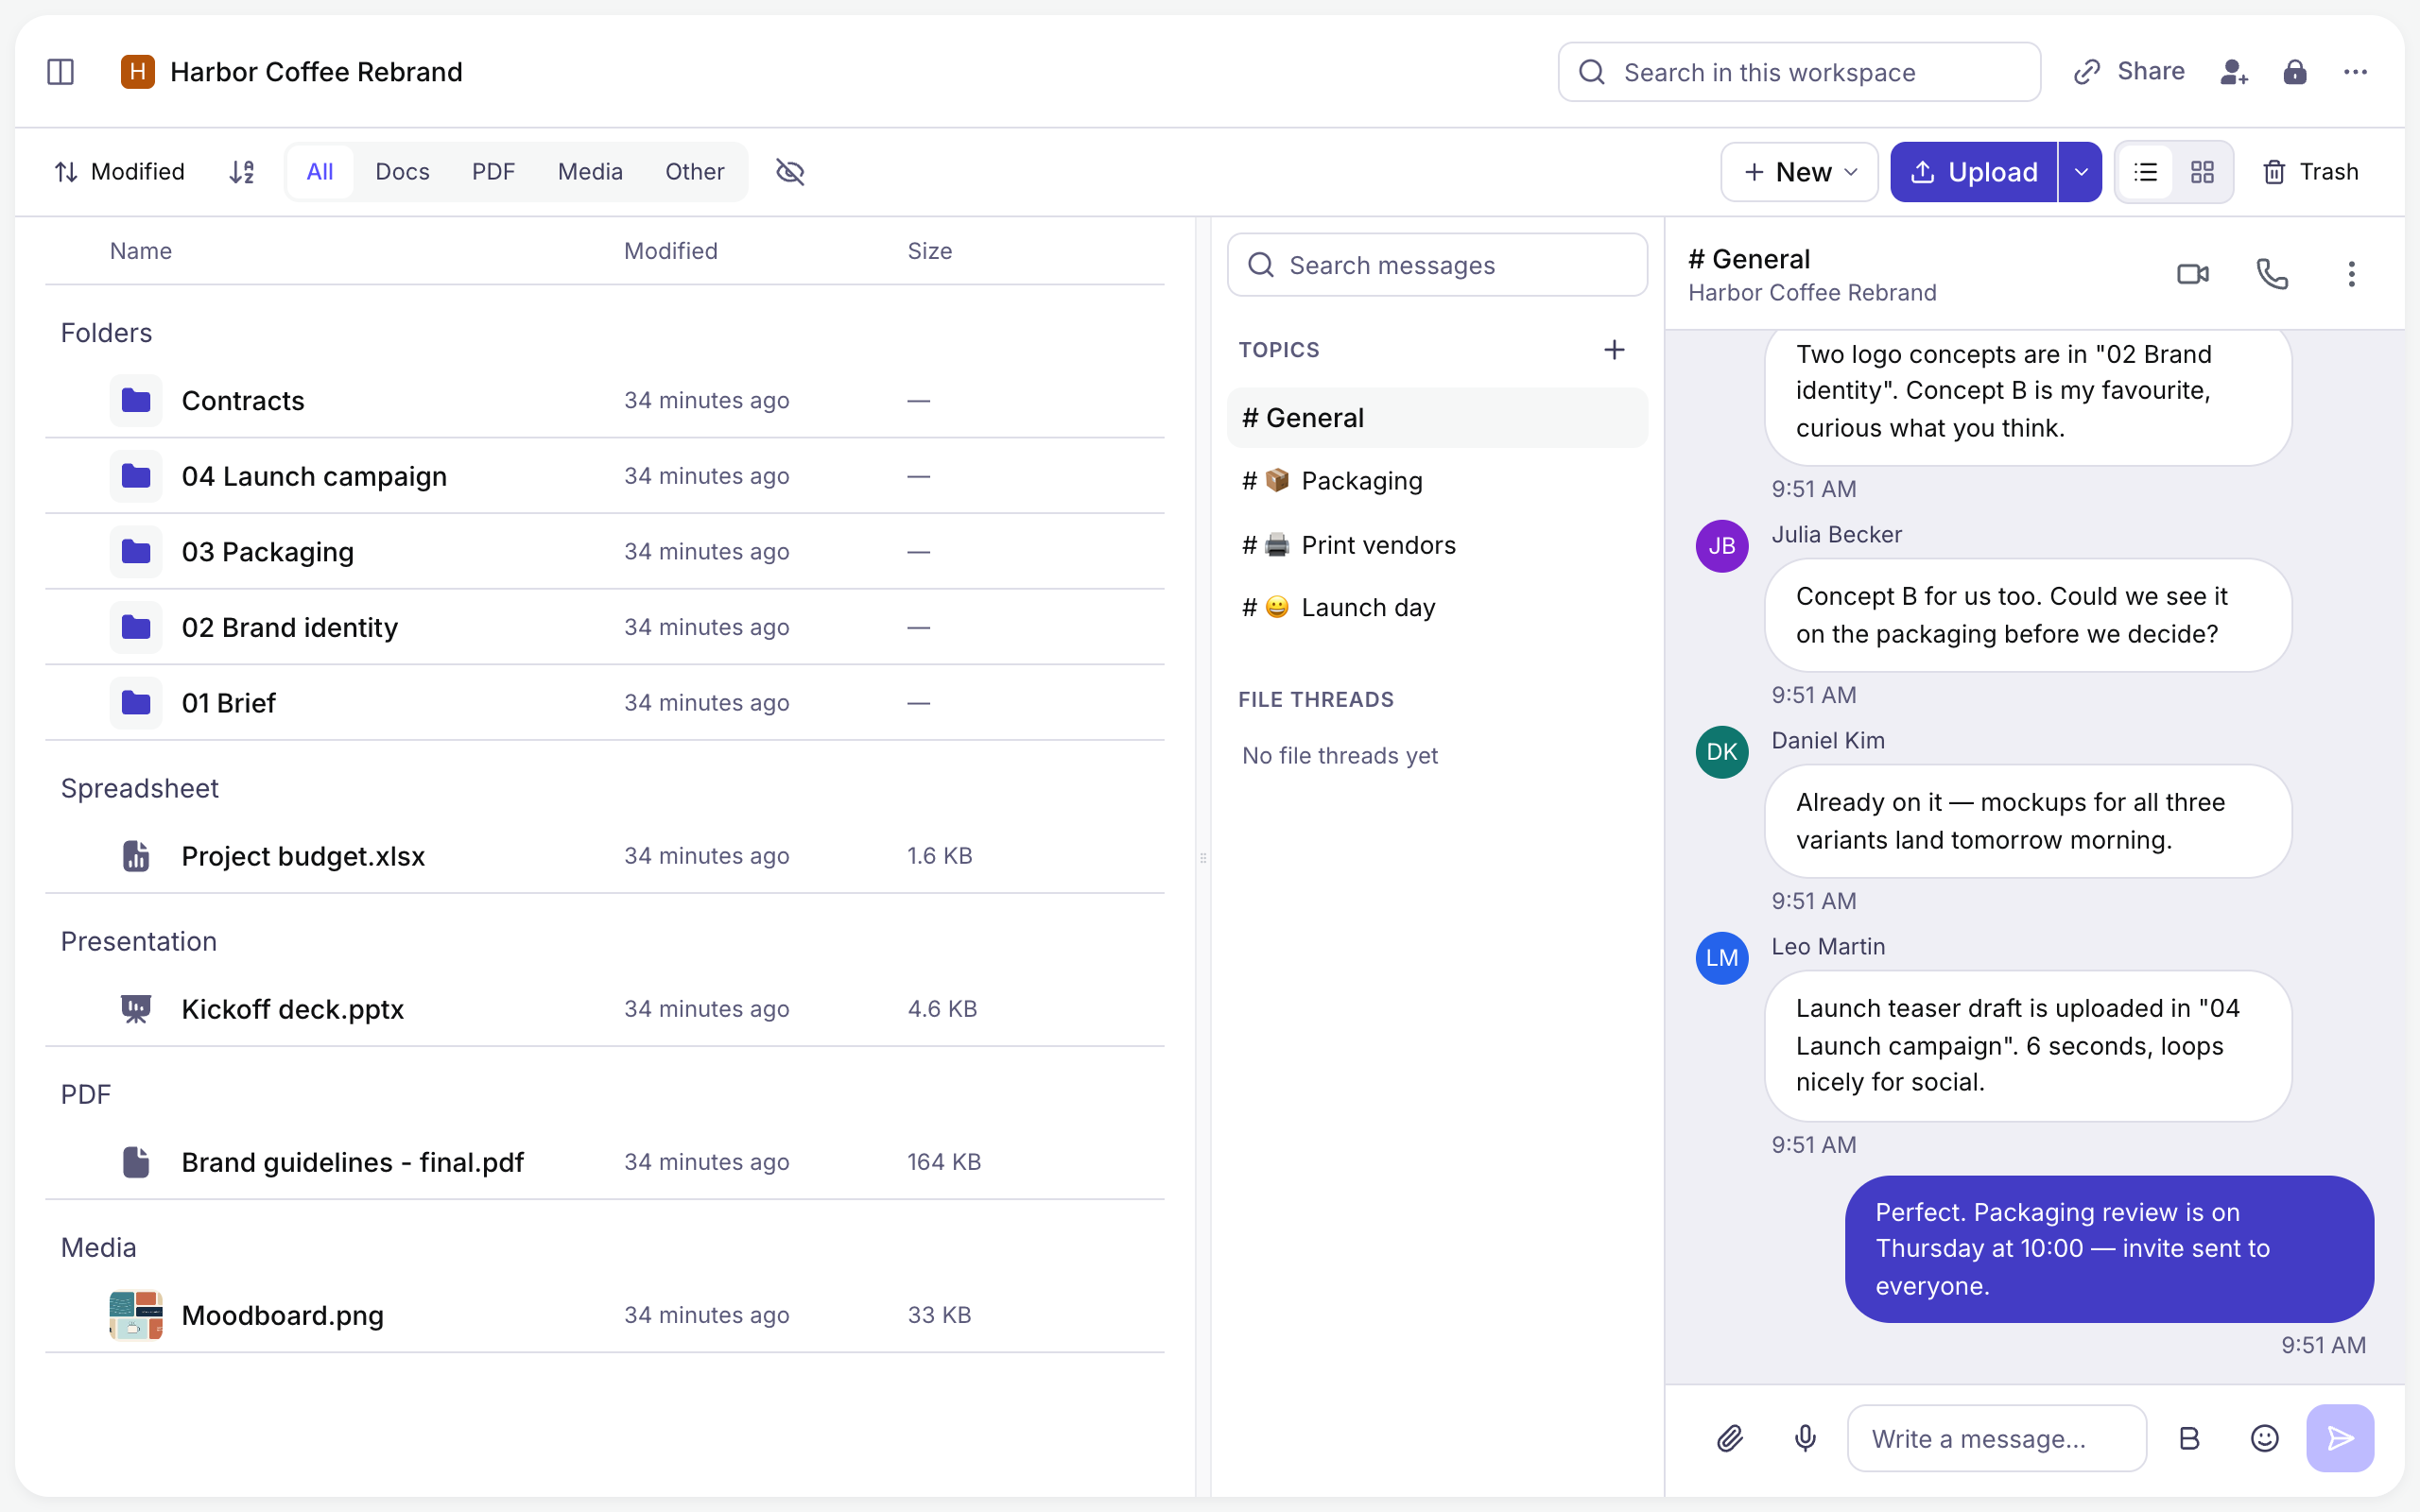
Step 3: Click a topic to follow that discussion only.
5.2 Chat in files
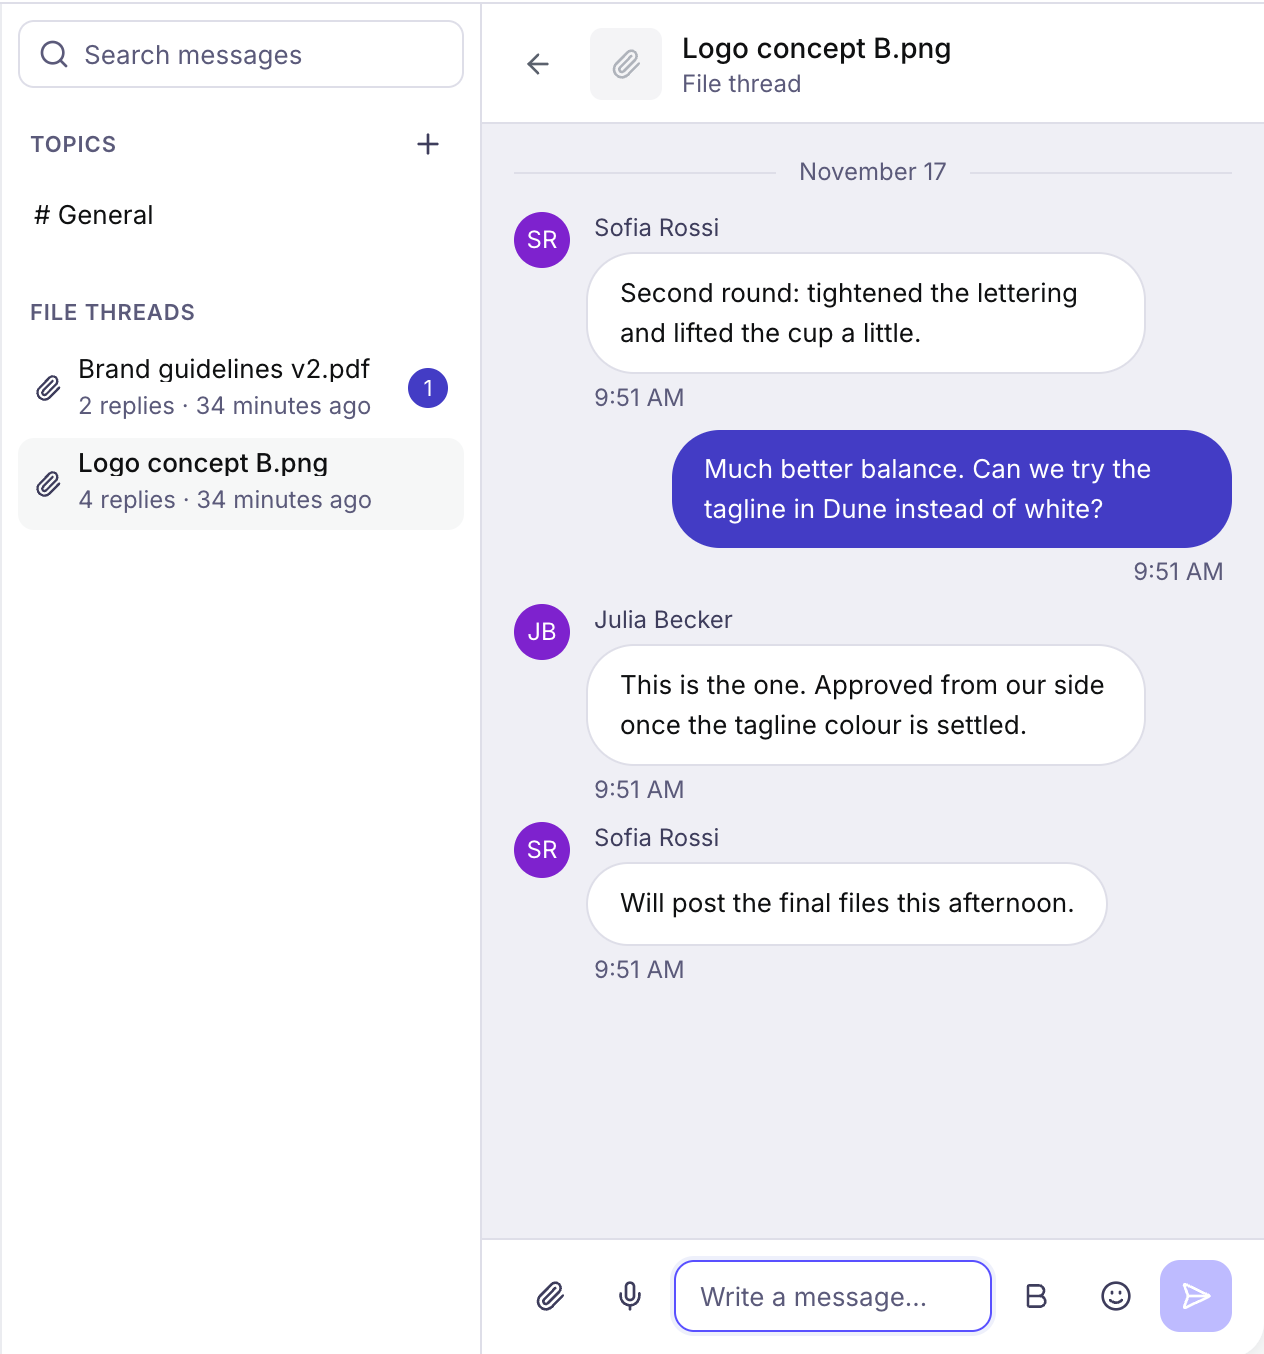
Step 1: Open the folder that contains the file. Its discussions are listed under File threads.
Step 2: Click a thread to read the whole discussion about that file and continue it.
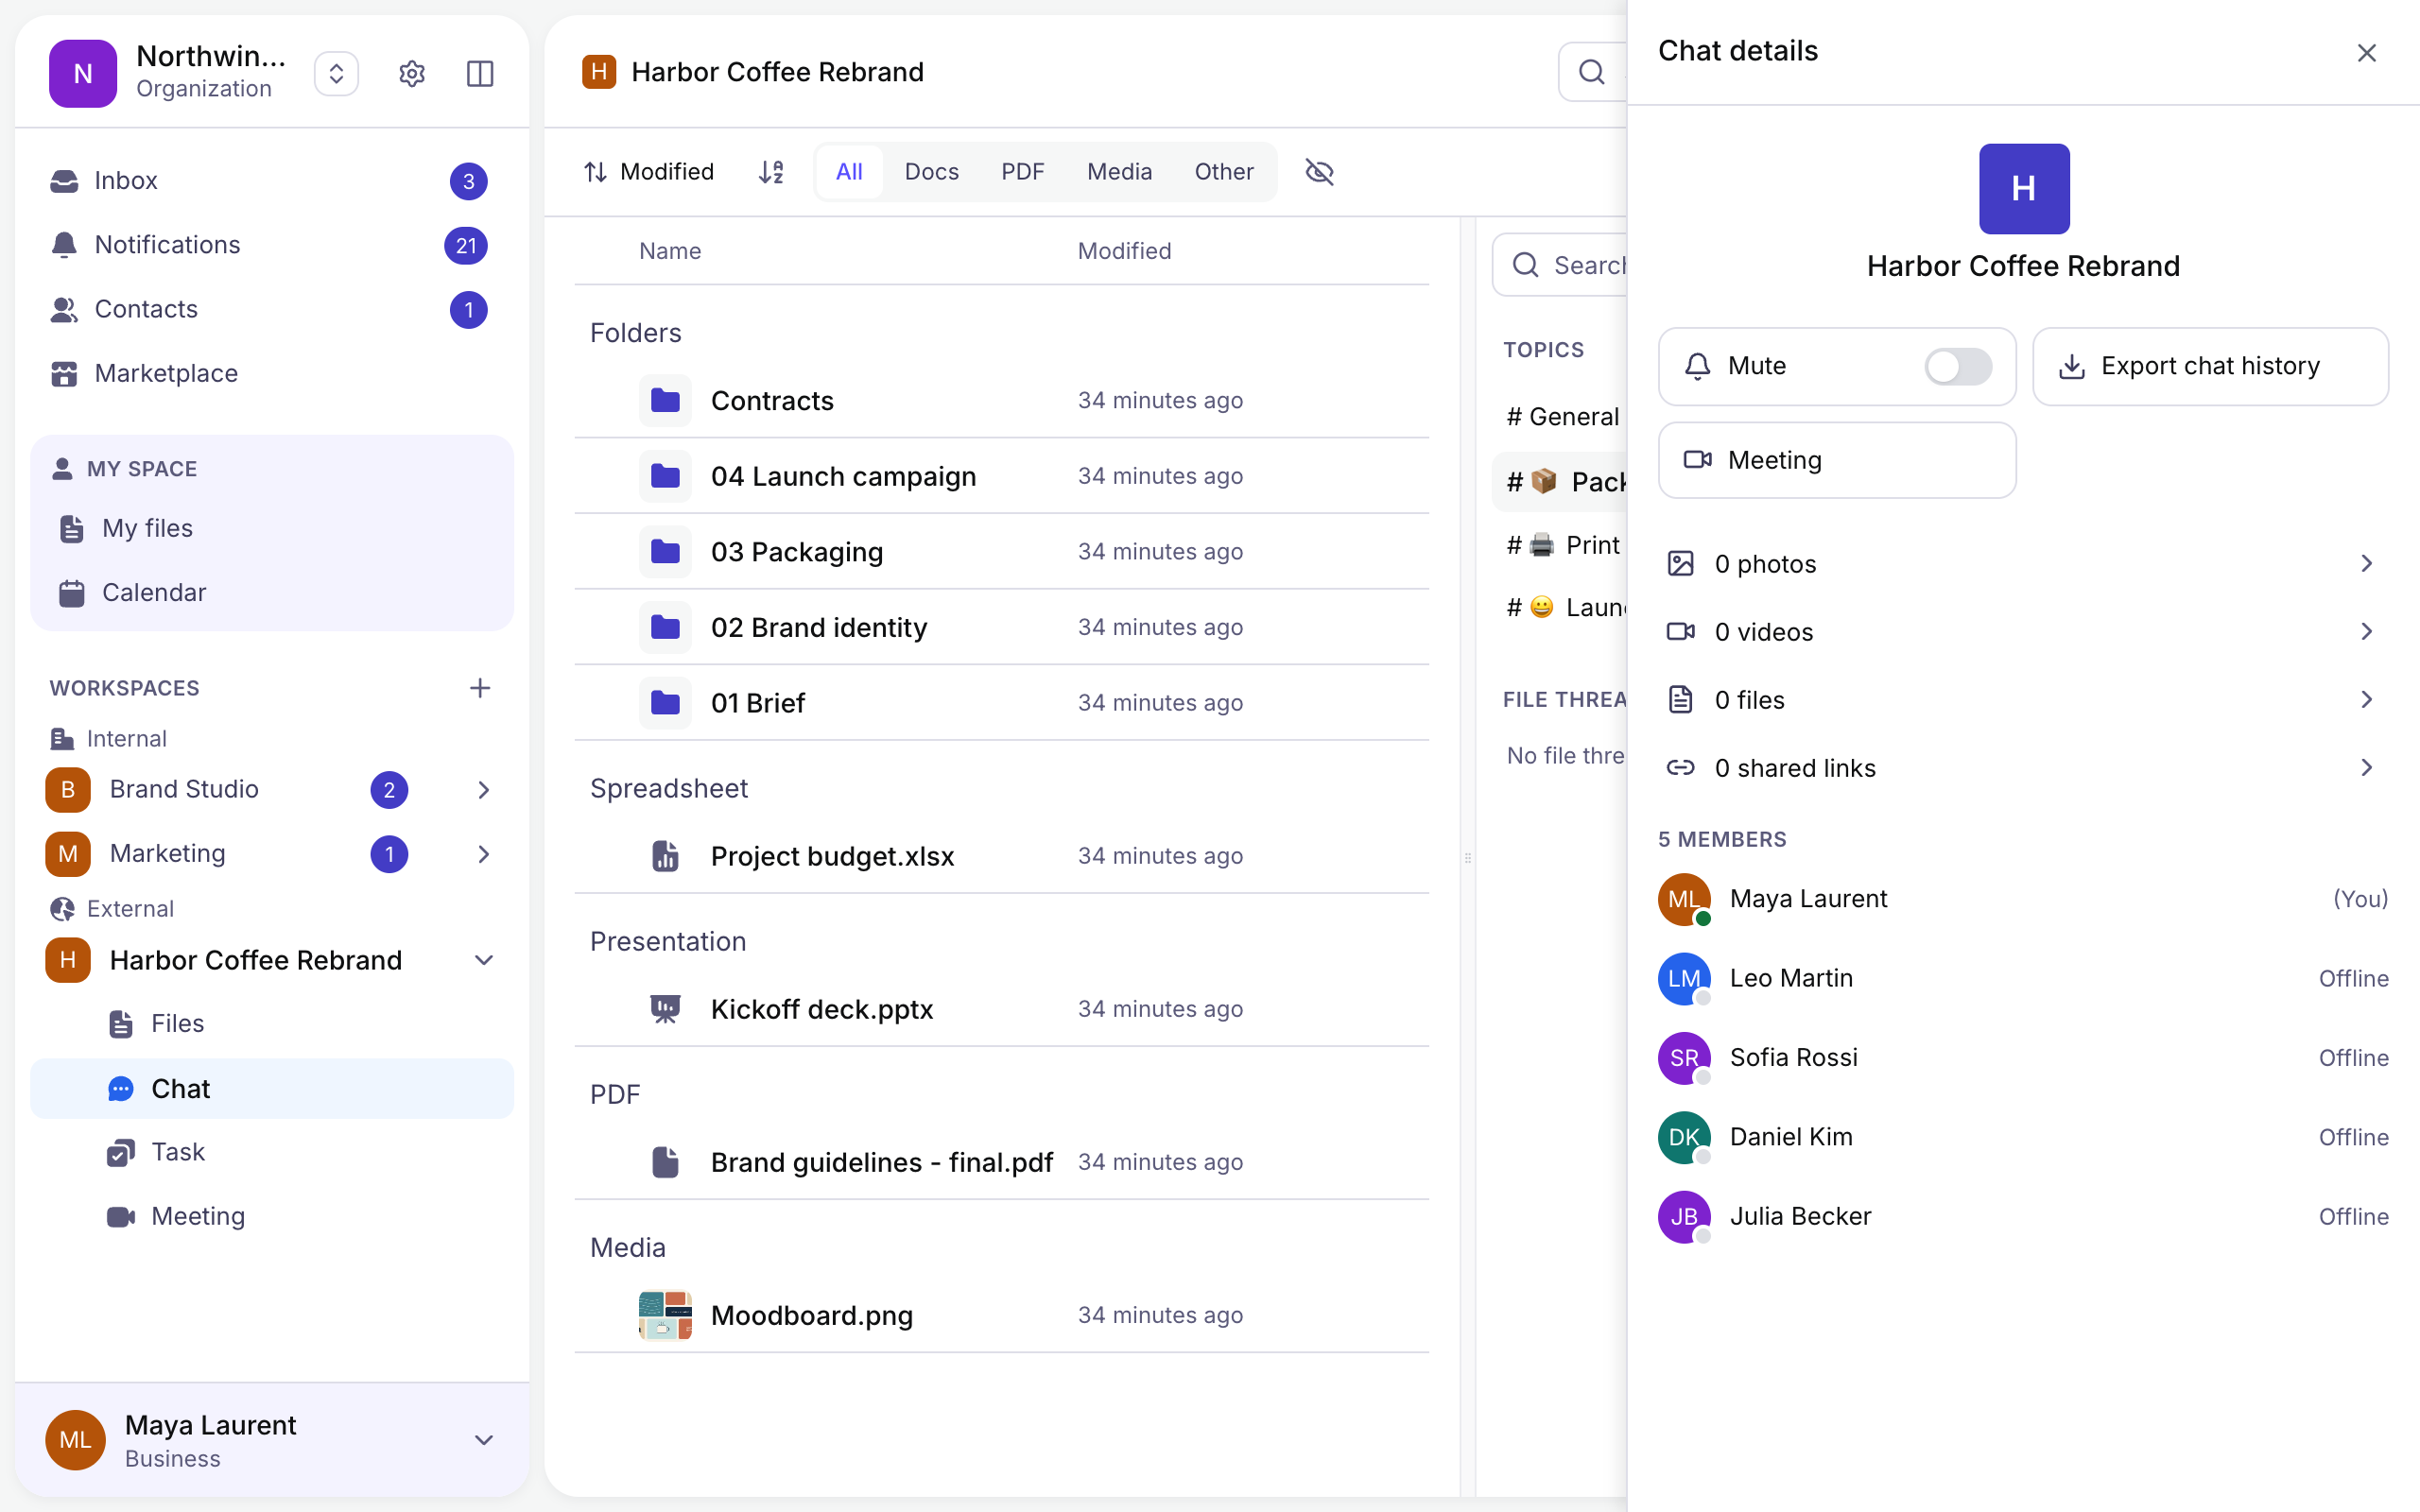
5.3 Chat details
Step 1: Click ⋮ at the top of the conversation to open Chat details.
Step 2: From there, mute the conversation, browse the photos, videos, files and links shared in it, see who is in it — or select Export chat history to download it.
6. Meeting with your team
Use Meeting to schedule and join meetings without leaving the workspace, keeping every discussion within the same project context.
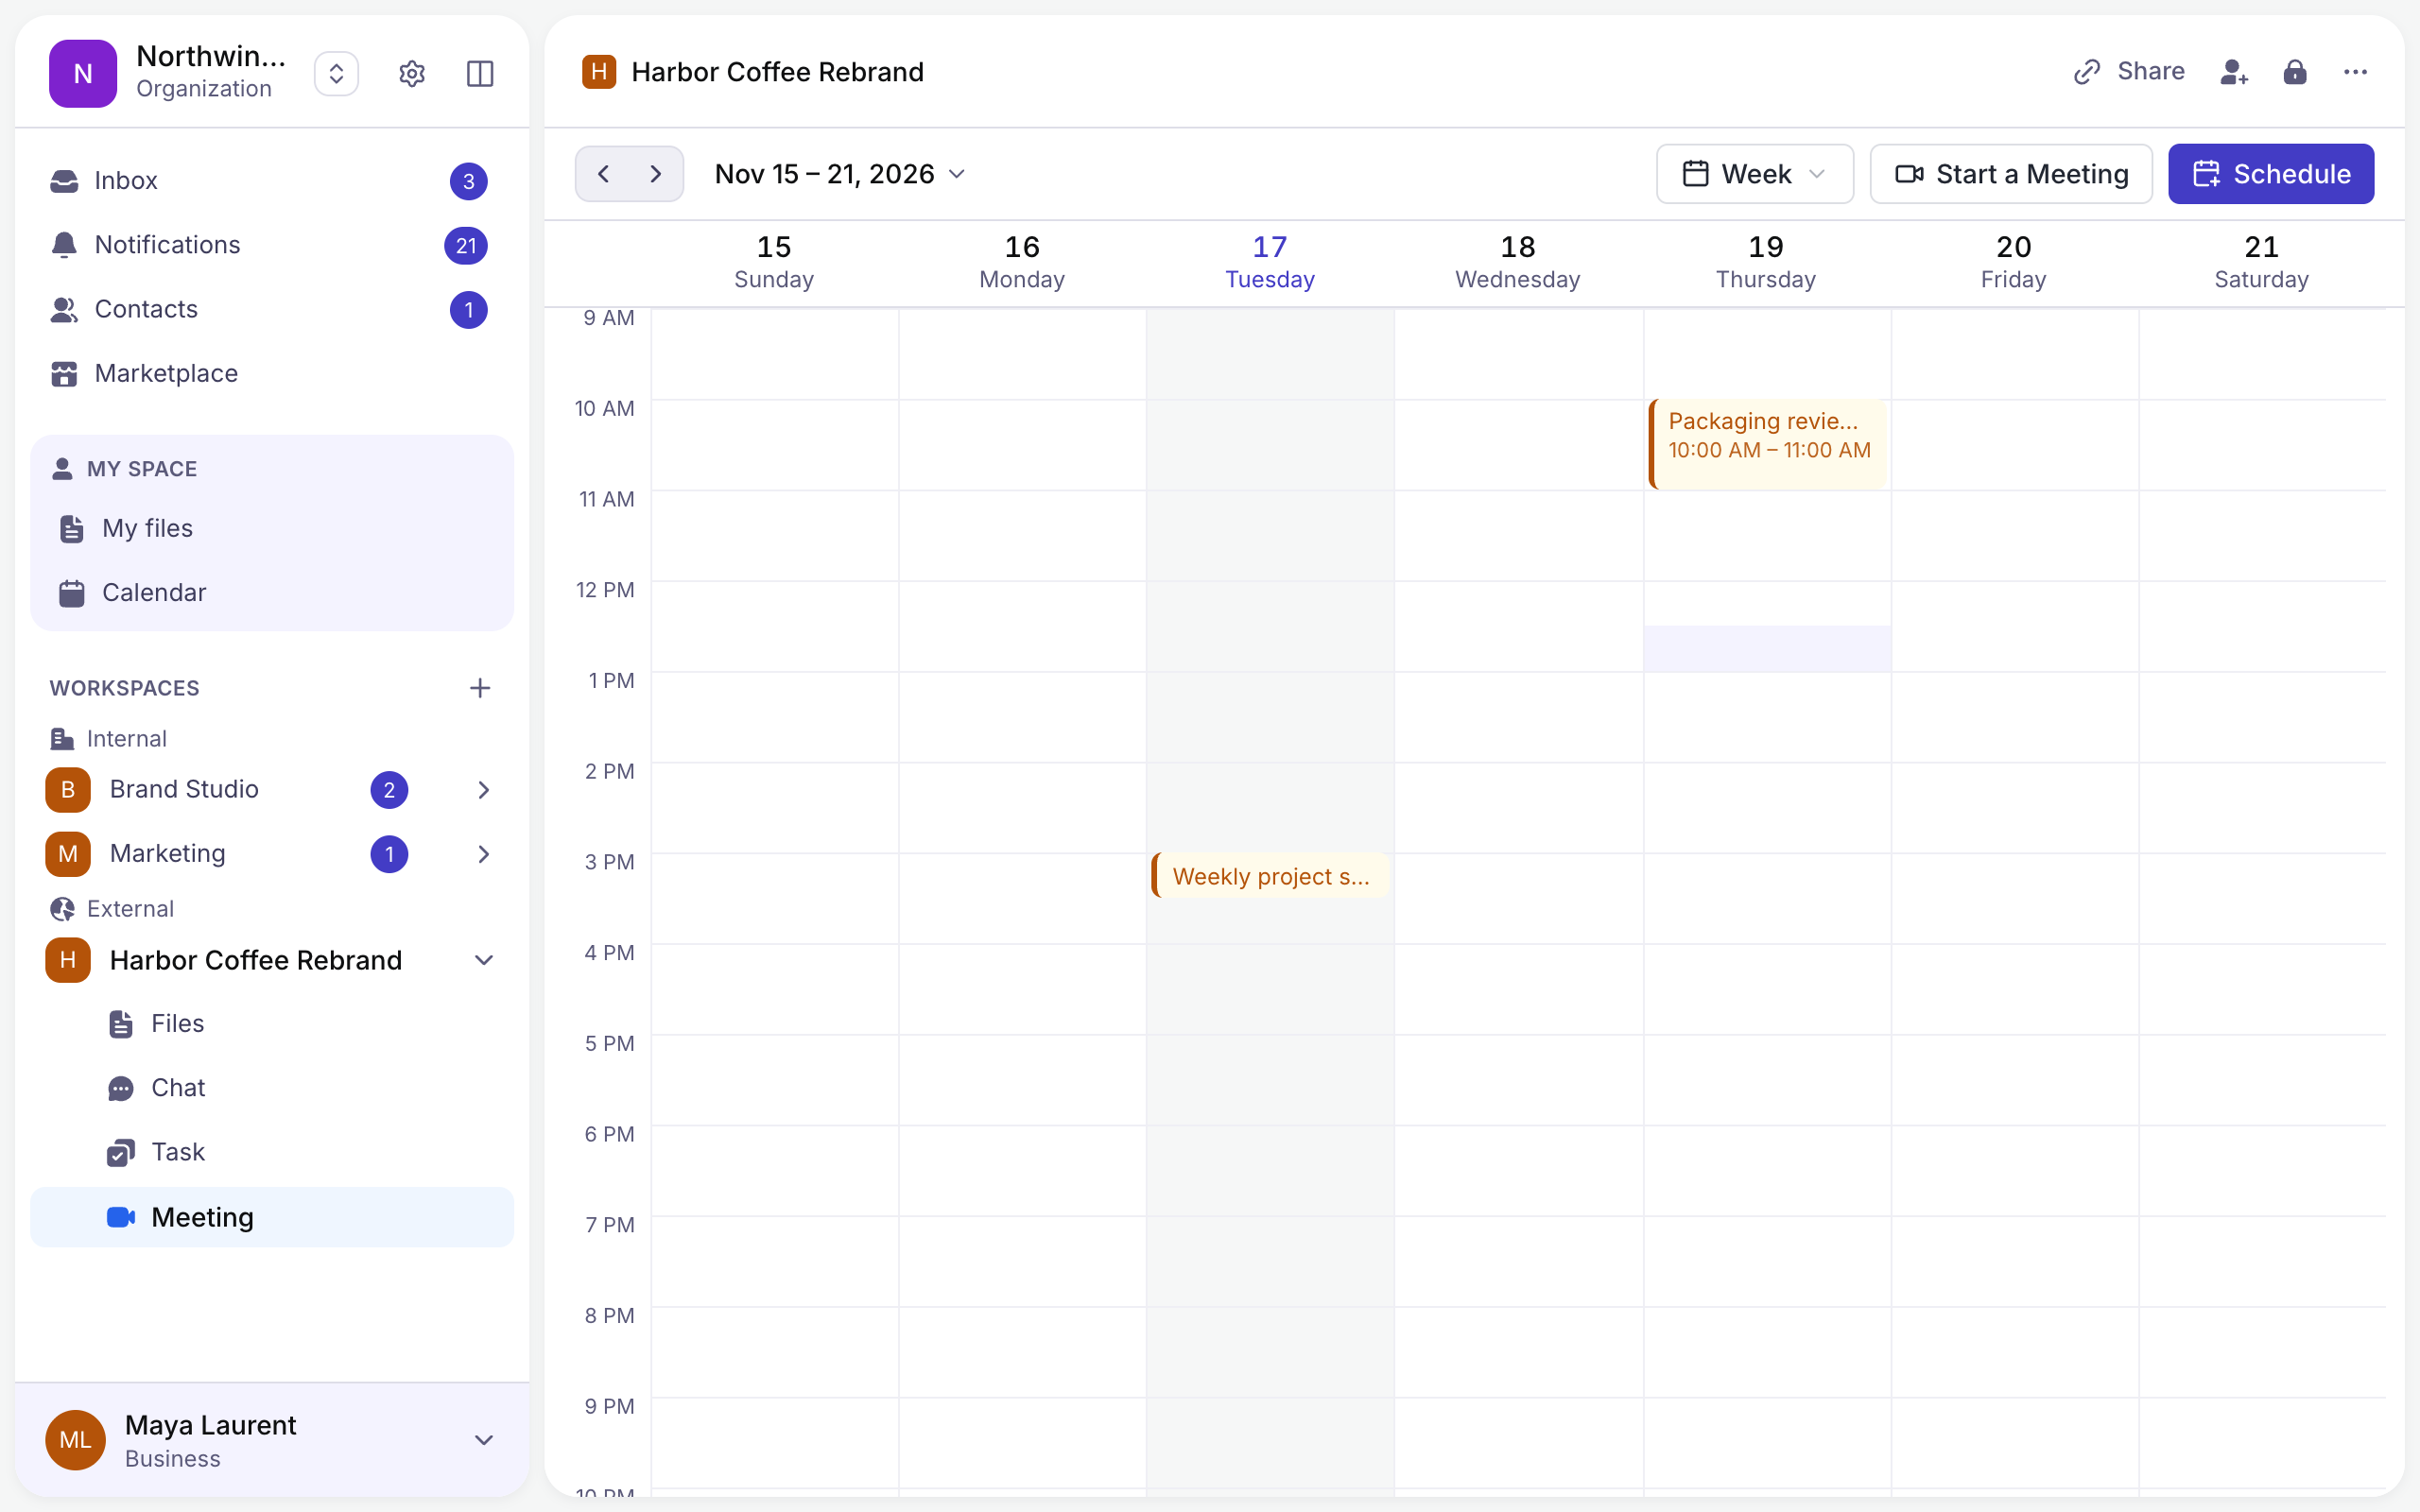
Step 1: Open the workspace => Select Meeting.
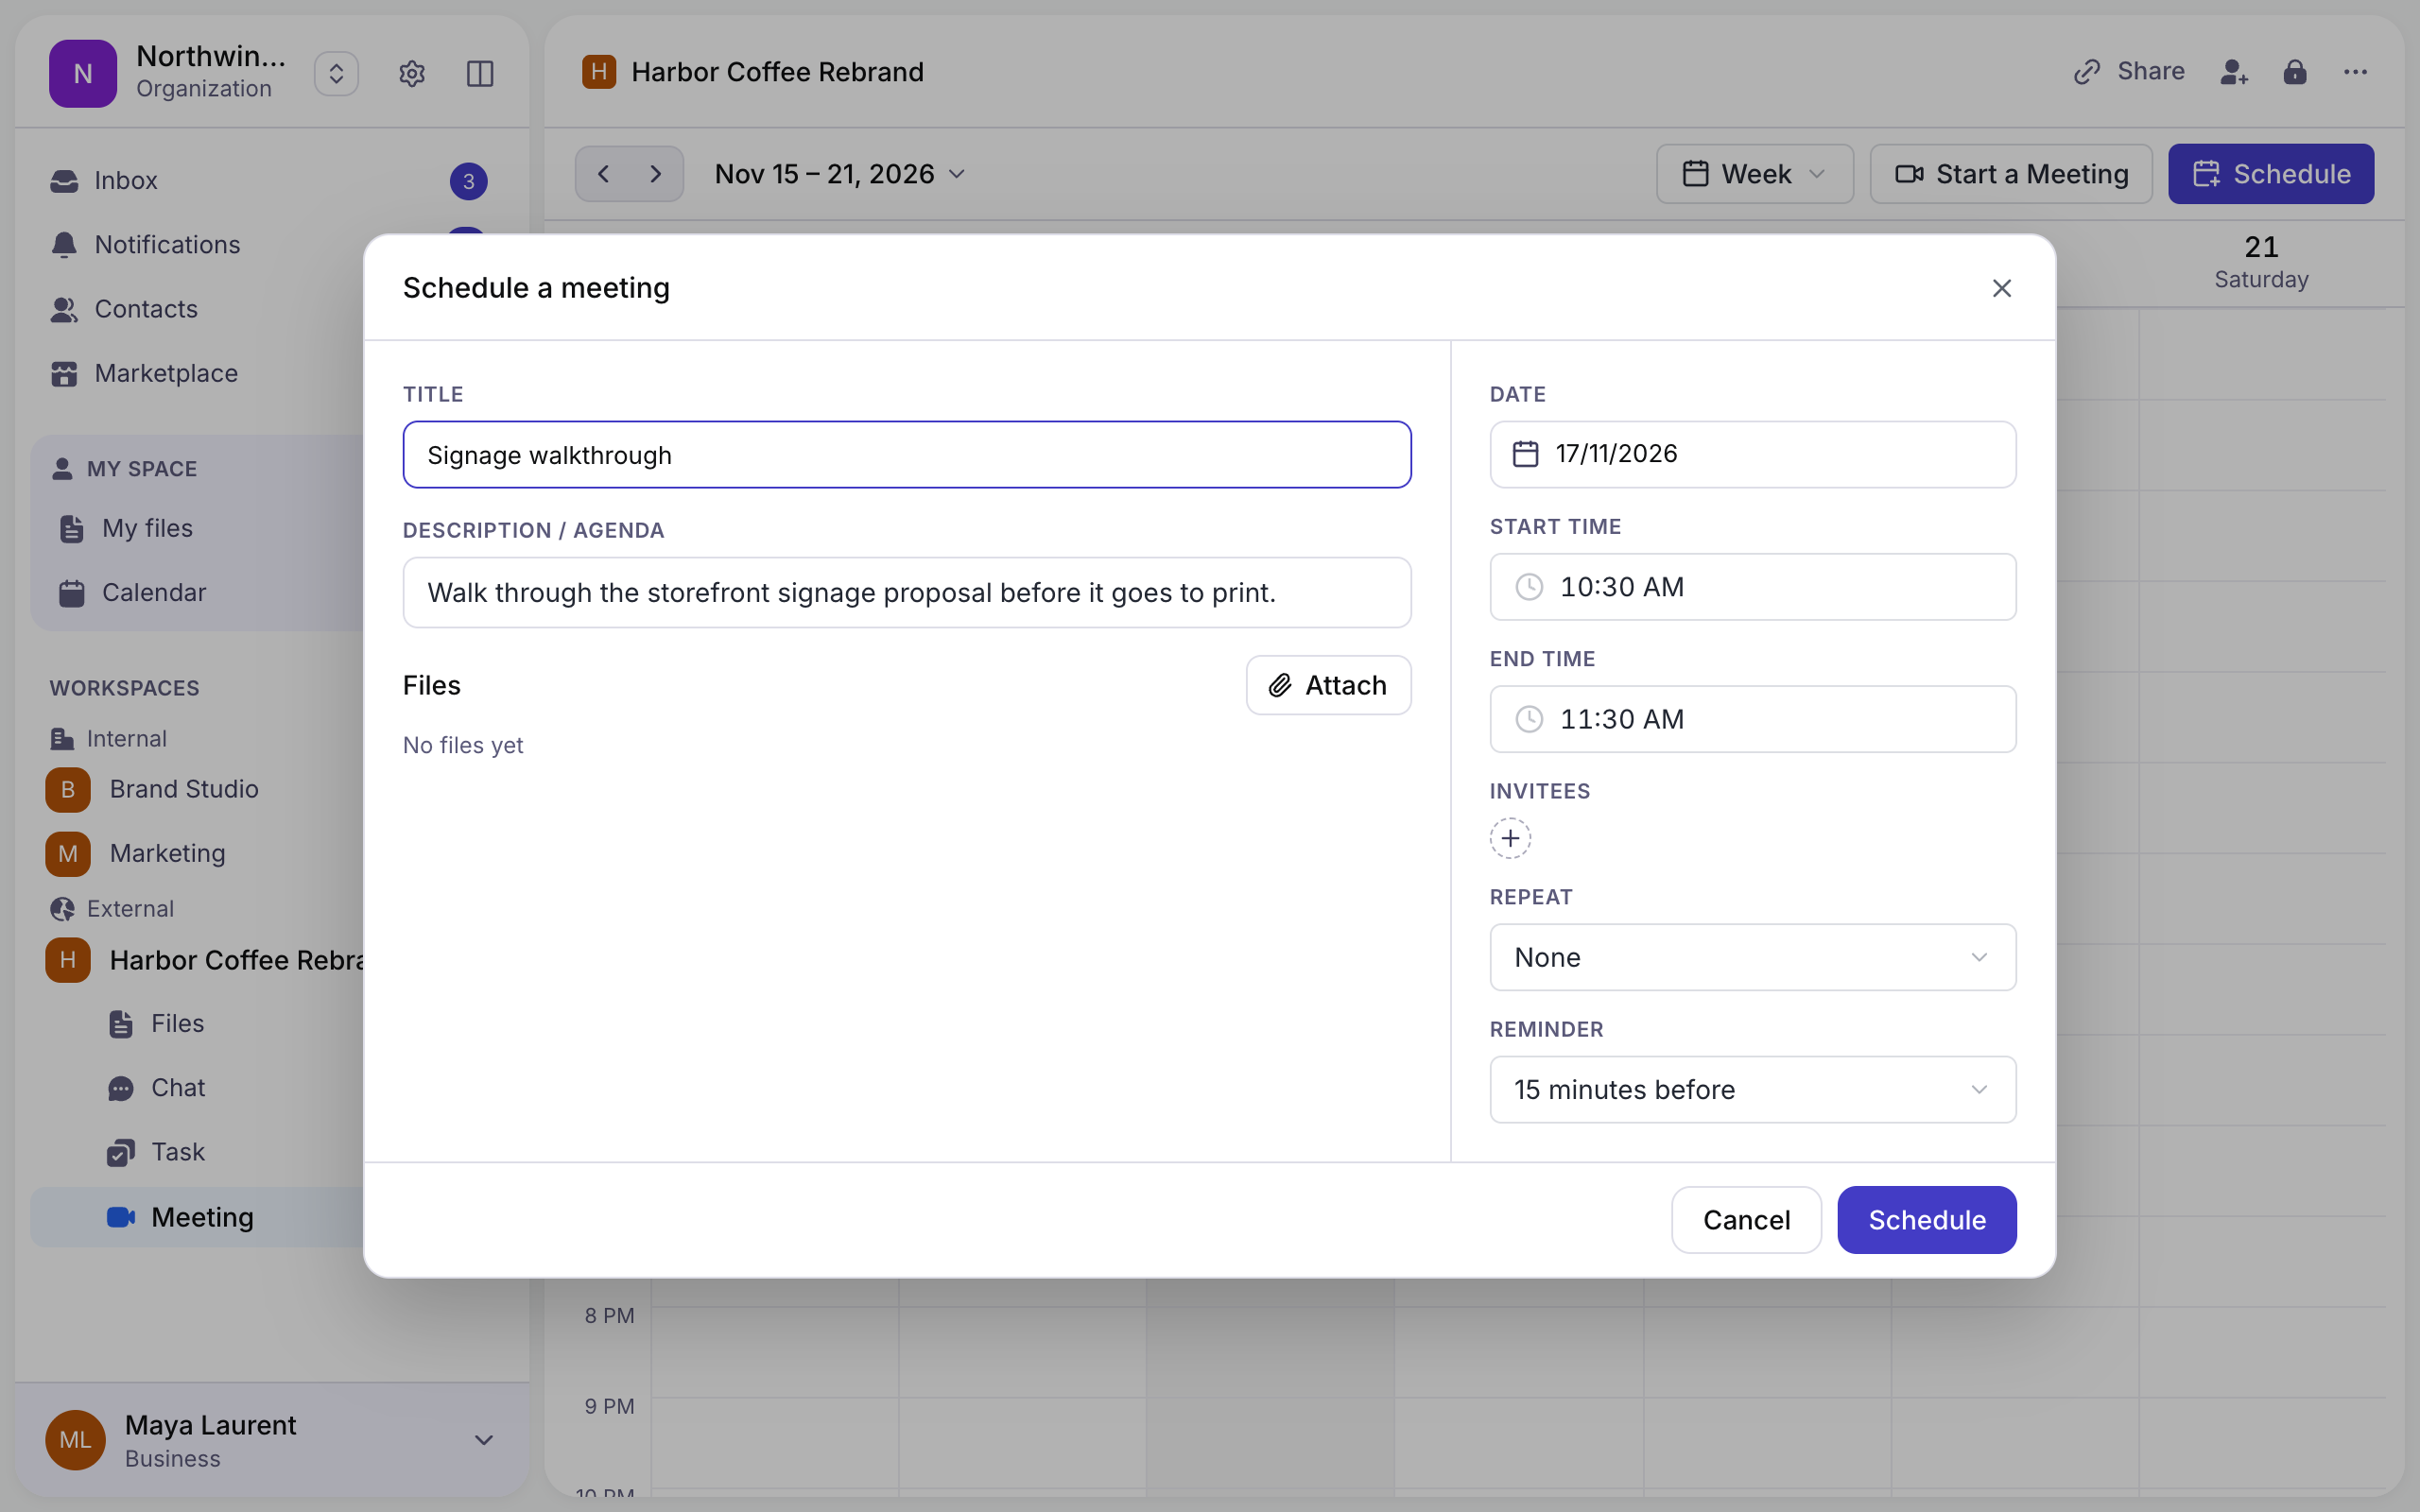
Step 2: Click Schedule => set the title, agenda, date and time, invitees, repetition and reminder. Attach the files the meeting is about.
Step 3: Click Schedule to complete. Invitees are notified, and the meeting appears in their calendar.
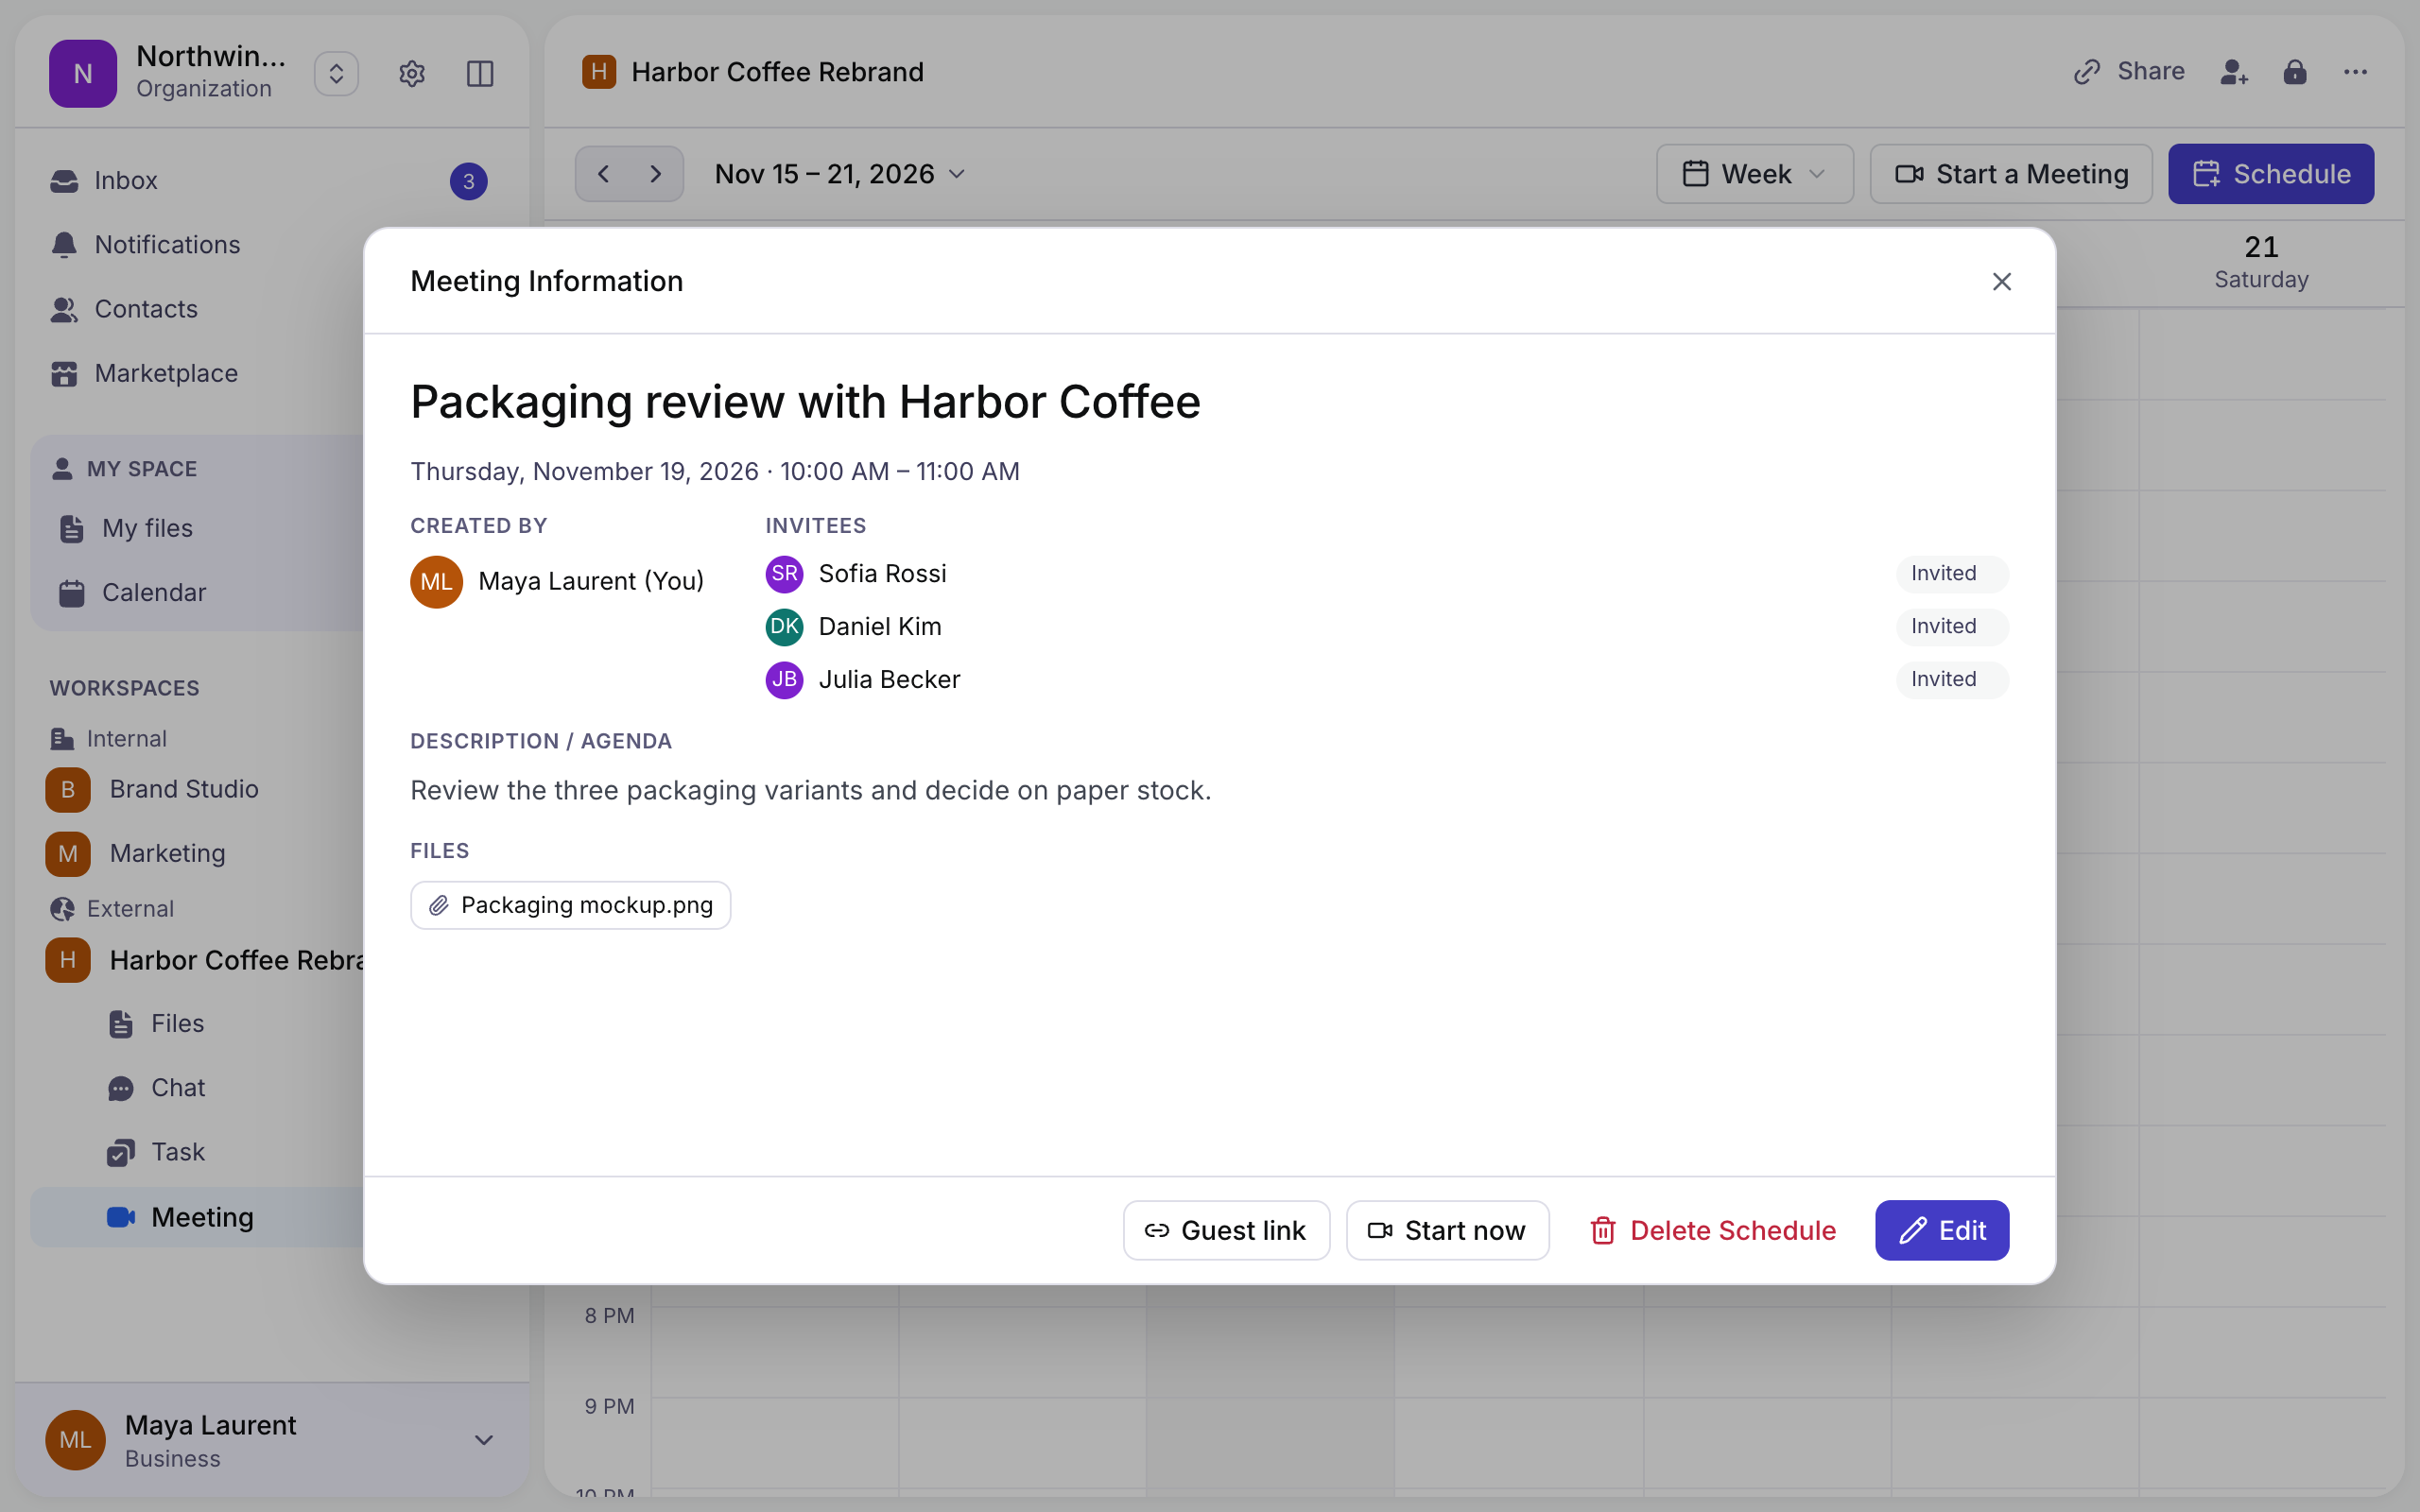
Step 4: Click a meeting to see its details. Start now opens the room; Guest link lets someone without an account join.
Need to talk right away? Start a Meeting opens the workspace’s room immediately.
7. Grant permissions
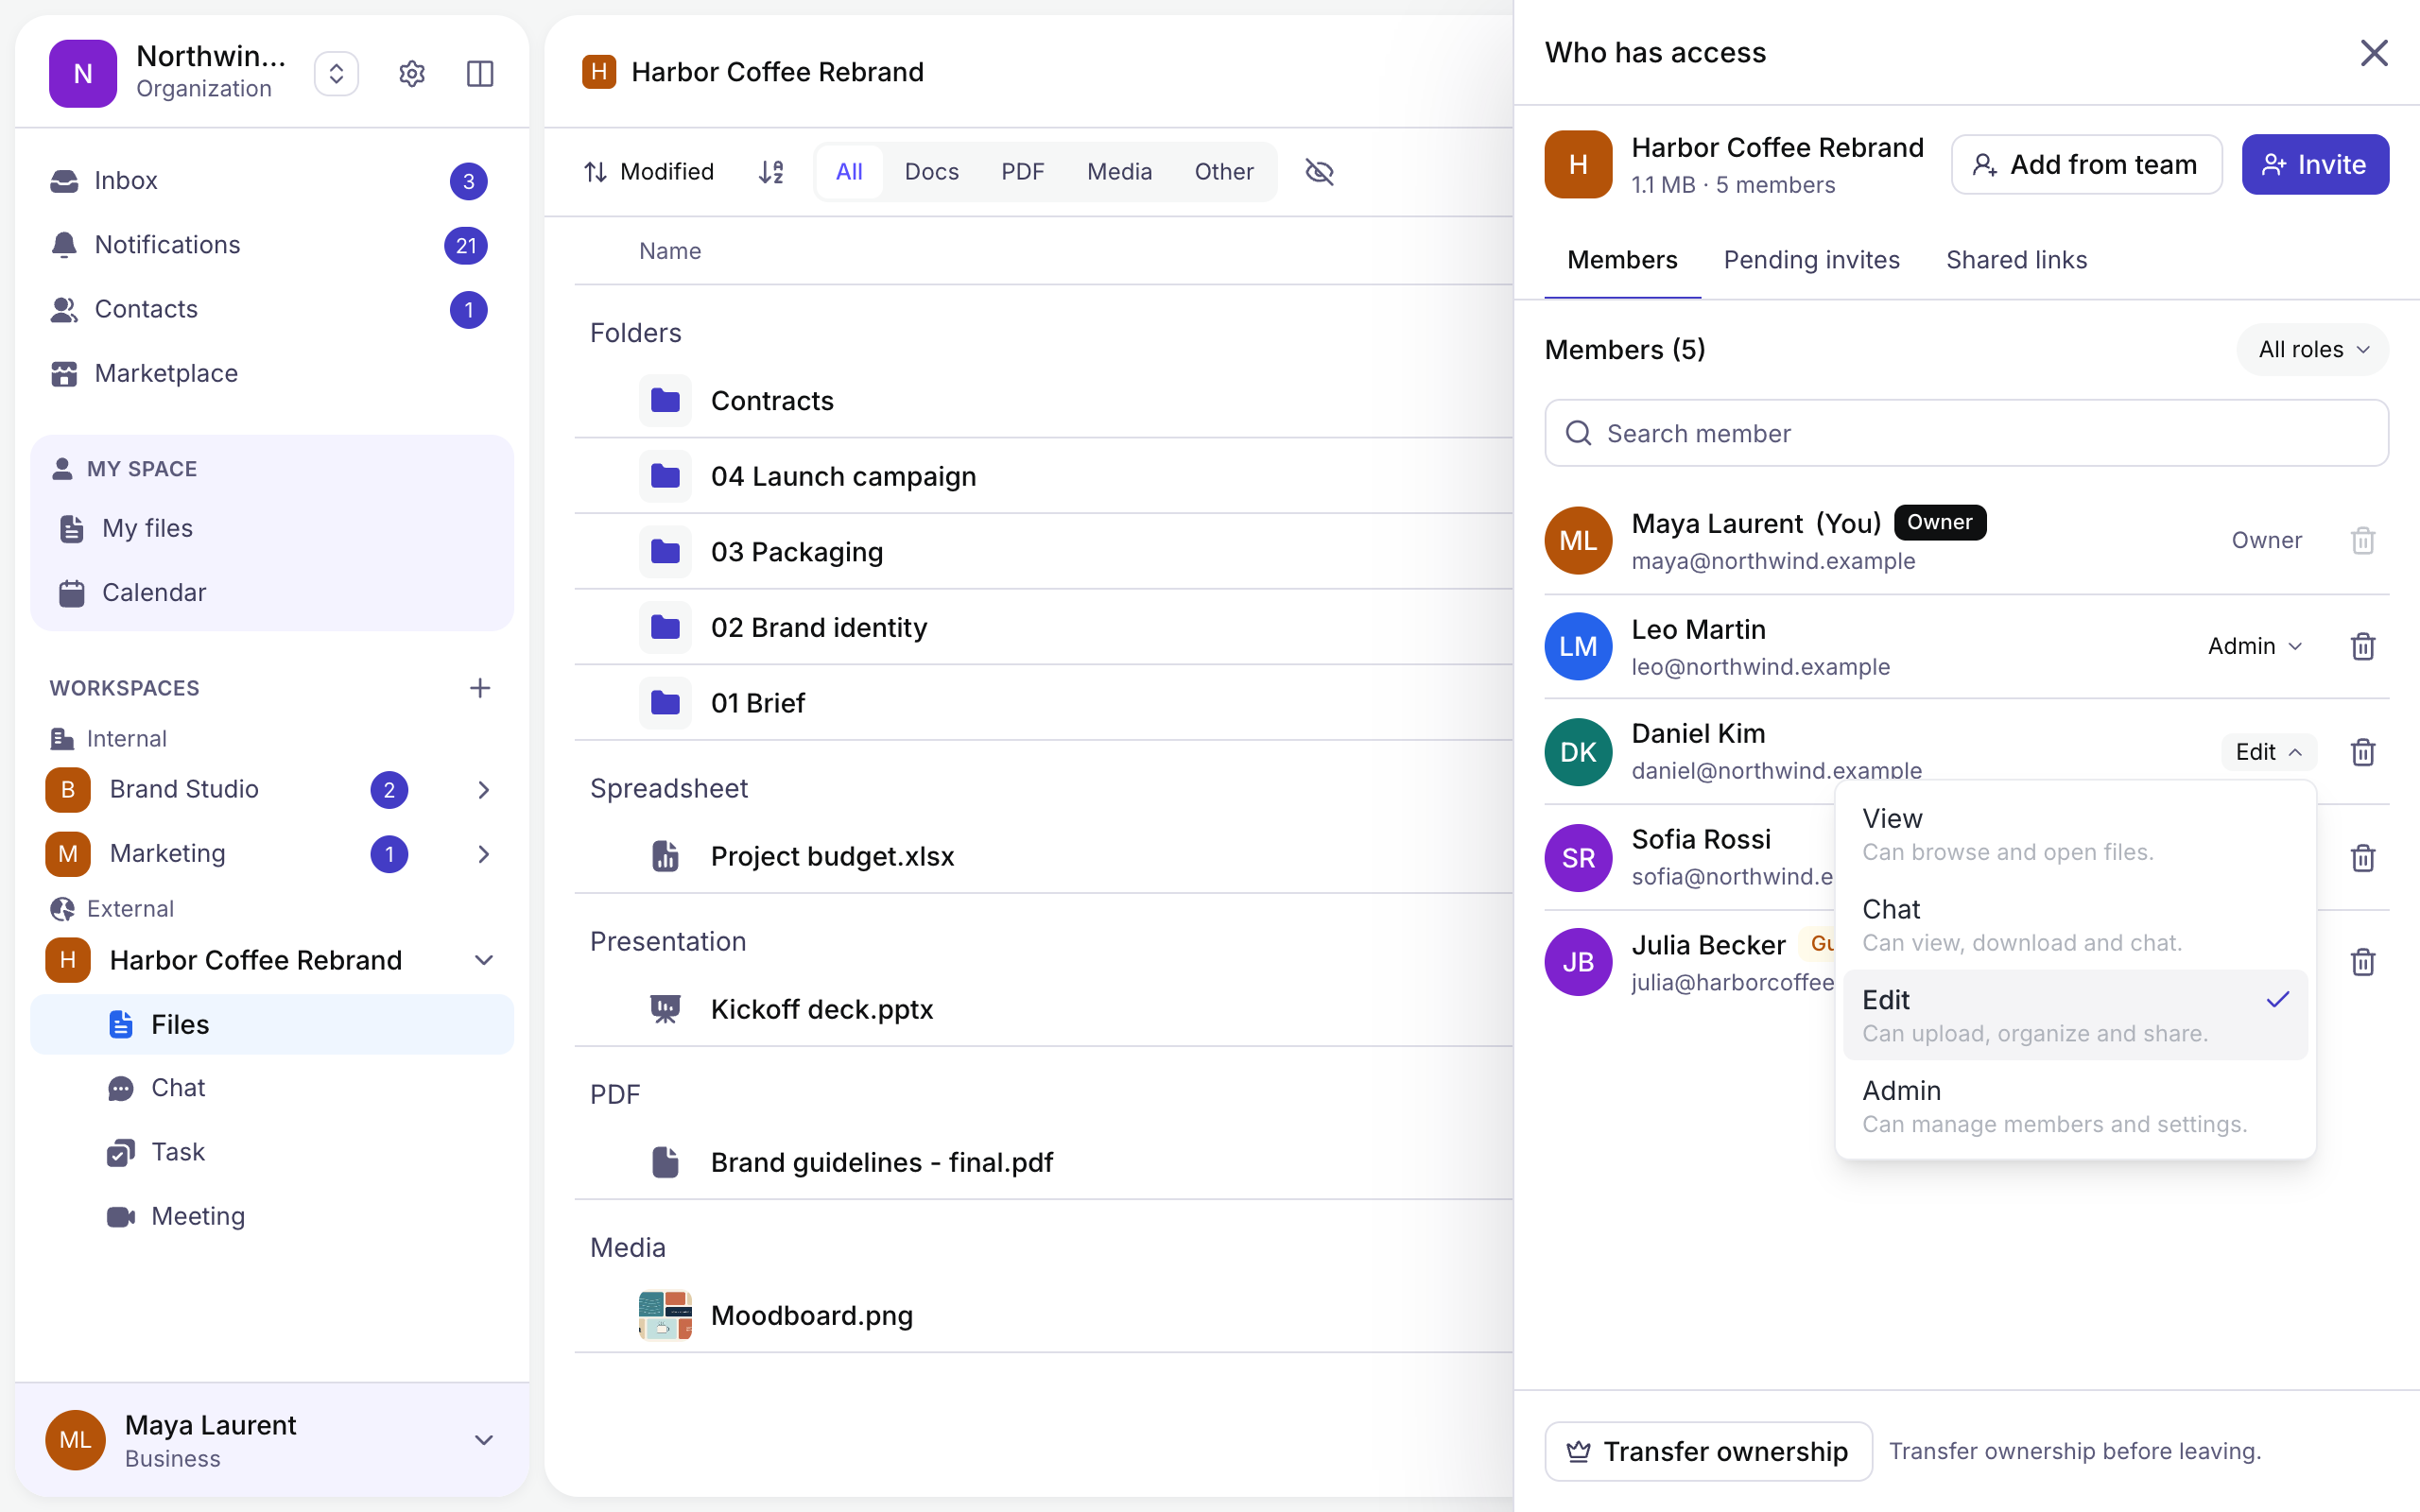
Each member has one role in a workspace, and the role decides what they can do there.
| Role | What it allows |
|---|---|
| View | Can browse and open files. |
| Chat | Can view, download and chat. |
| Edit | Can upload, organize and share. |
| Admin | Can manage members and settings. |
| Owner | The one person who can transfer or delete the workspace. |
Step 1: Open the workspace => Click Who has access at the top right.
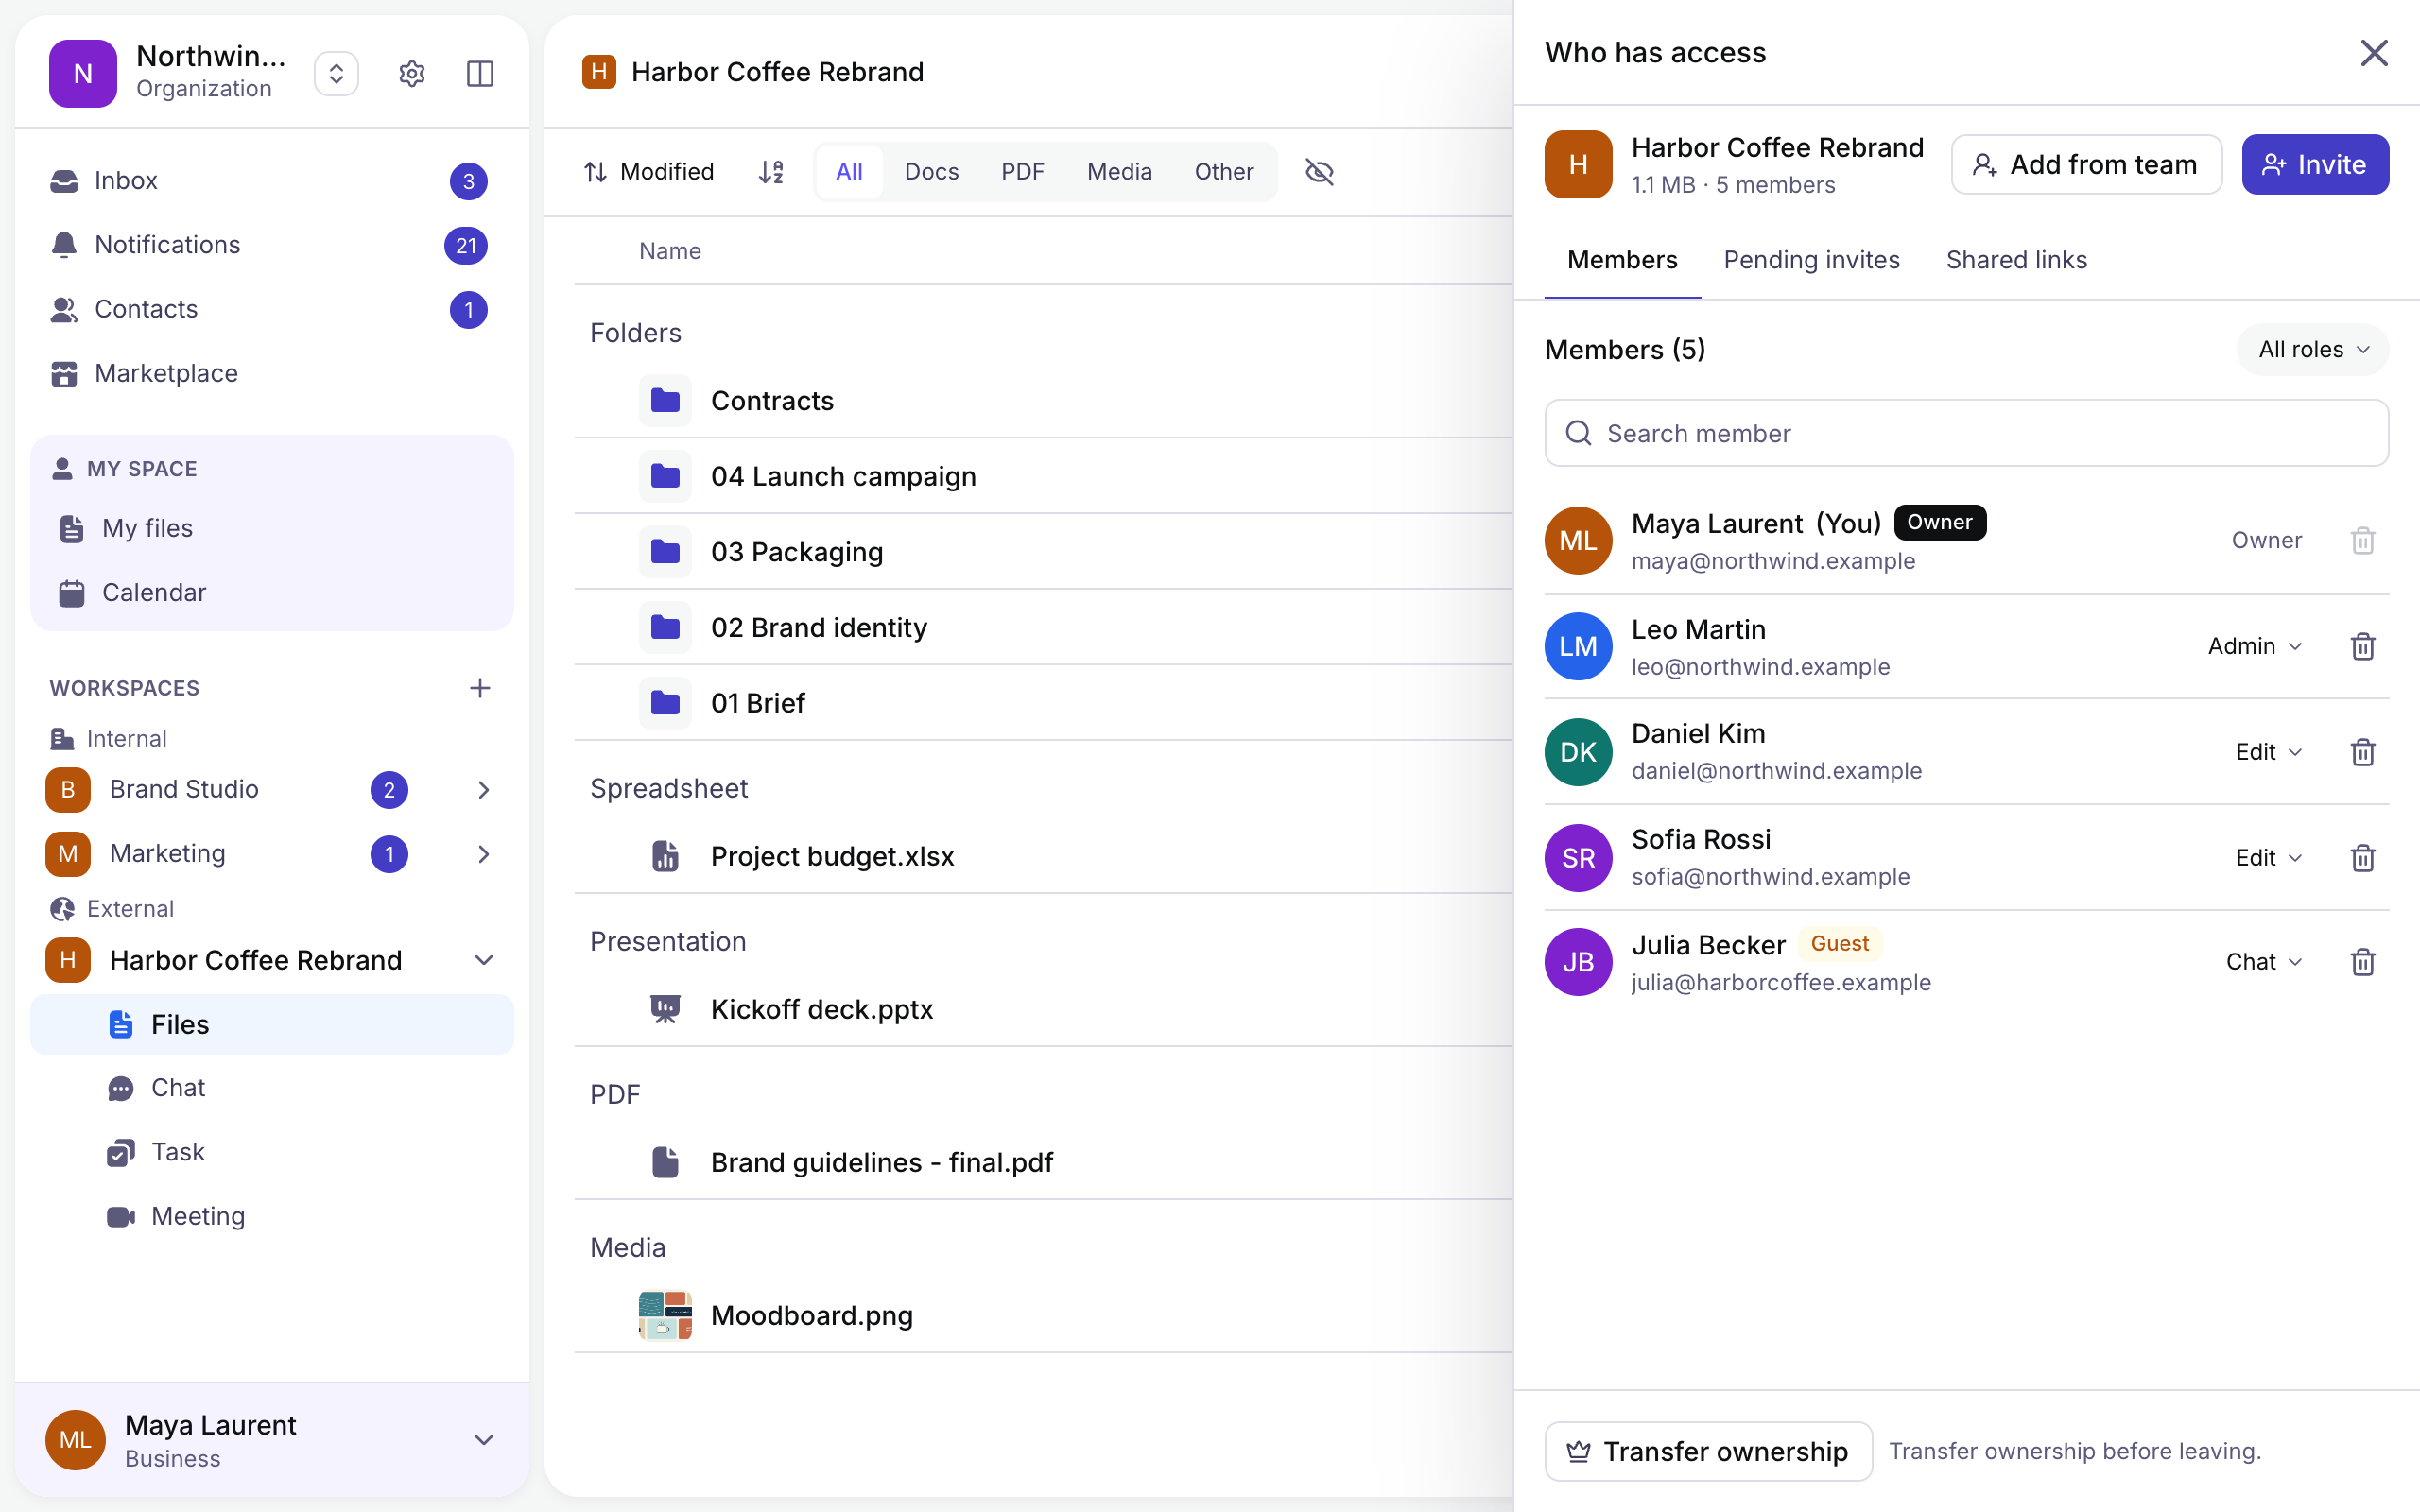
Step 2: Click the role next to a member.
Step 3: Choose the new role. It applies at once.
People from outside your organization join as guests, with the View or Chat role.
→ The full model is described in RBAC System.
8. AHA Moments
8.1 Secure Share
Use Secure Share to send confidential files to clients outside your workspace while controlling access with:
| Feature | What it does |
|---|---|
| Password protection | Require a password before recipients can open the link. |
| Expiration | Set a time after which the link automatically stops working. |
| Email requirement | Require recipients to enter their email, and restrict the link to chosen addresses or domains. |
| Granular permissions | View by default; add Download, Chat or Edit. |
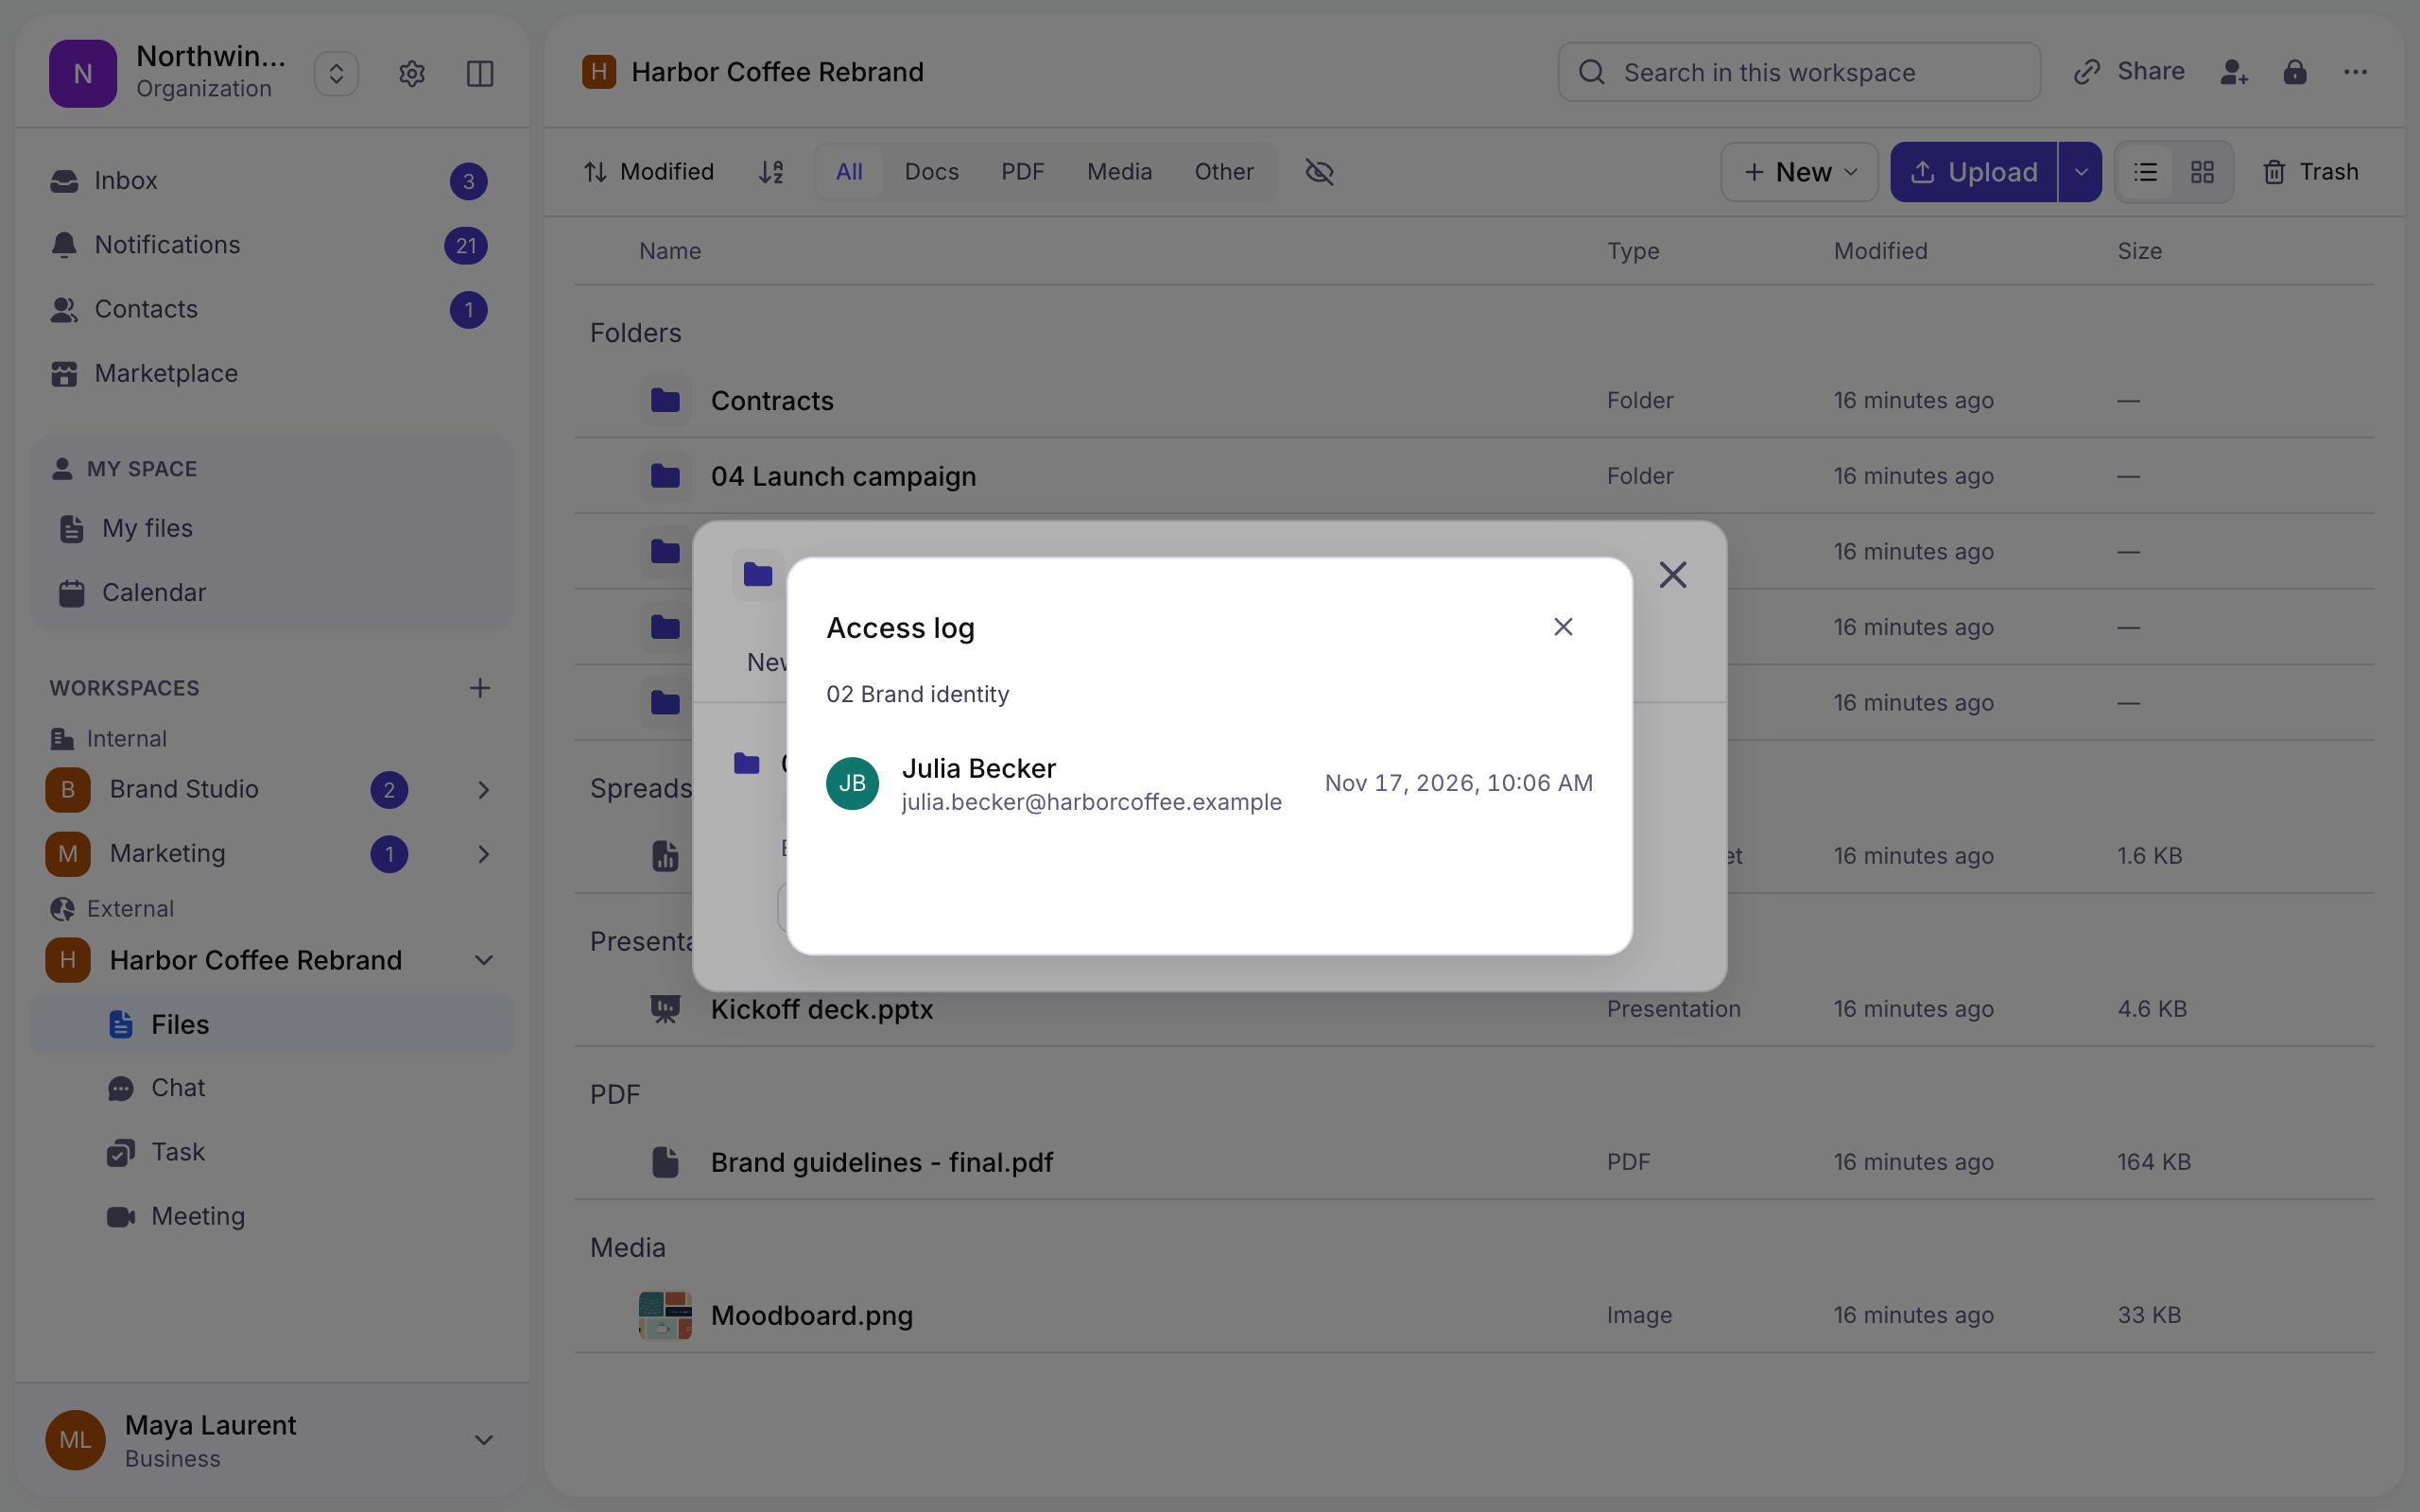
| Access log | See when the link was opened and by whom. |
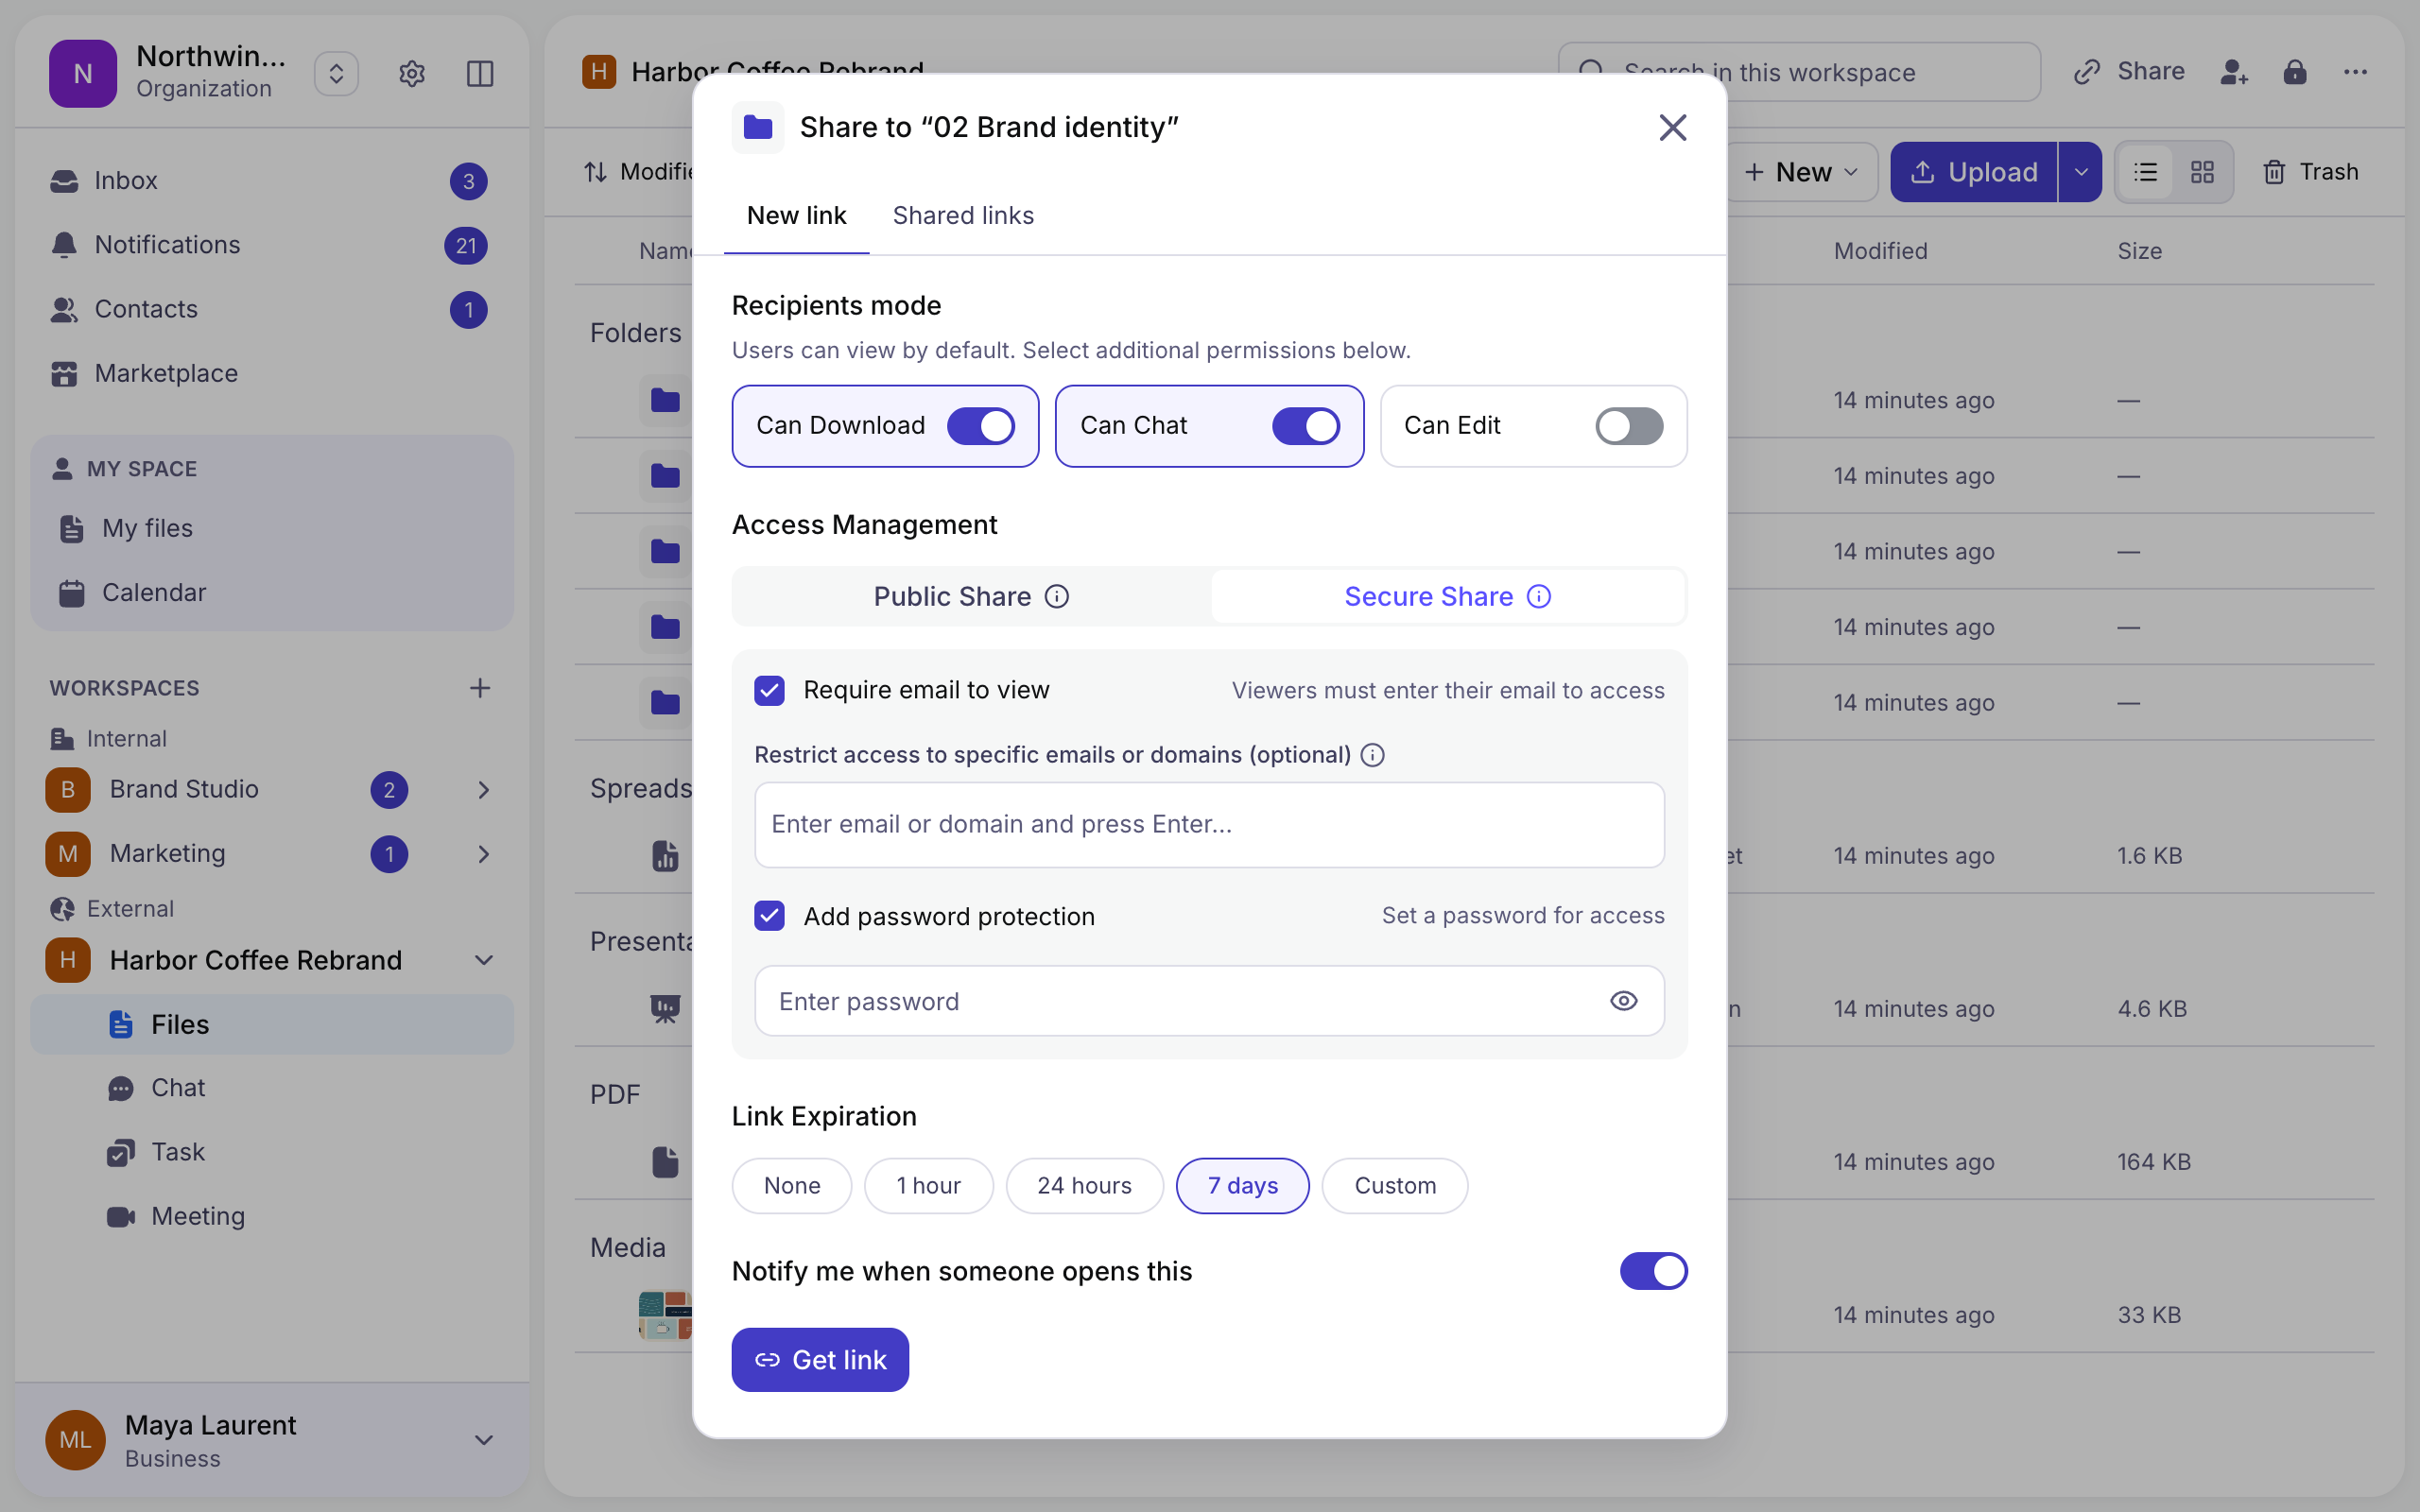
Step 1: Click ⋮ on a folder or file → Select Share.
Step 2: Choose what recipients may do, then select Secure Share.
Step 3: Tick Require email to view and Add password protection, pick an expiration, then click Get link.
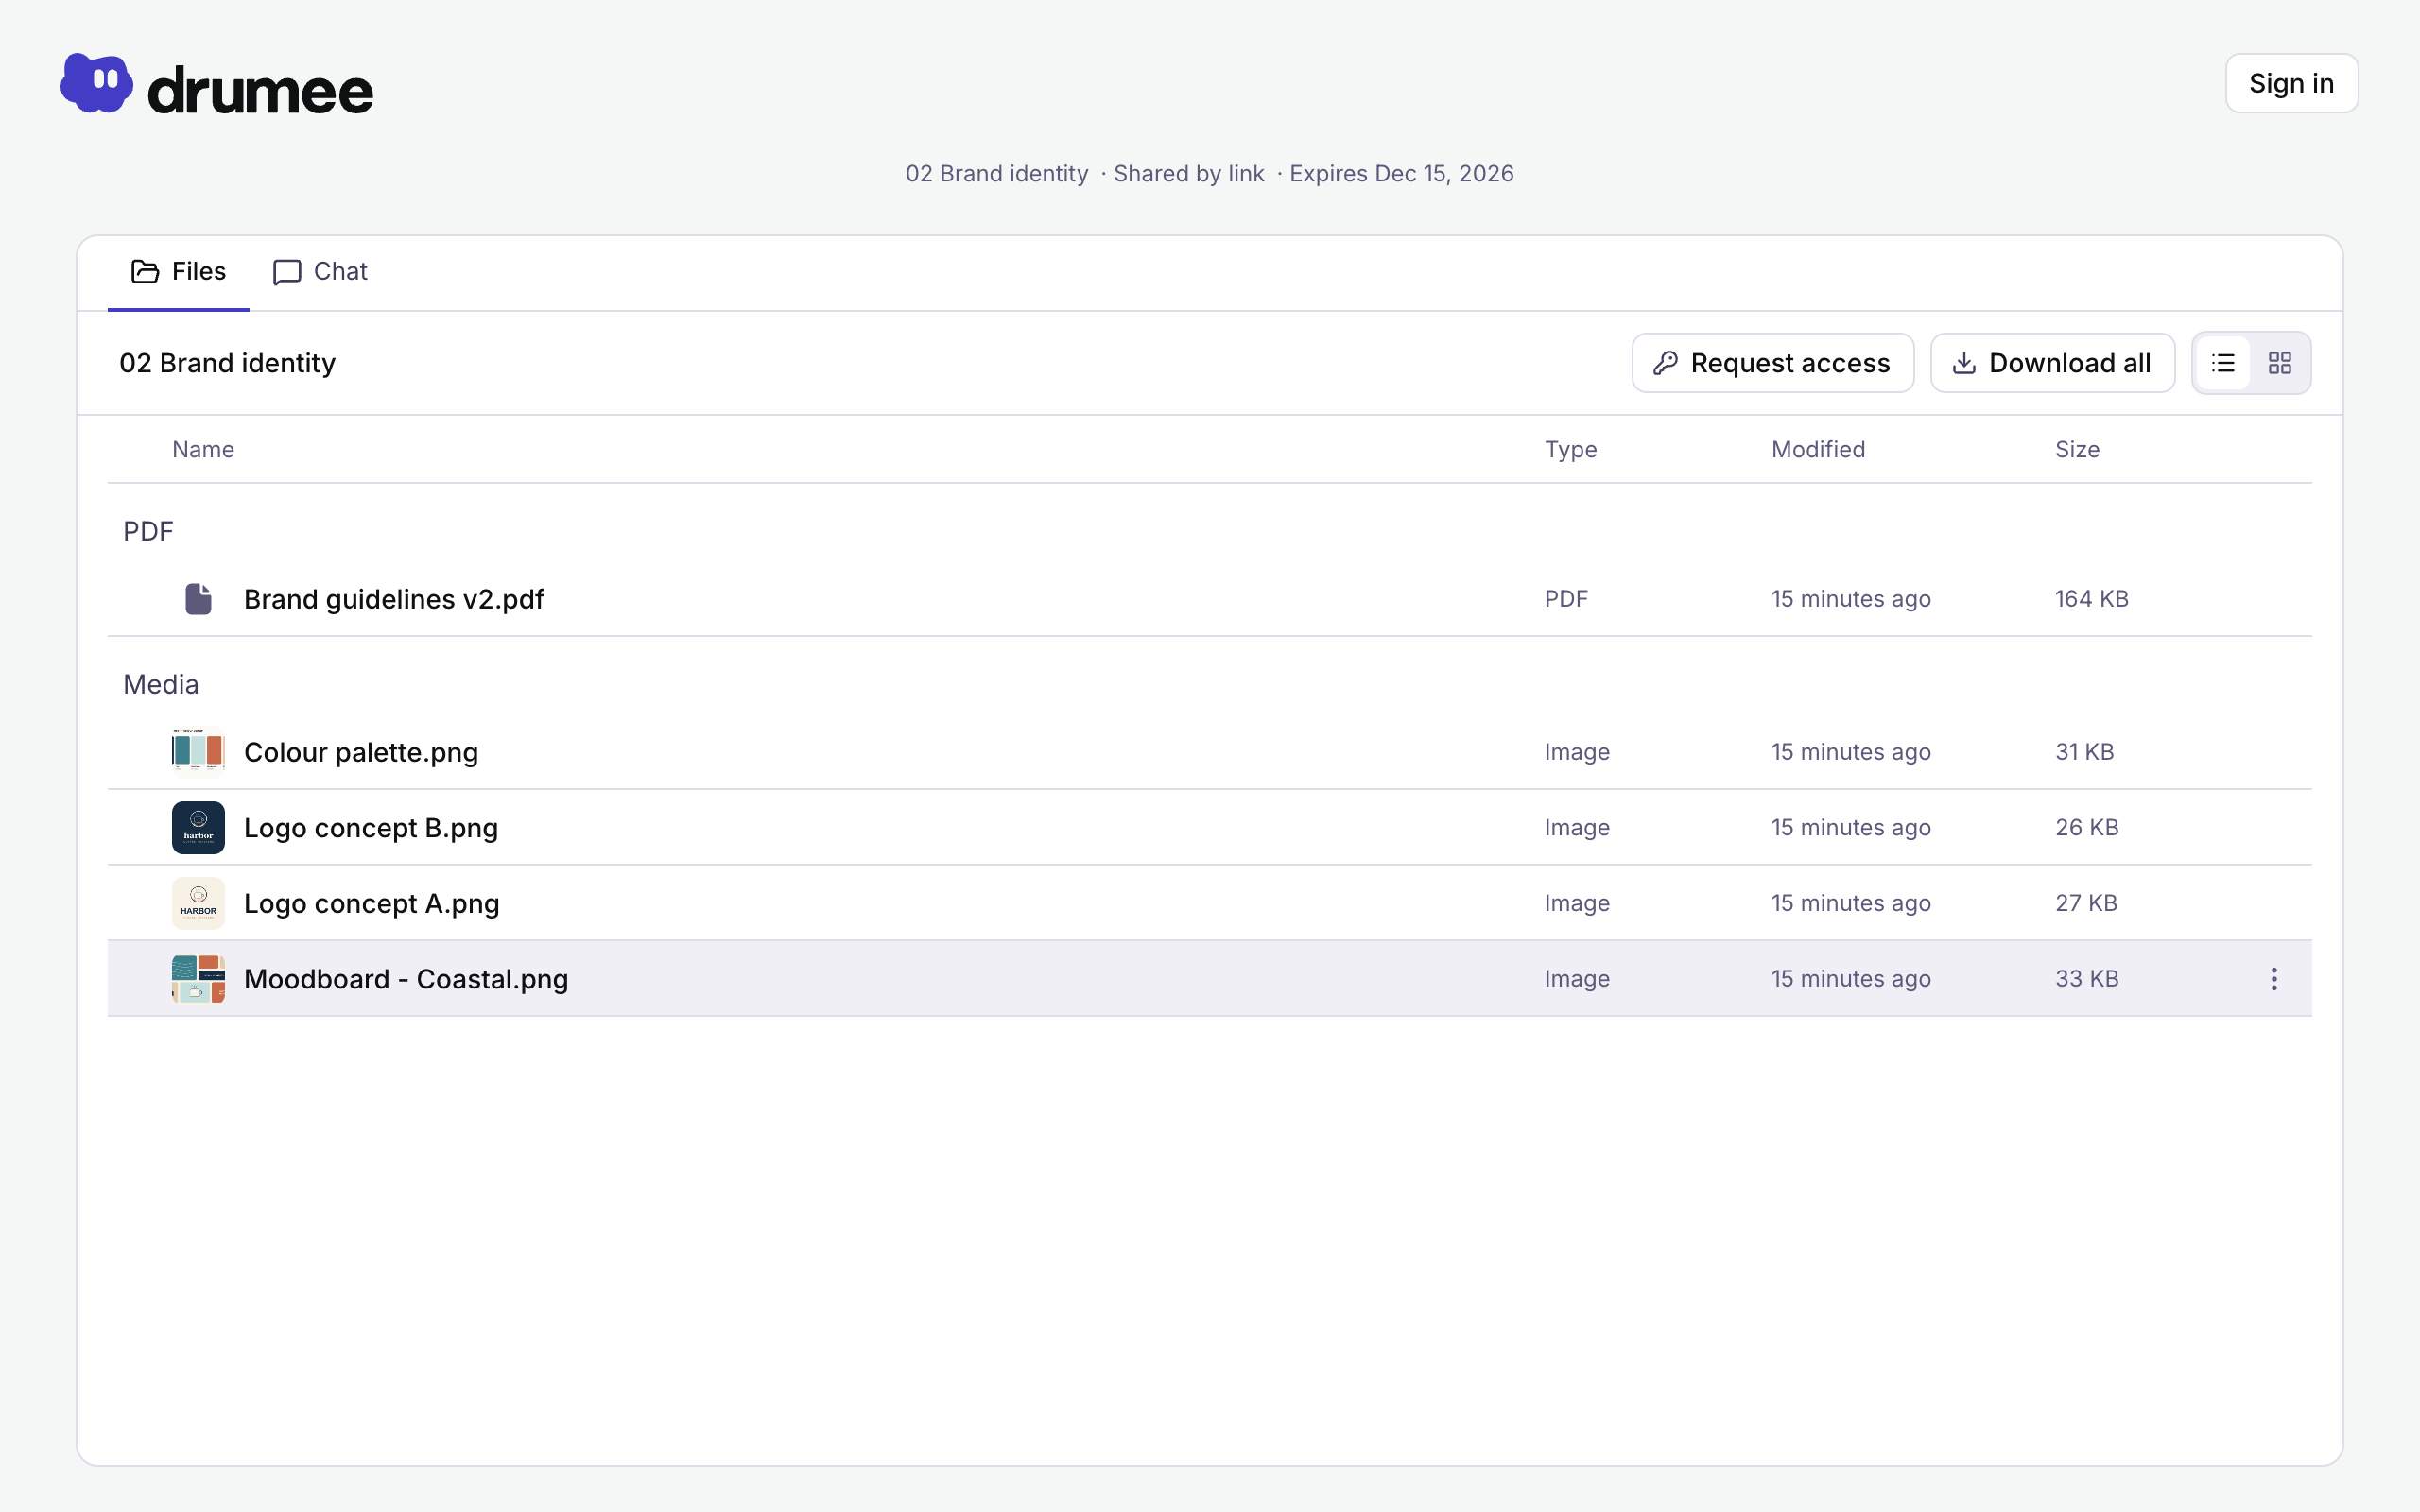
Step 4: Your recipient opens the link, enters their email and the password…
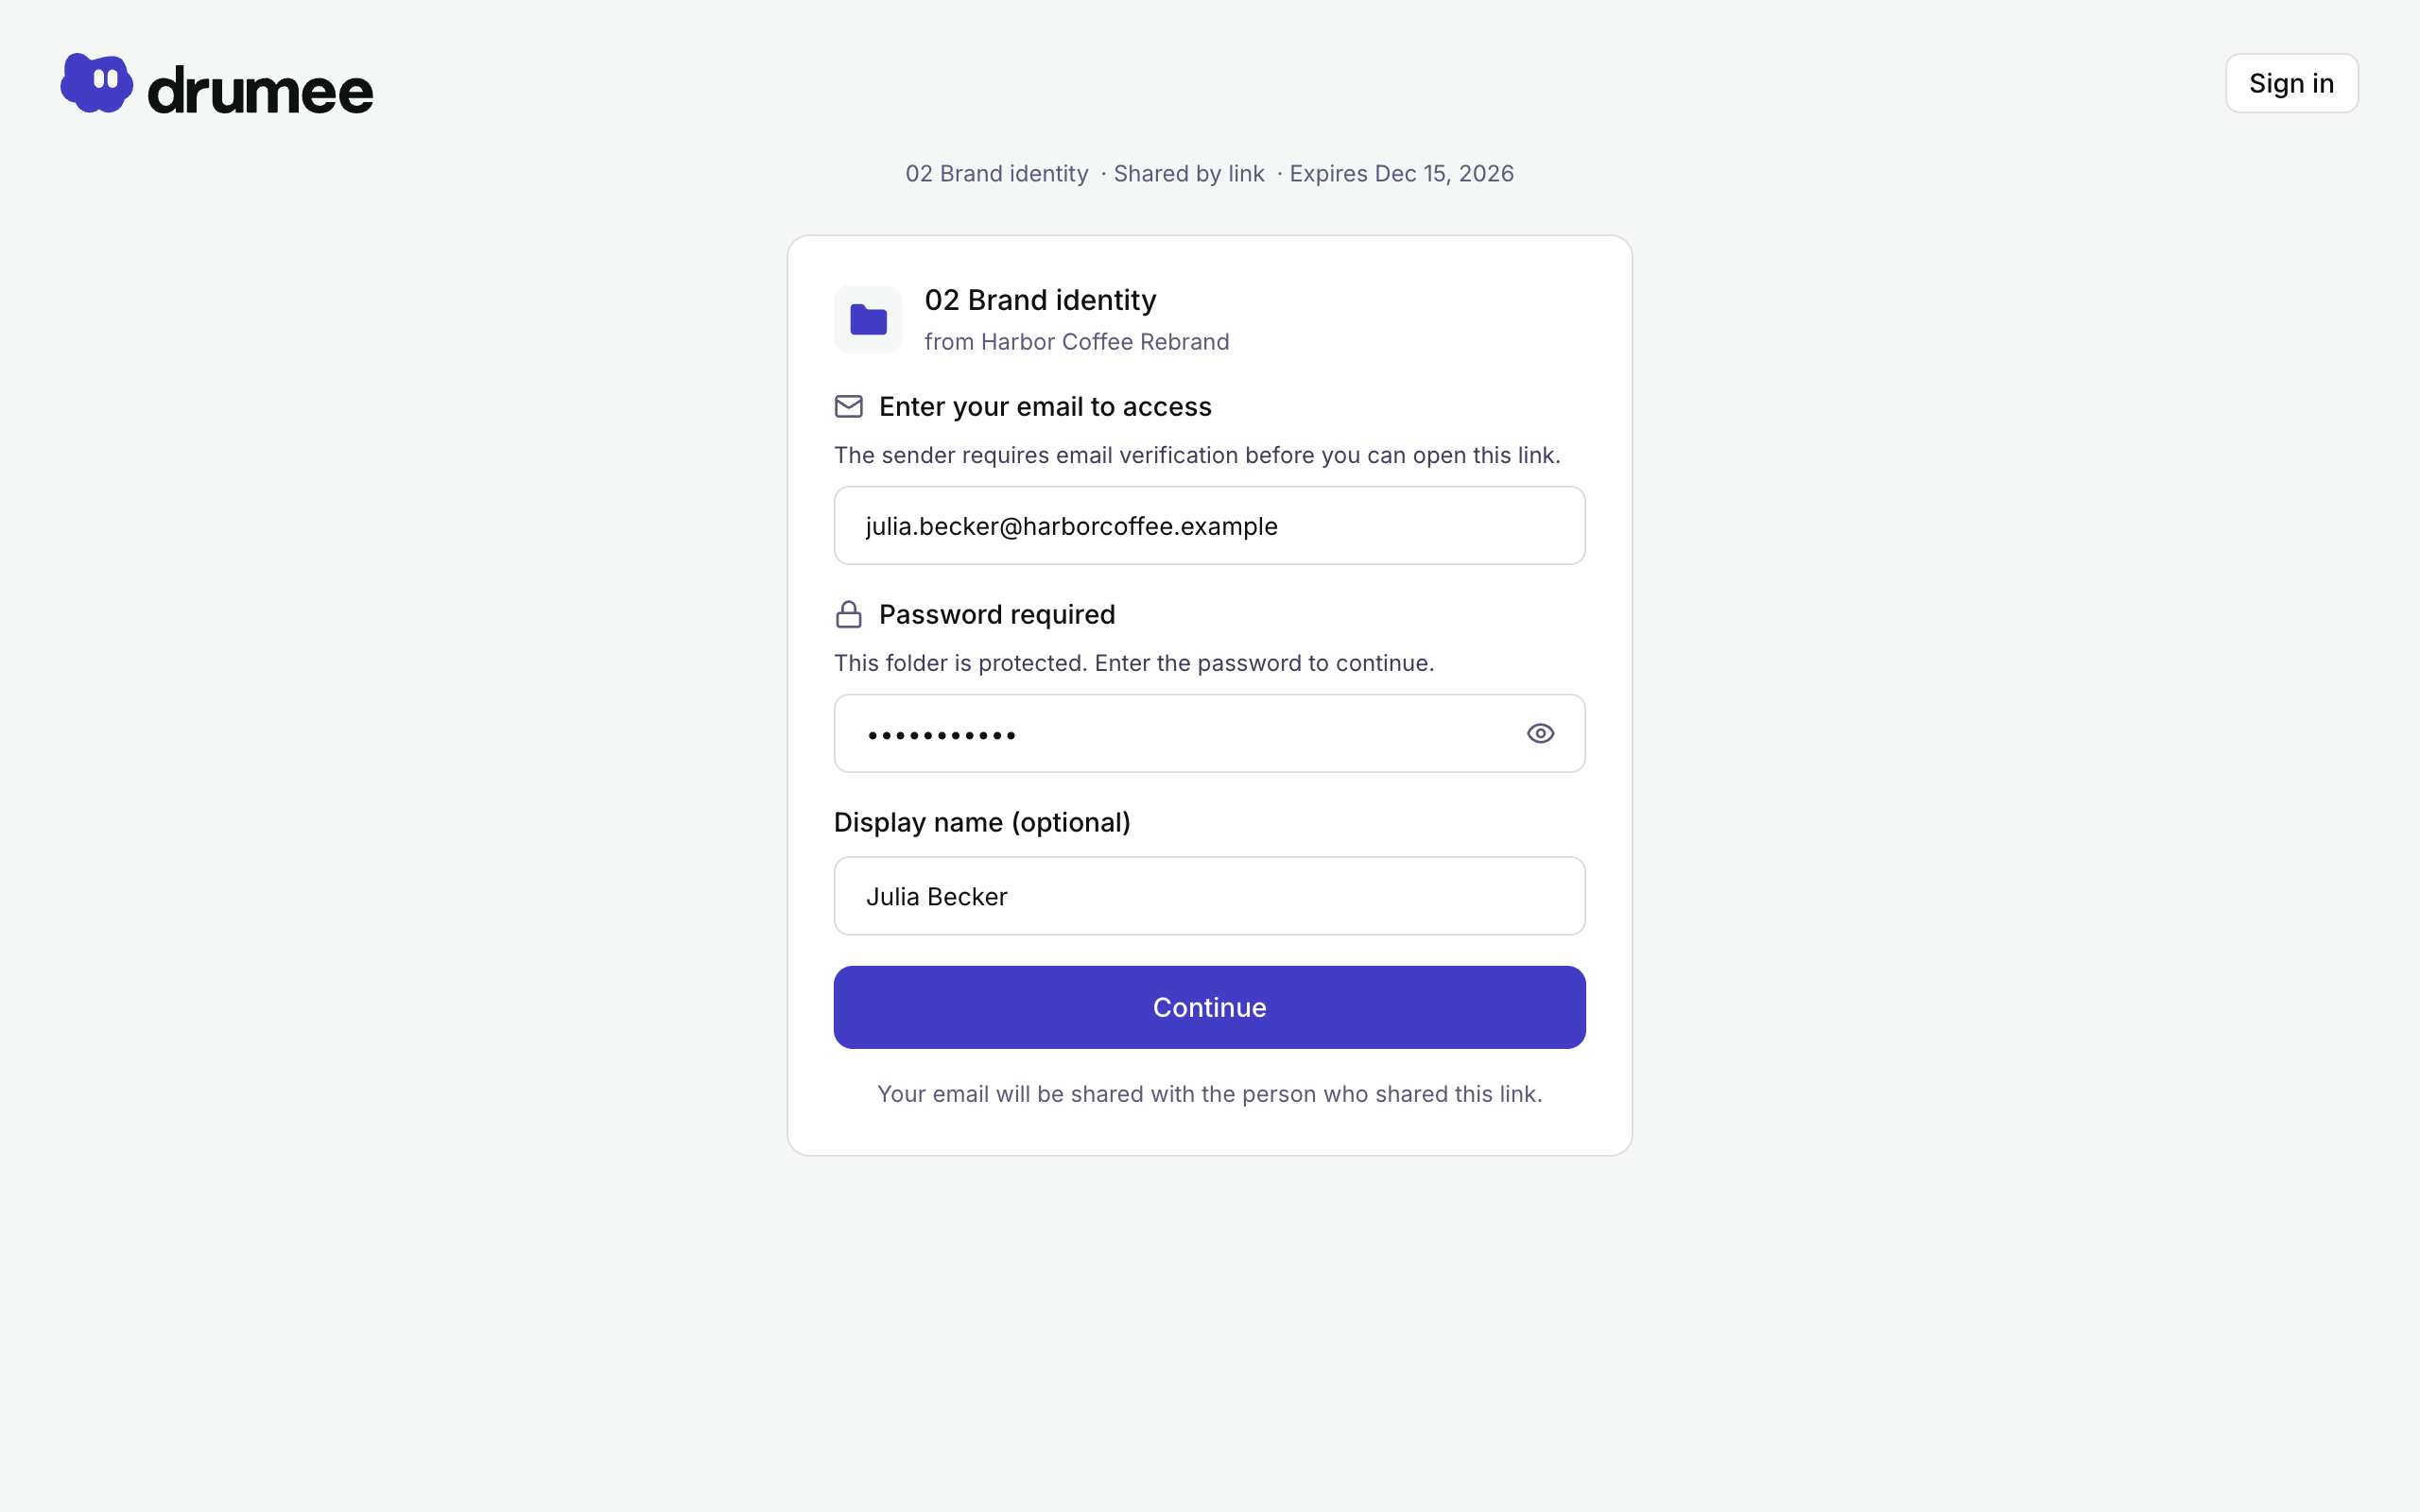
…and sees the shared folder — nothing else from your workspace.
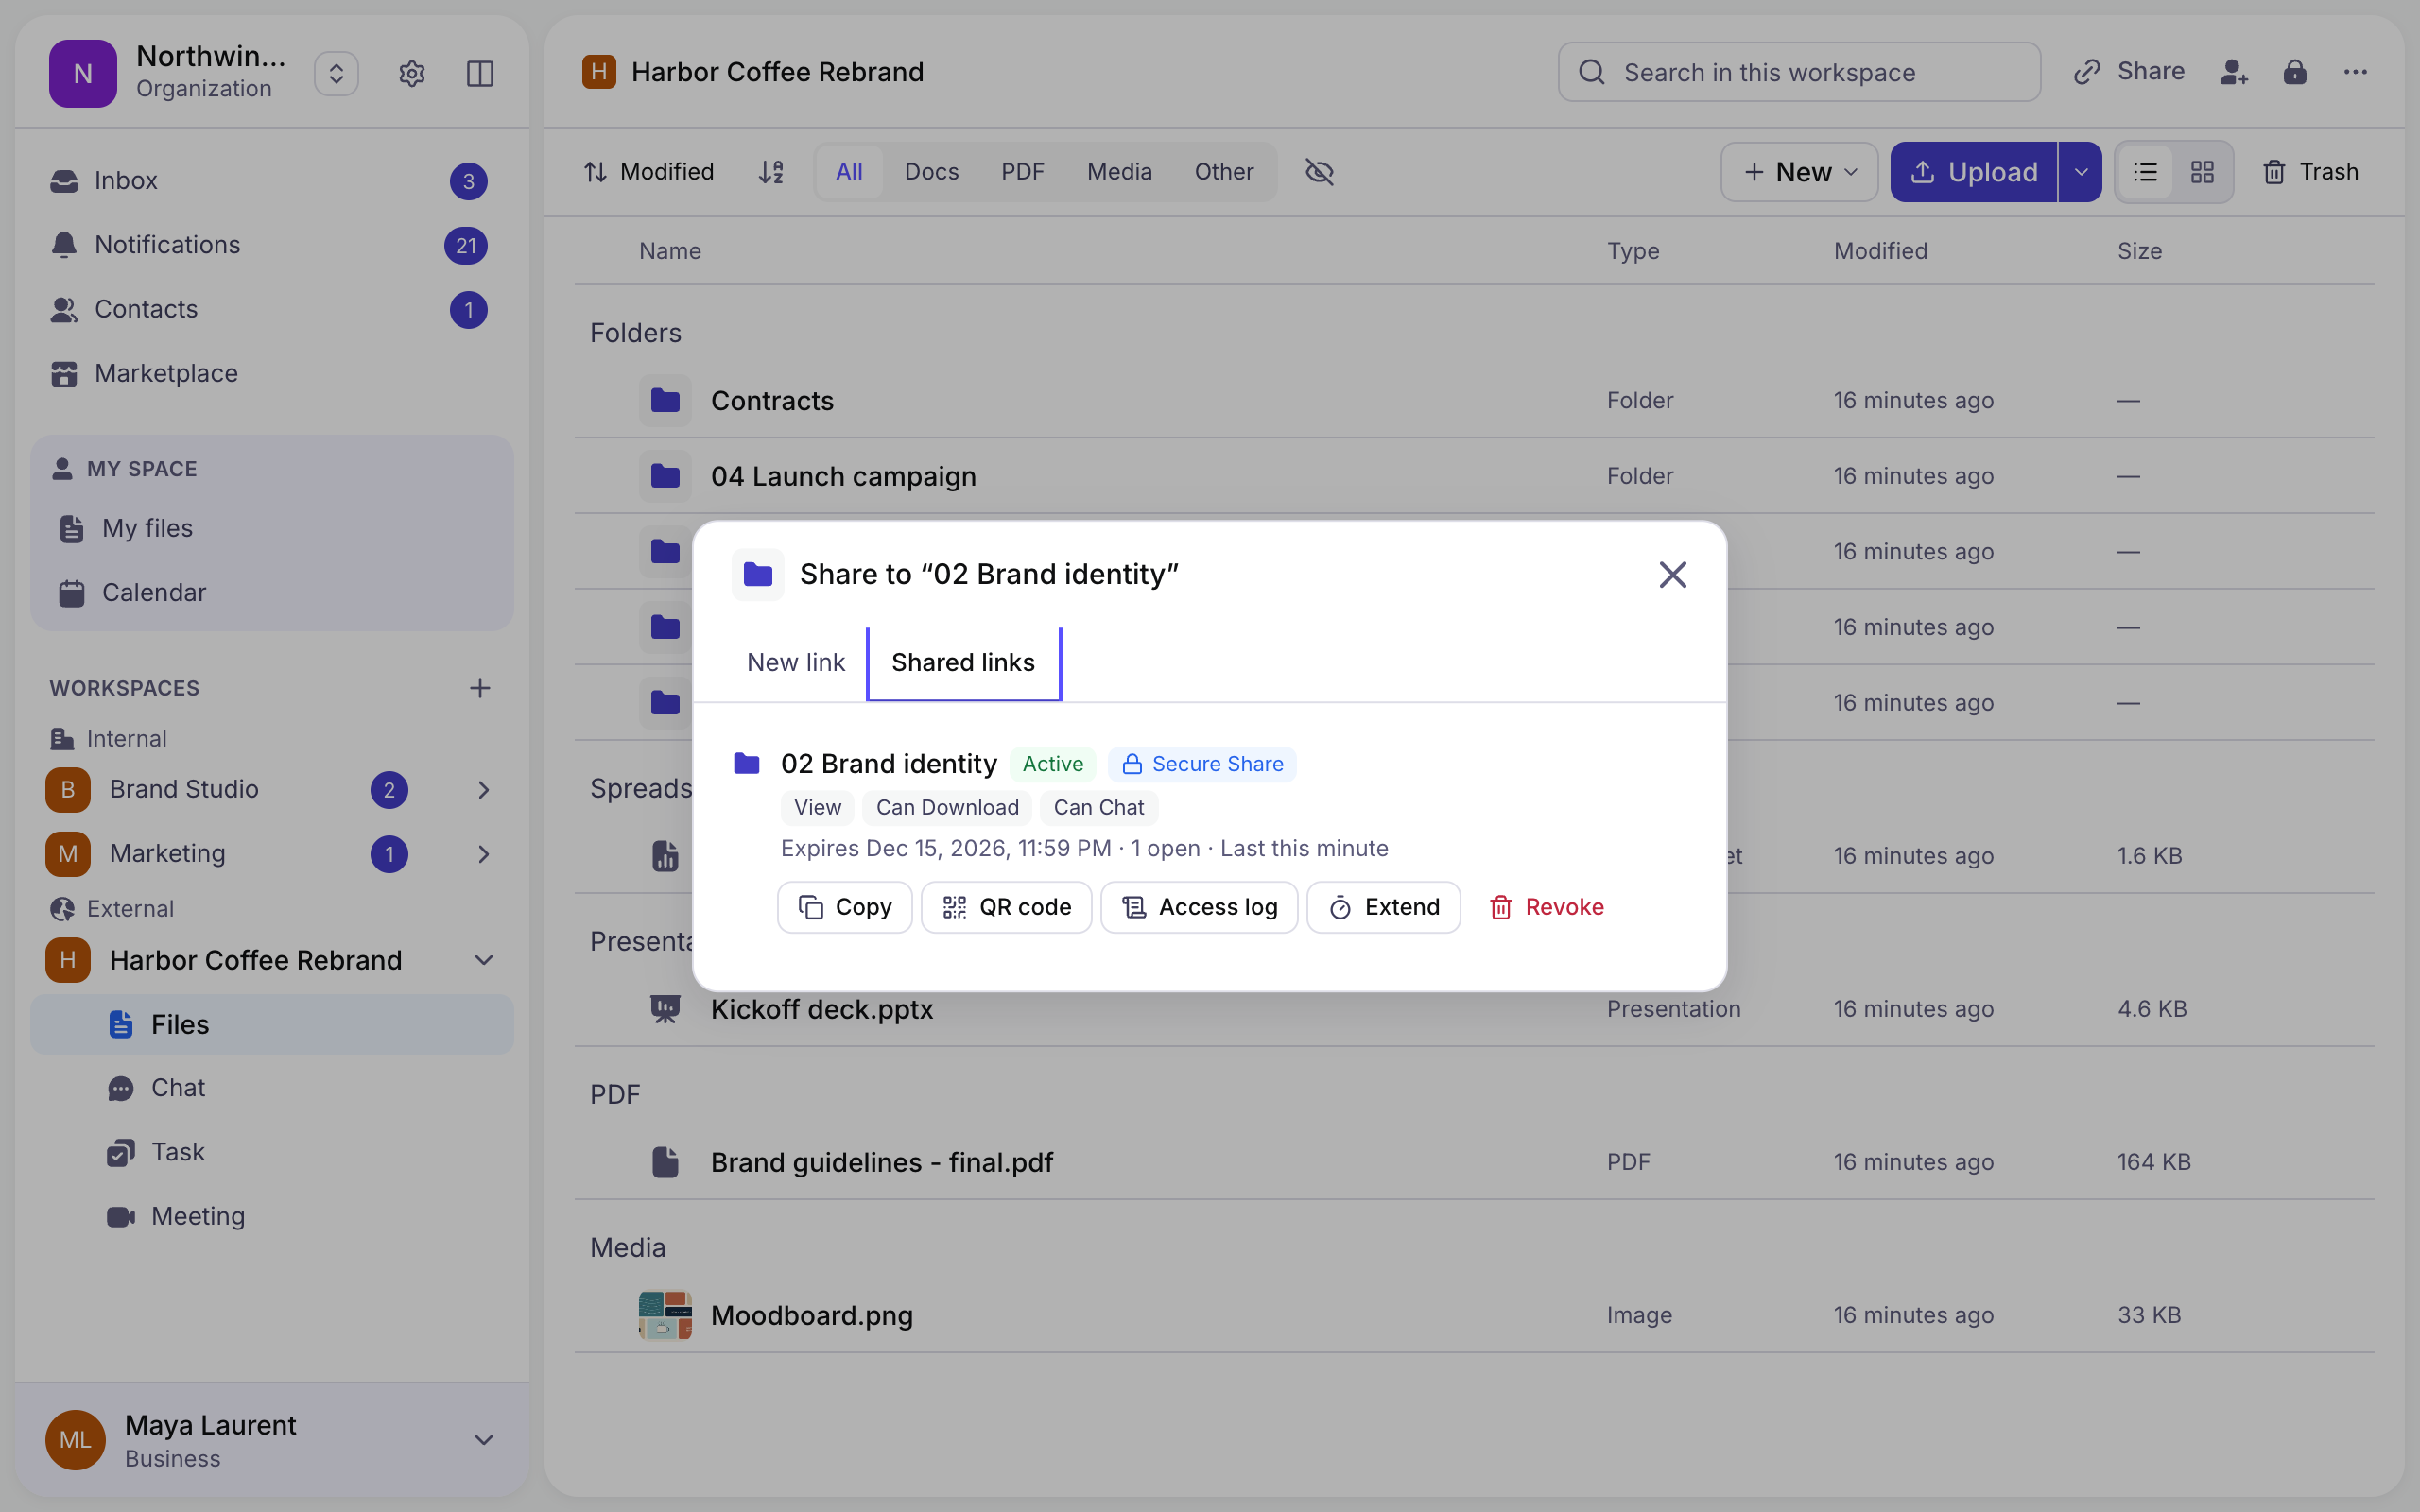
Step 5: Back in Share → Shared links, copy the link again, show its QR code, extend it, or revoke it.
Step 6: Click Access log to see who opened it, and when.
8.2 Google Drive Migration
Move entire projects or departments into Drumee, original folder hierarchy preserved, no rebuilding from scratch.
Step 1: Open the account menu => Account => scroll to Import.
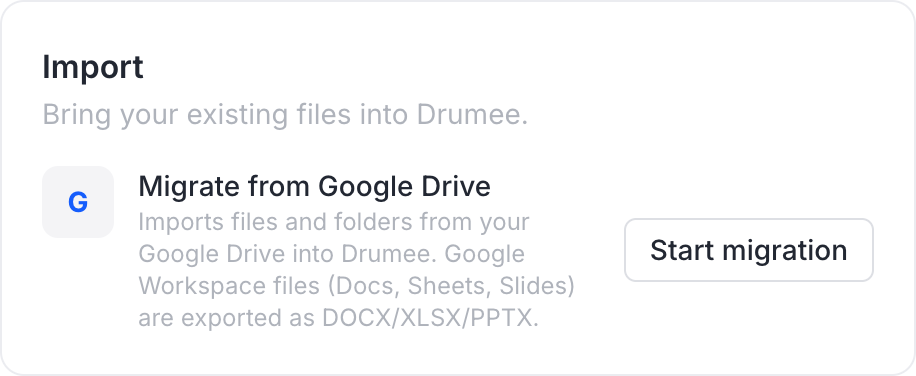
Step 2: Click Start migration, connect your Google account, and choose the files and folders to bring in.
Step 3: The import runs in the background and reports its progress. Google Docs, Sheets and Slides arrive as Word, Excel and PowerPoint files that you can edit in Drumee. A file whose name already exists in the destination is skipped, so nothing is overwritten.