A visual tour of Drumee: where everything is, and what each part is for.
The screens below show a sample organization, Northwind Studio, working on a client project. Your own workspaces will look the same, with your content.
1.1 The Main Window
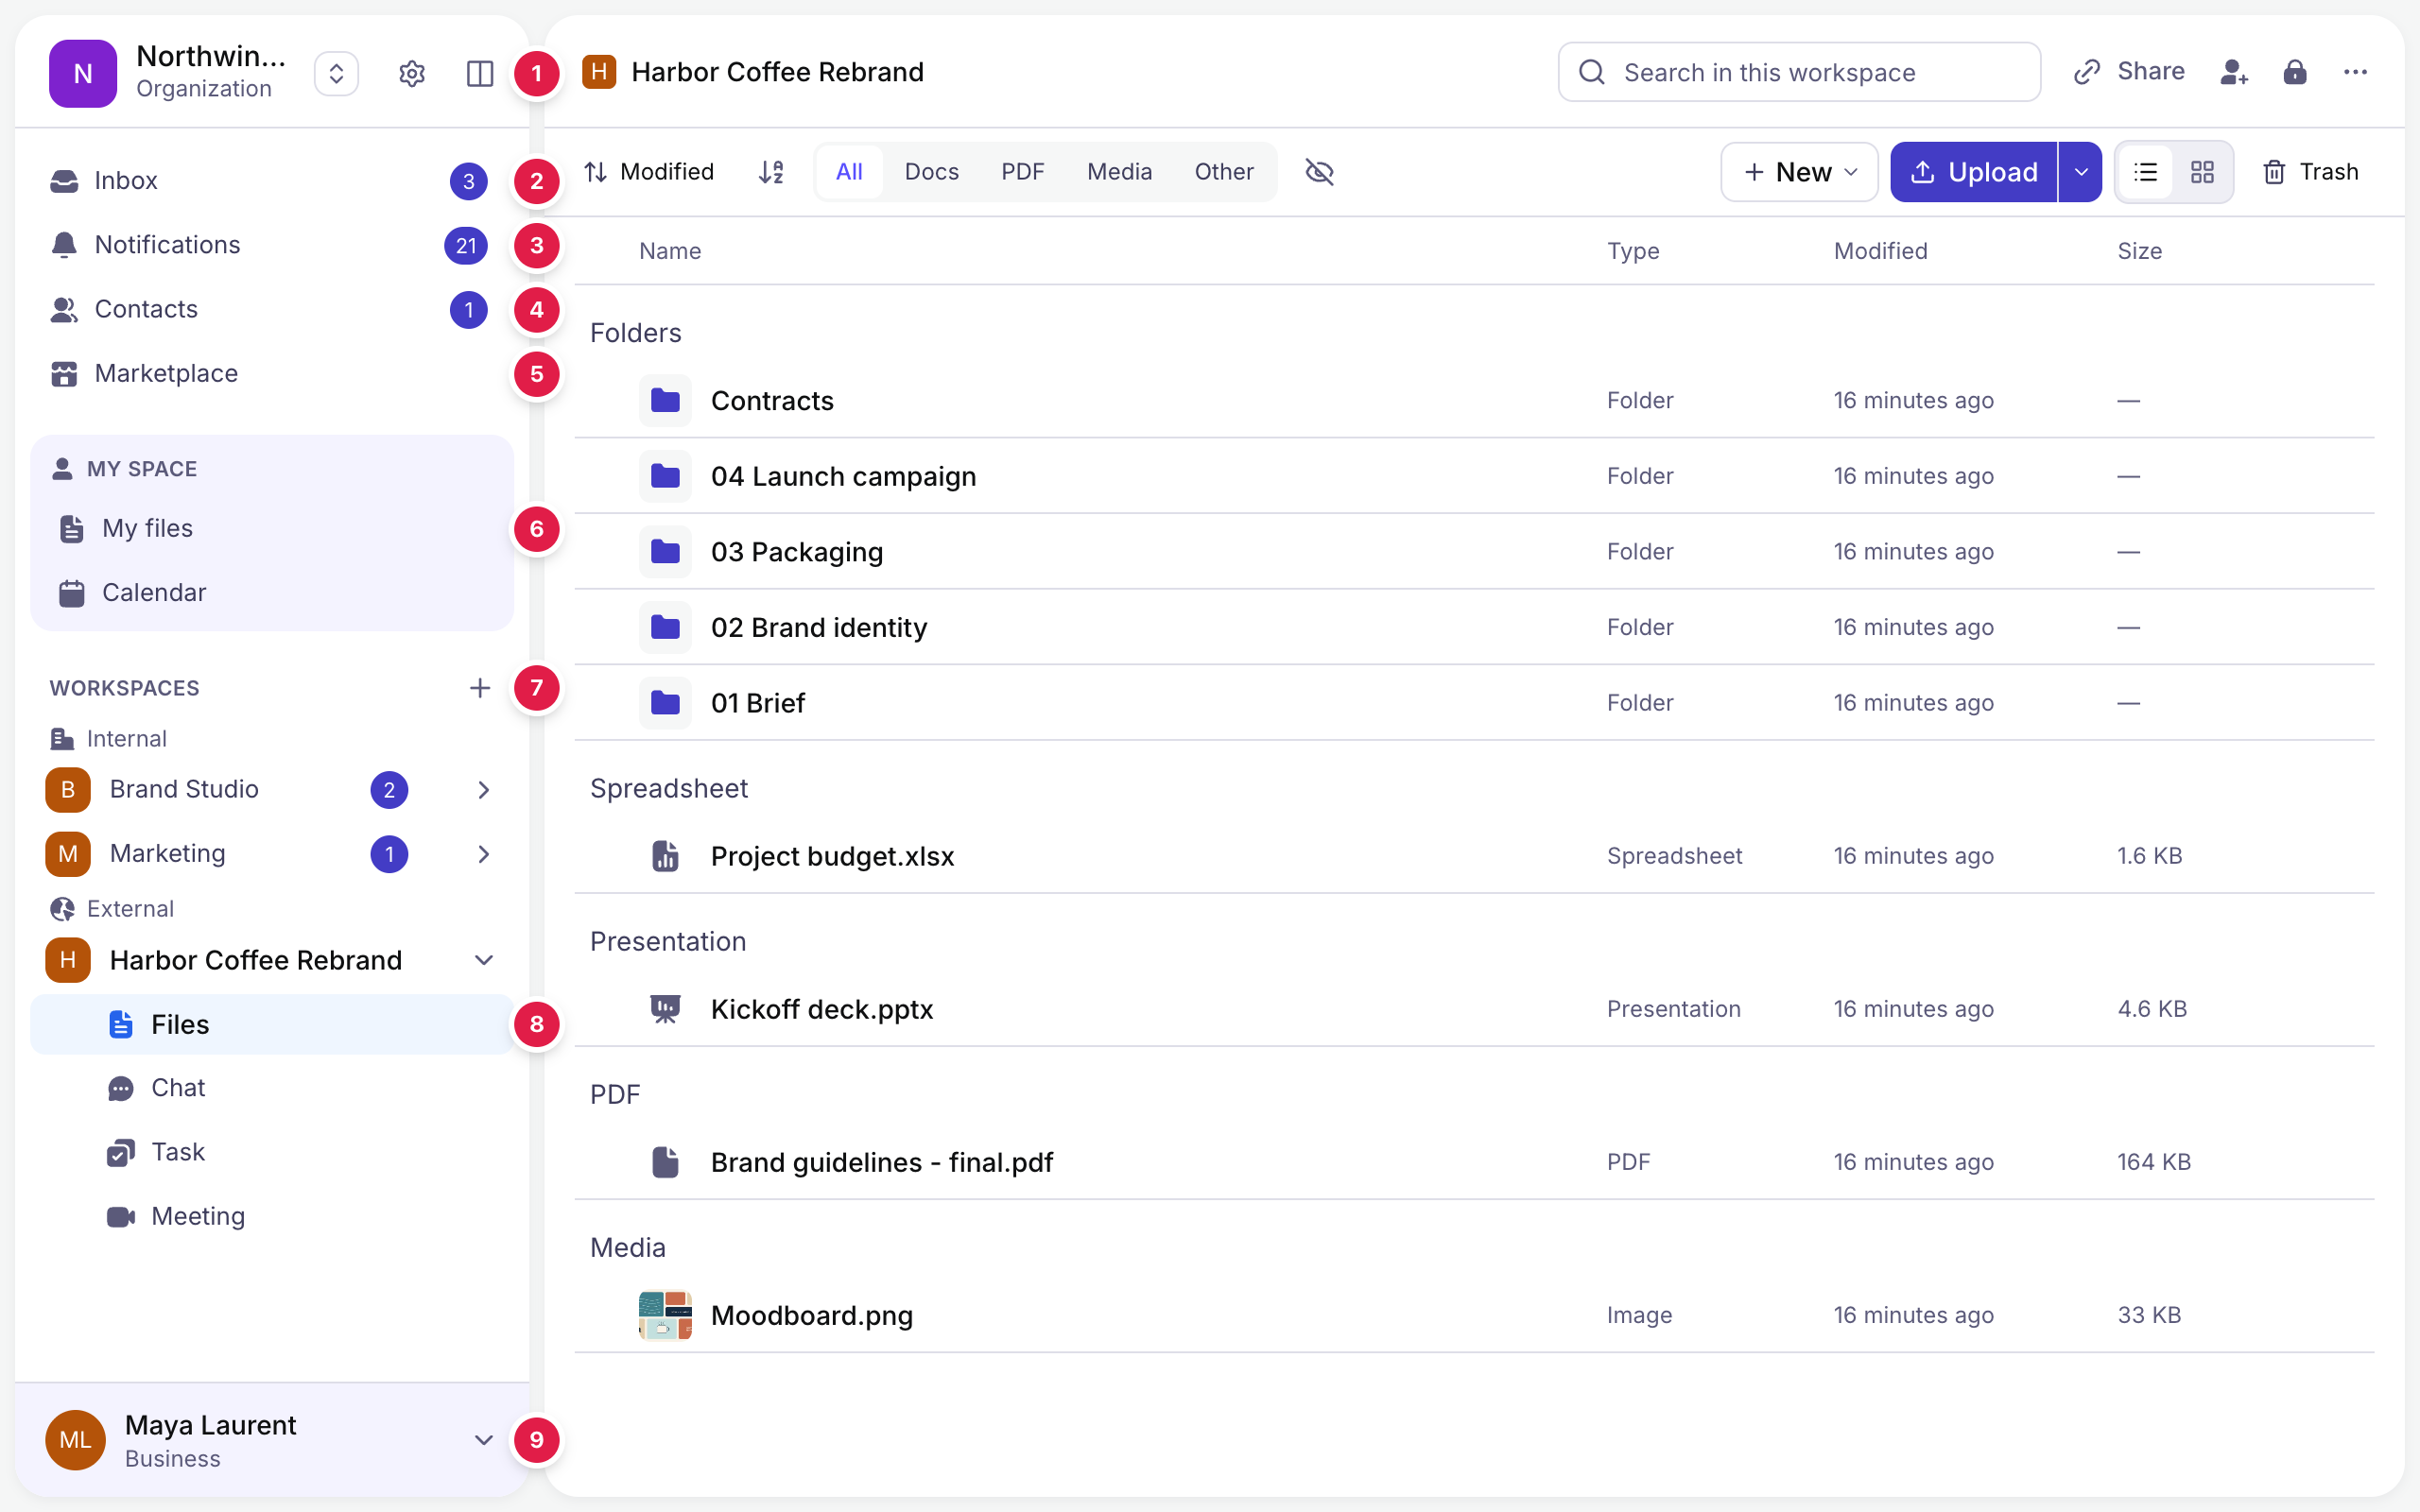
Everything in Drumee is reached from the sidebar on the left. The area on the right shows what you selected.
| # | Part | What it does |
|---|---|---|
| 1 | Team / organization switcher | Switch between your personal space and the teams or organizations you belong to. The gear opens their settings. |
| 2 | Inbox | Your conversations: direct chats and workspace chats, with unread counts. |
| 3 | Notifications | Everything that needs your attention: invitations, task assignments, meetings, new messages and files. |
| 4 | Contacts | People you talk to directly, inside or outside your organization. |
| 5 | Marketplace | Apps that extend your workspaces. |
| 6 | My space | My files is your personal workspace, visible only to you. Calendar gathers your meetings and task deadlines from every workspace. |
| 7 | Workspaces | Your workspaces, grouped into Internal and External. The + creates a new one. |
| 8 | Workspace views | Each workspace has four views: Files, Chat, Task and Meeting. |
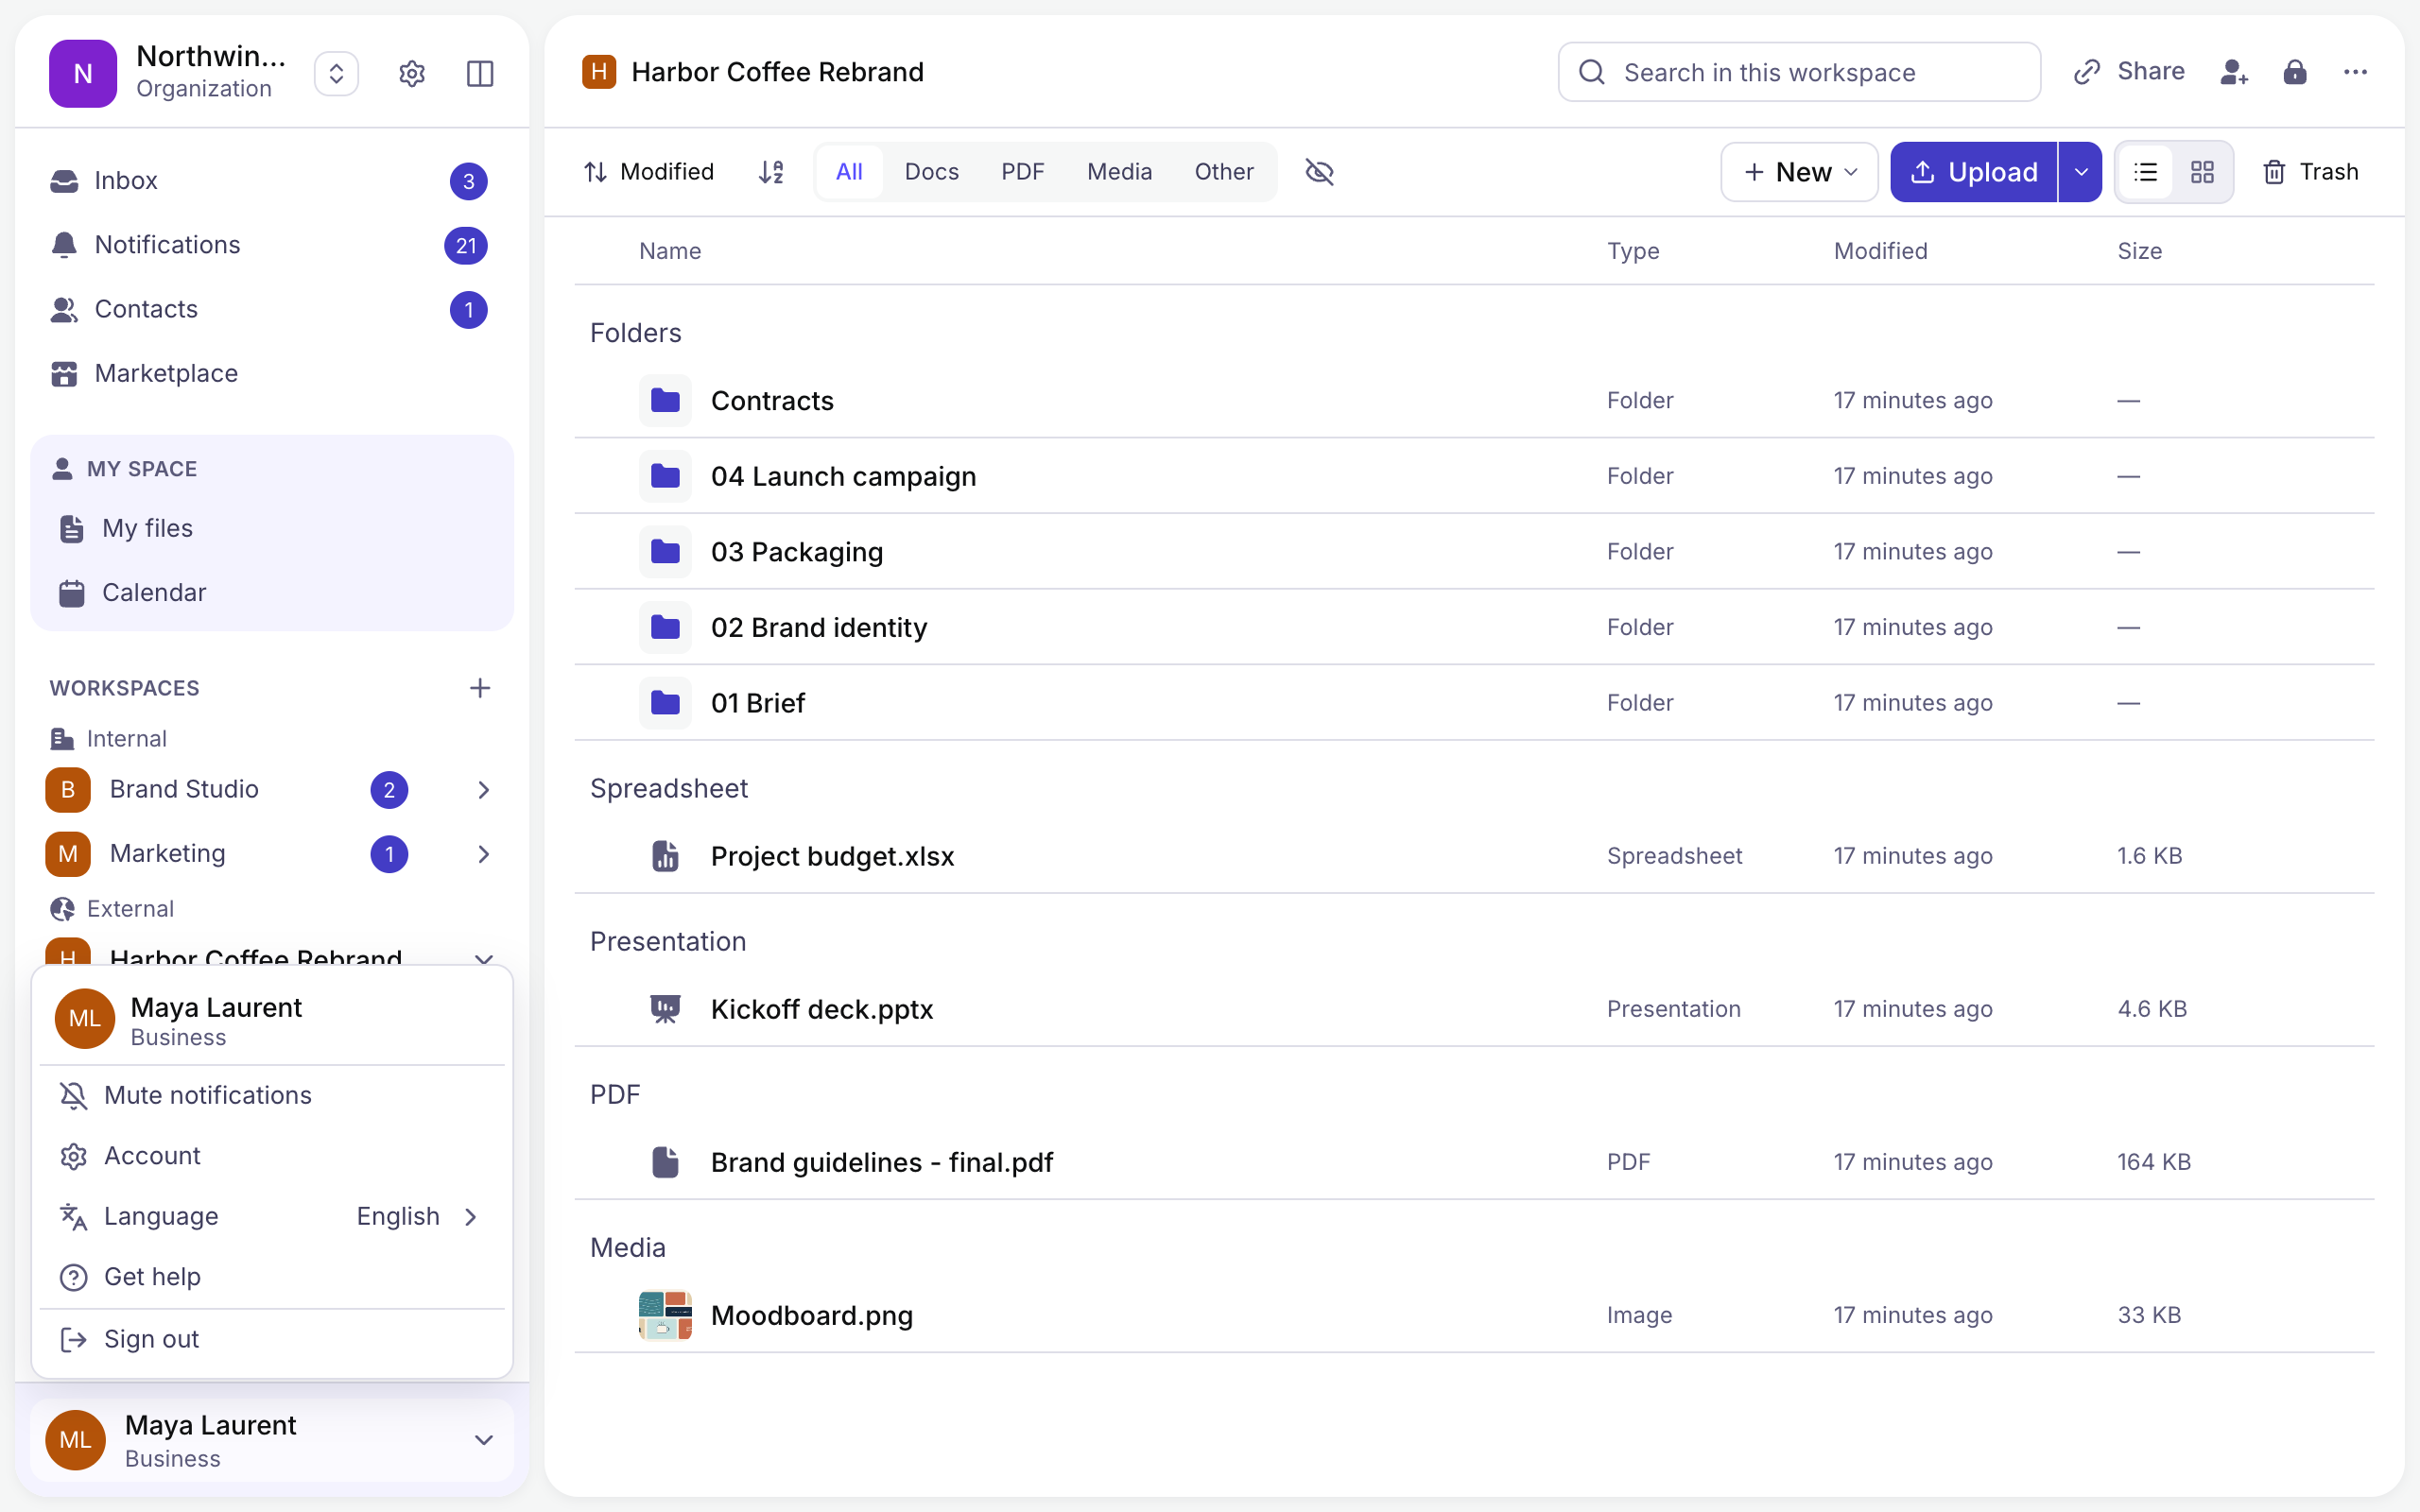
| 9 | Account menu | Your account settings, language, help, and sign out. |
Notifications
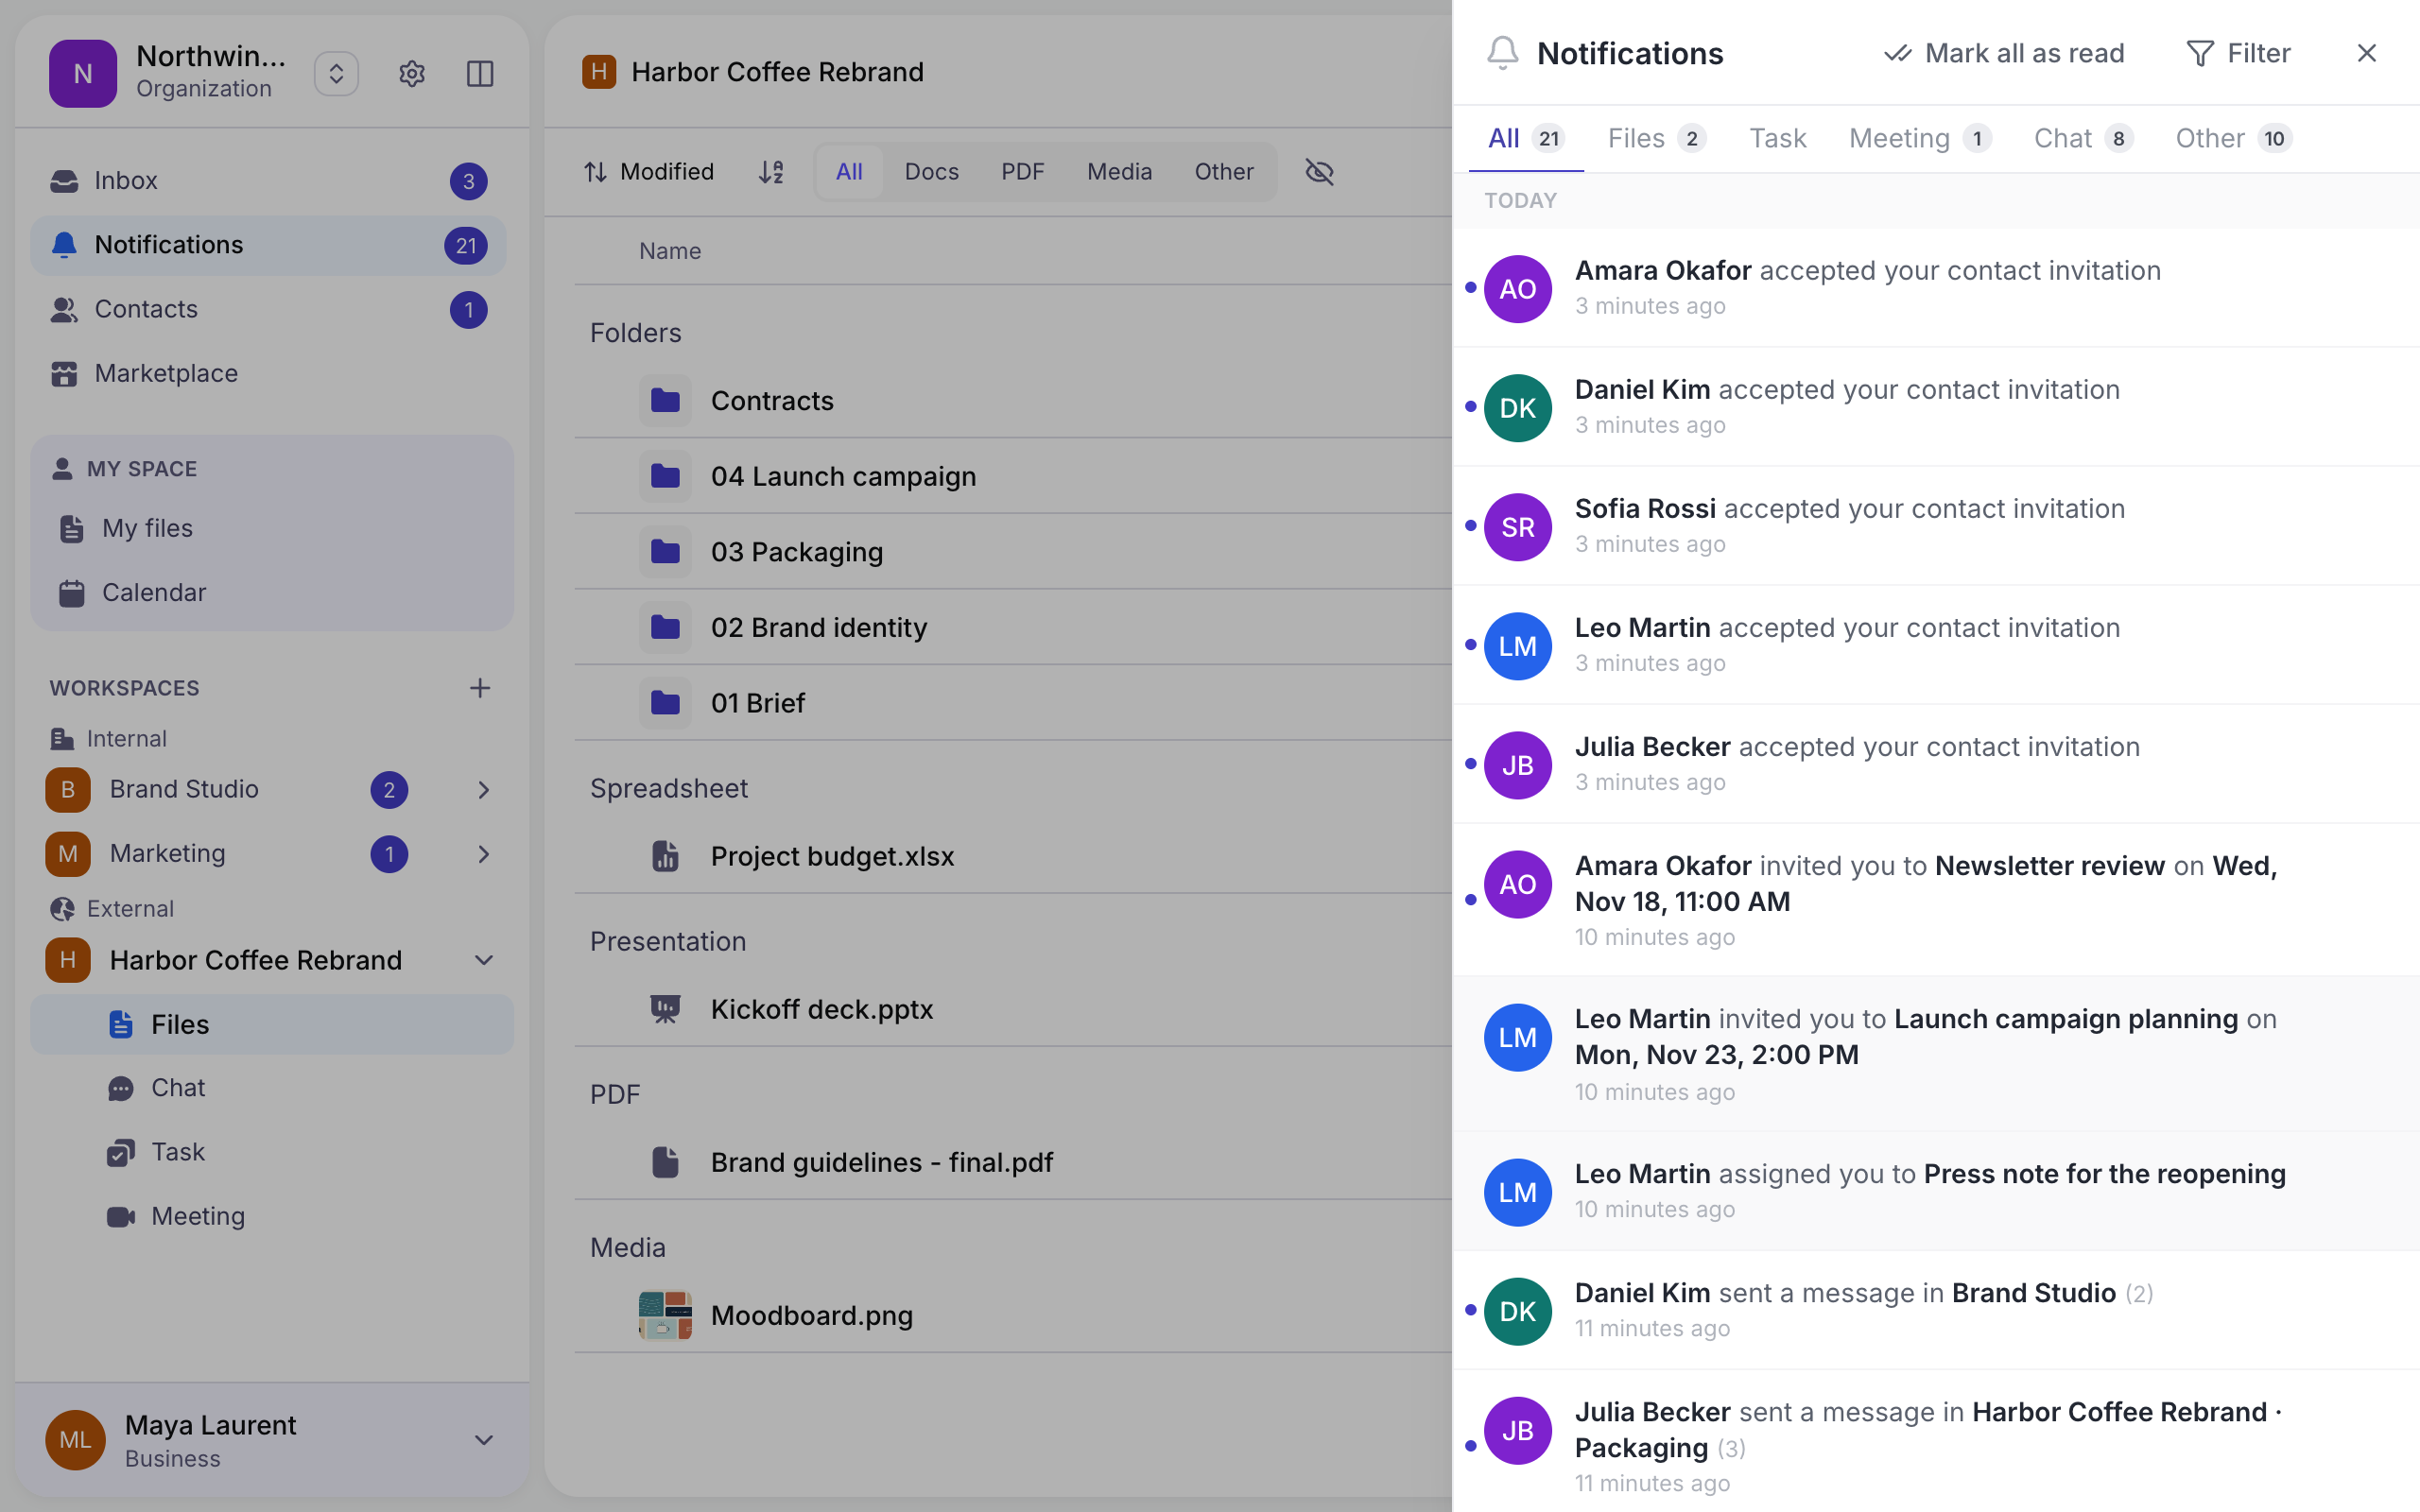
Click Notifications to open the panel. Filter by kind — Files, Task, Meeting, Chat — or mark everything as read.
Inbox
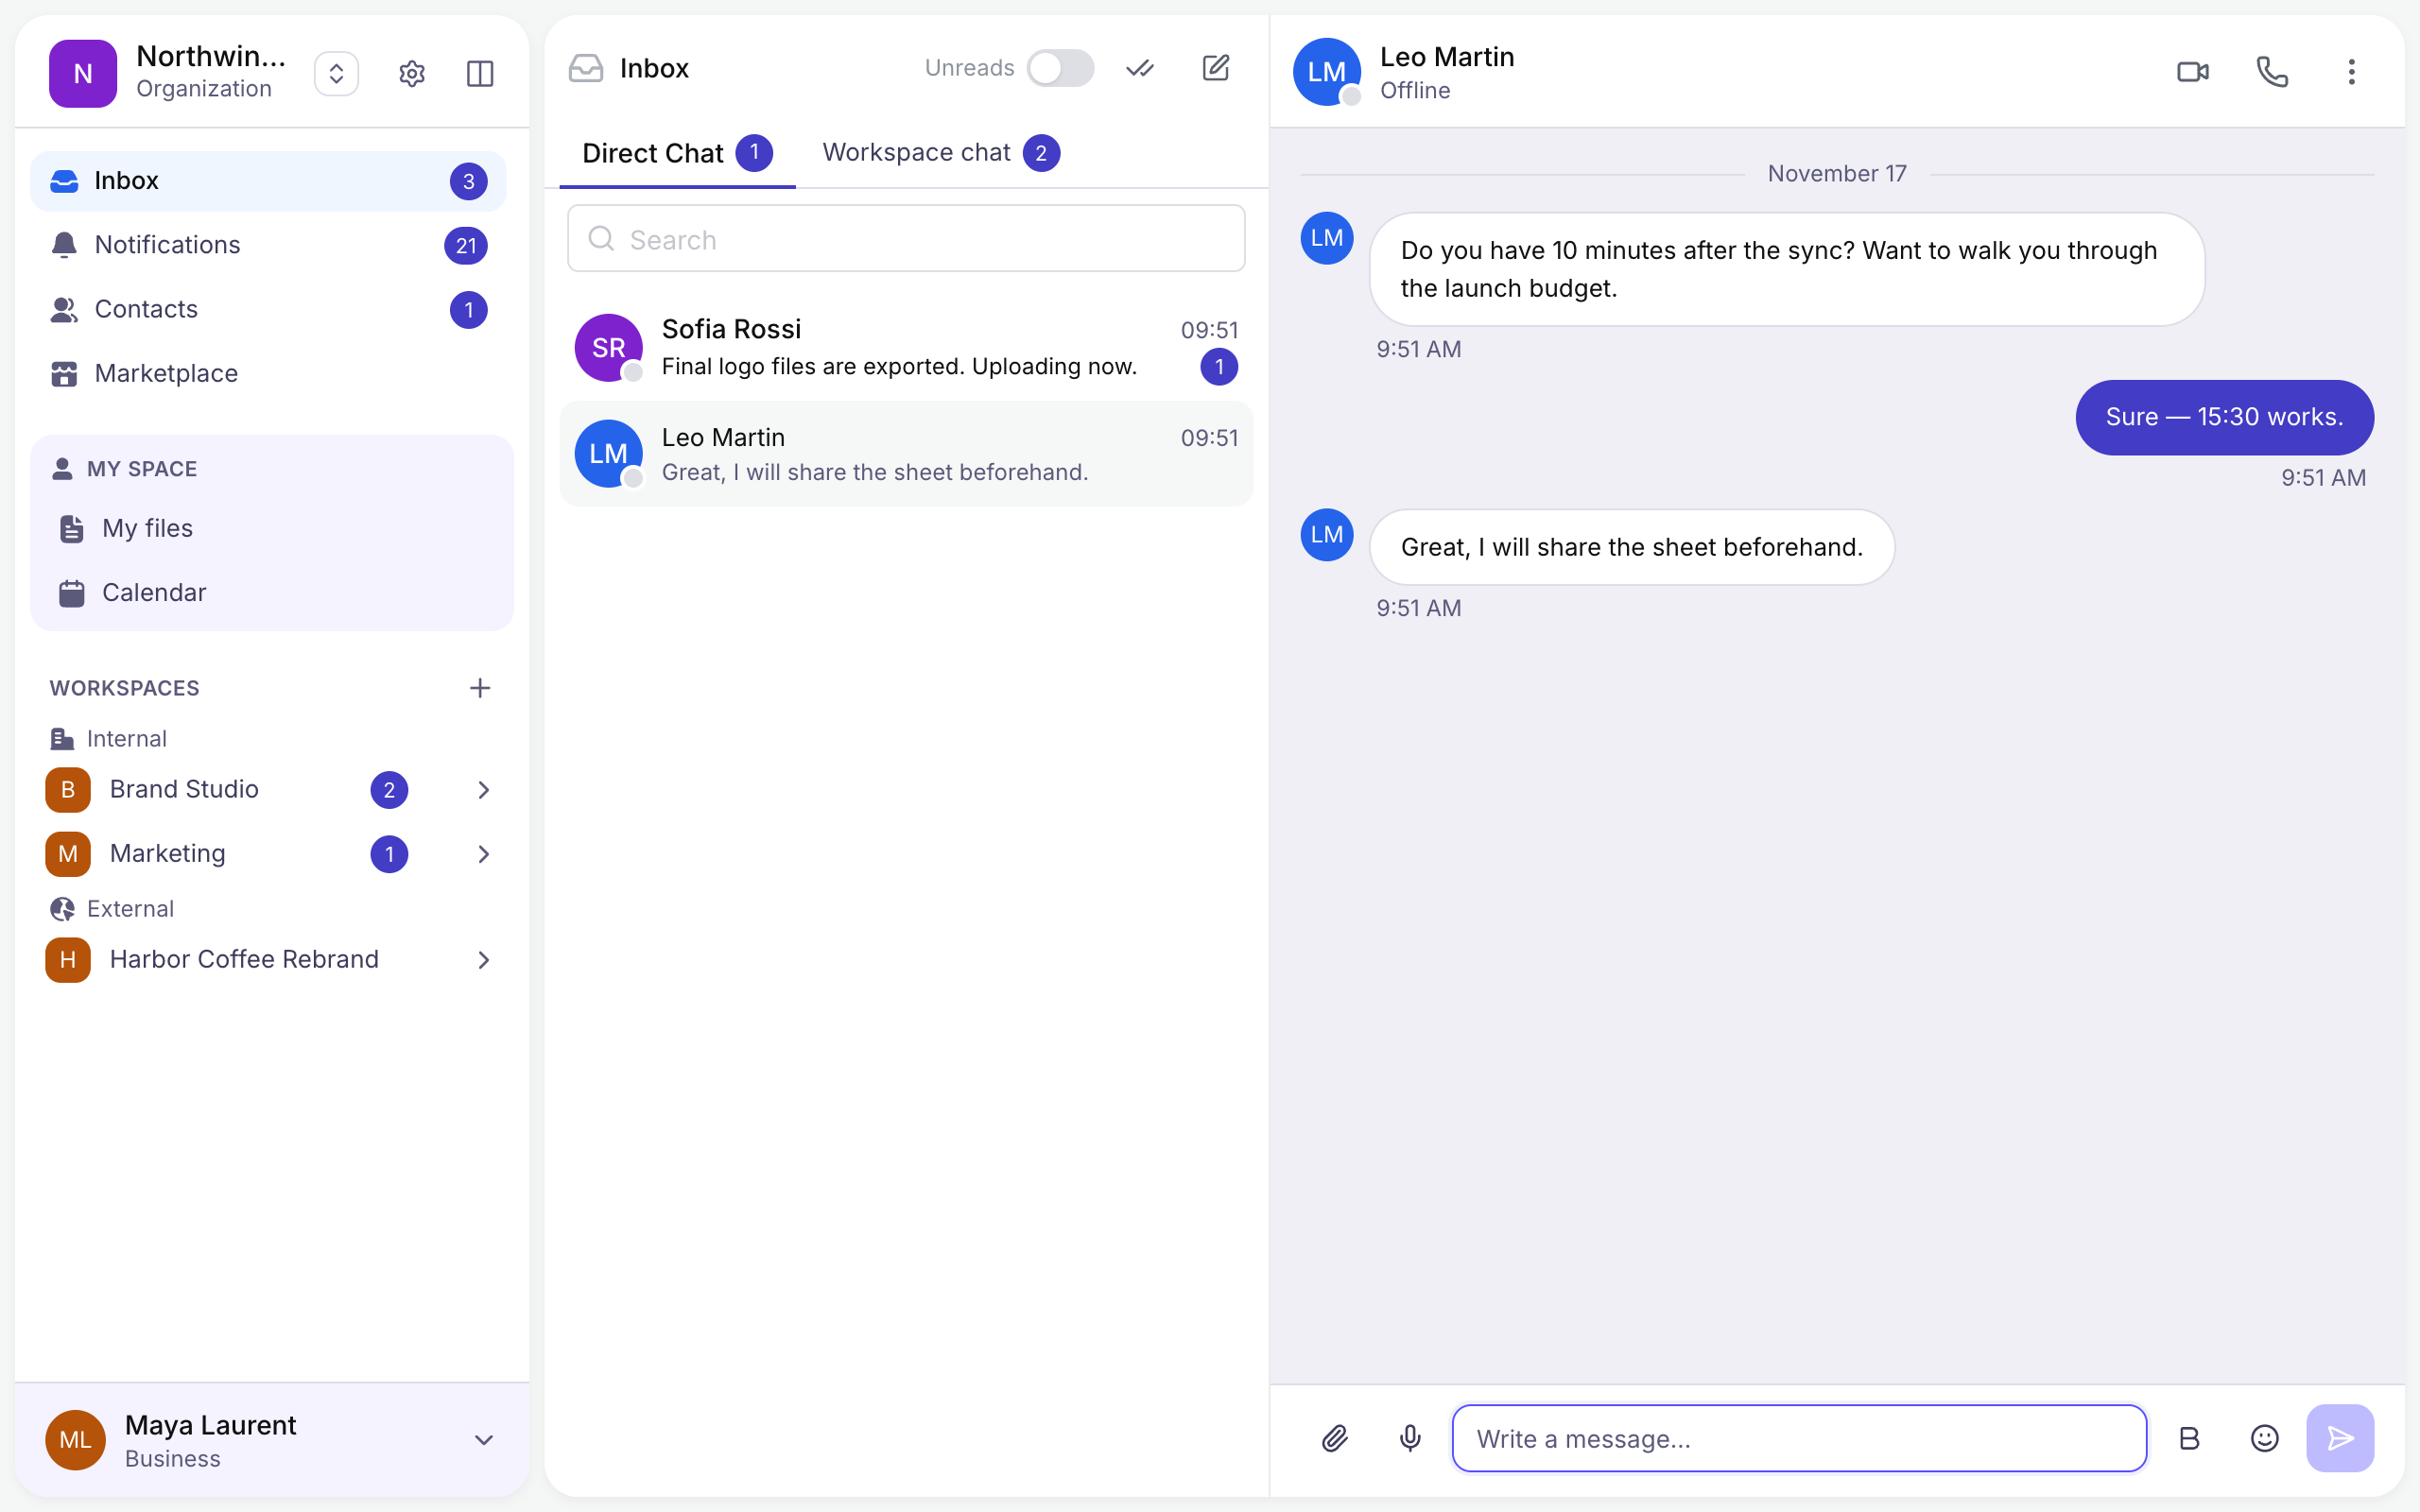
The Inbox lists your conversations in two tabs: Direct Chat for one-to-one conversations, and Workspace chat for the conversations of your workspaces. Turn on Unreads to see only what is new.
Contacts
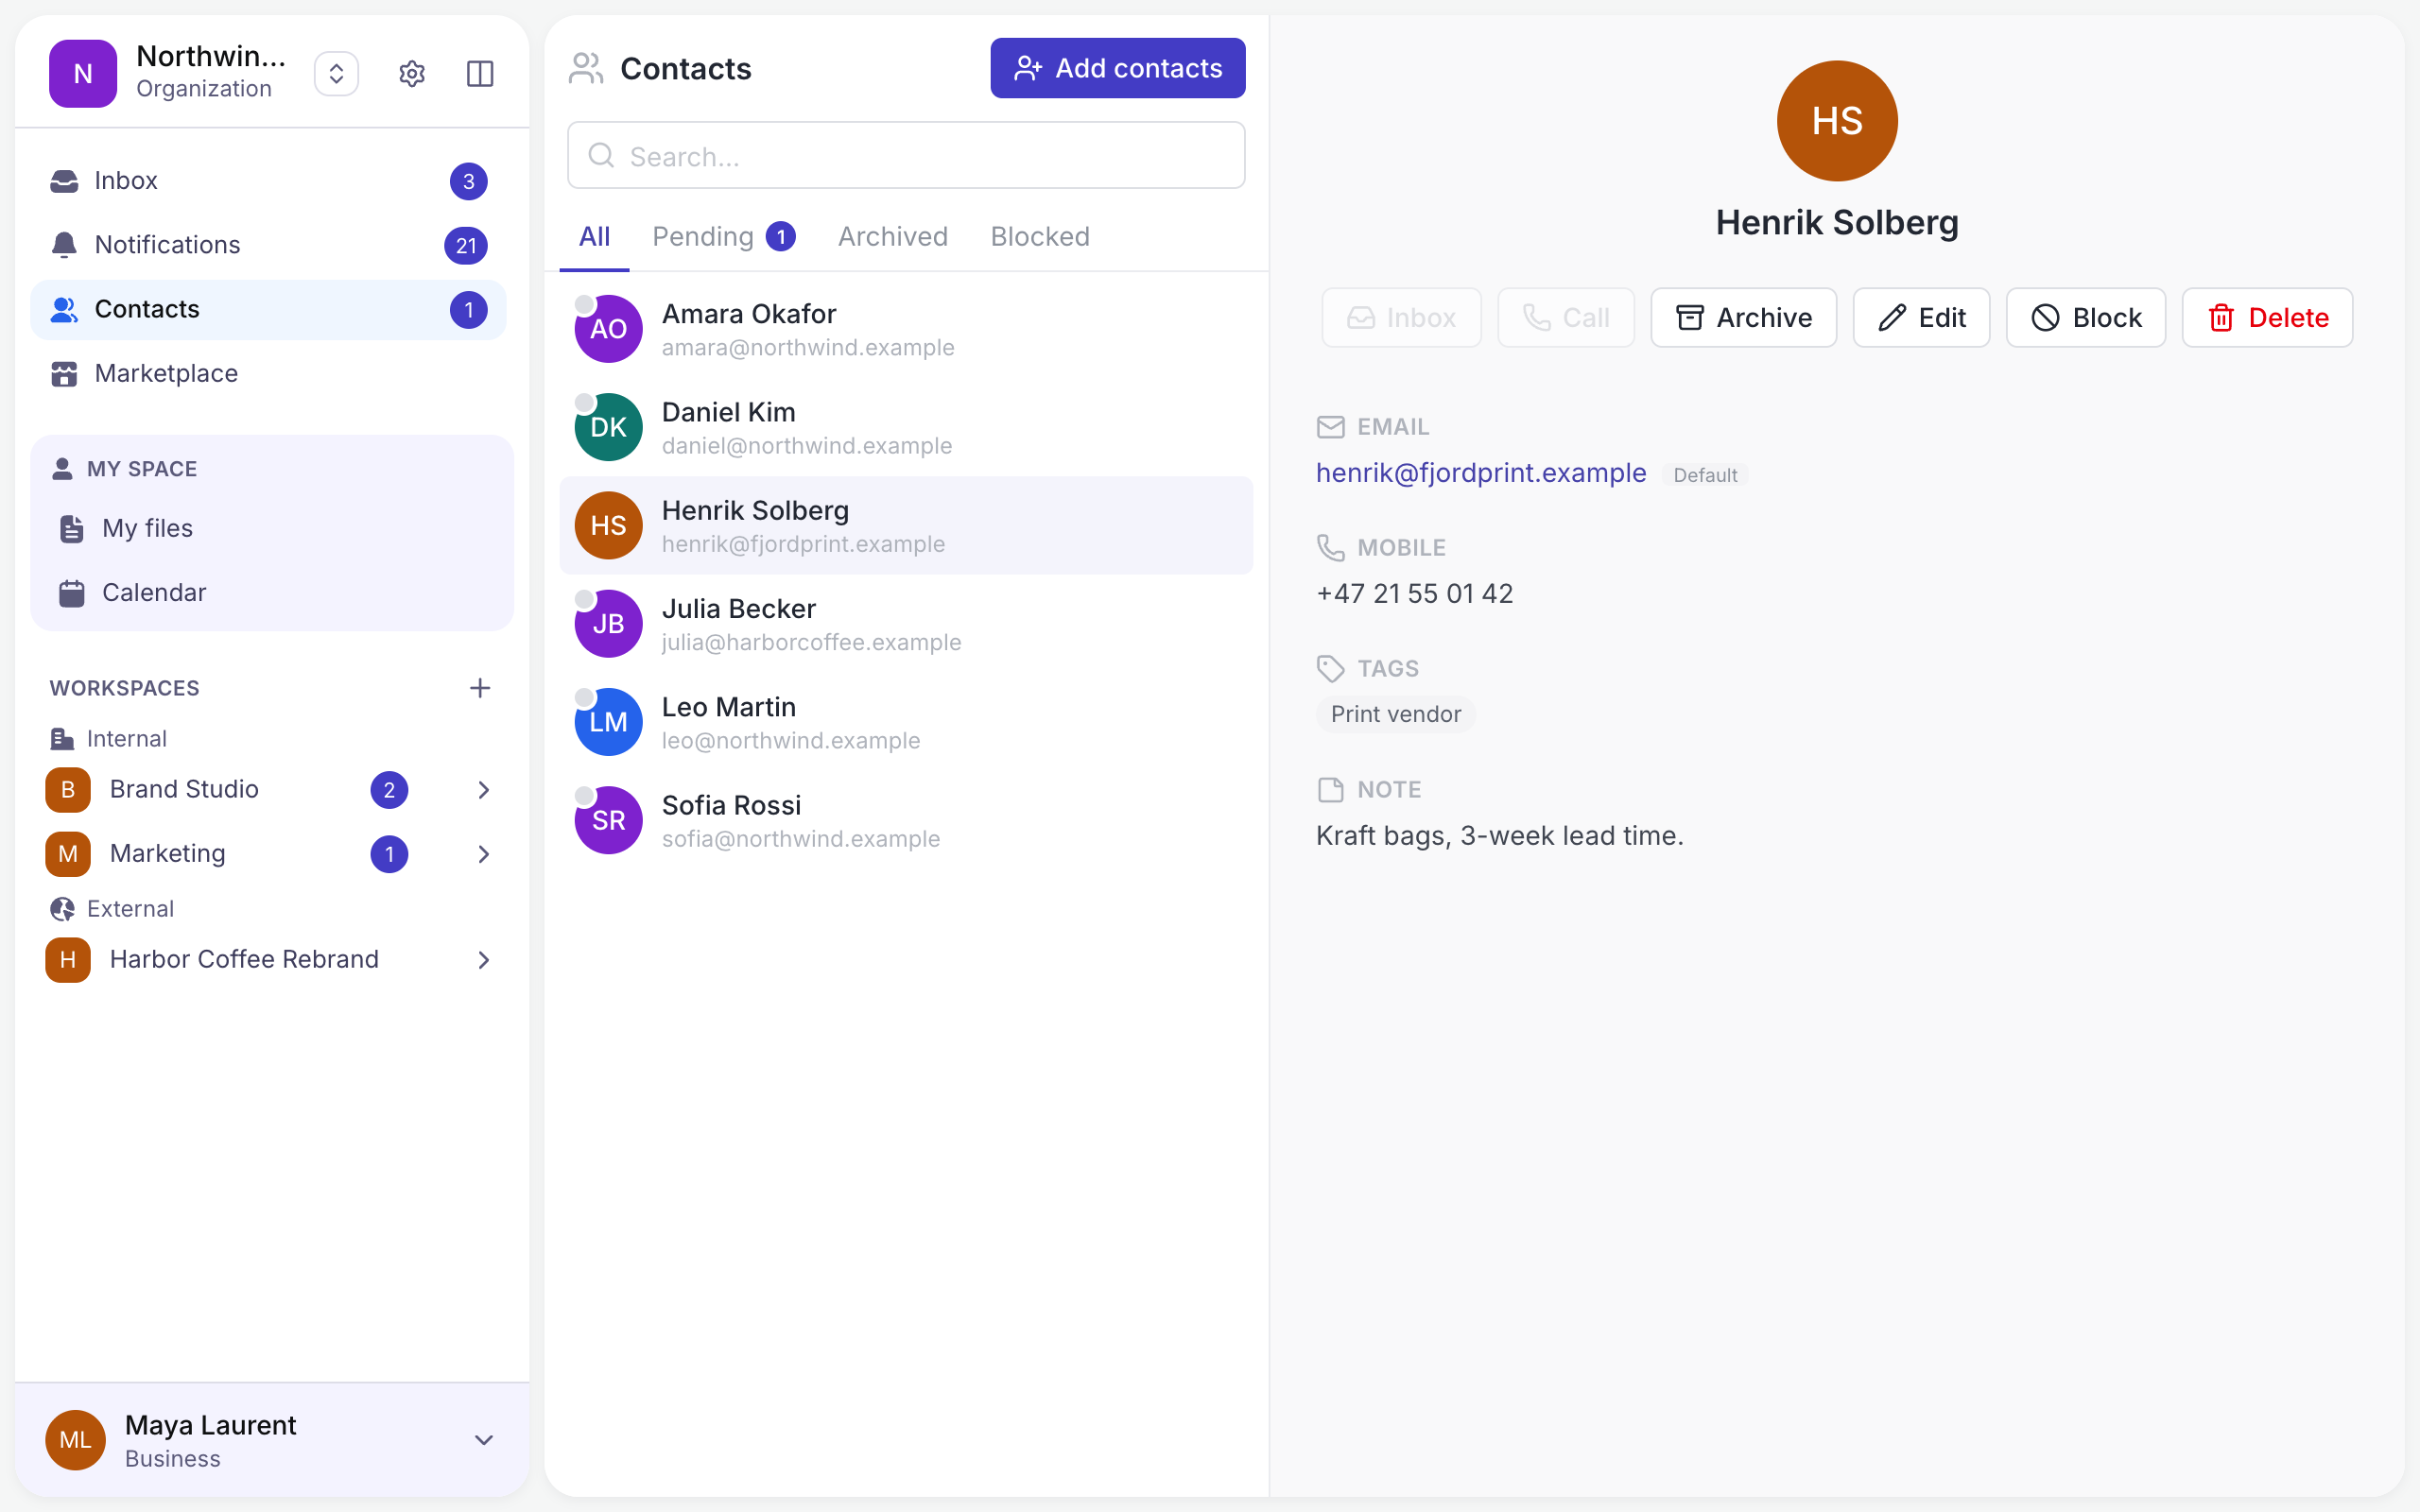
Add people with Add contacts. From a contact you can open a chat, start a call, edit their details, archive or block them. Contacts can also be plain entries — a supplier, for example — with their email, phone, tags and a note.
Calendar
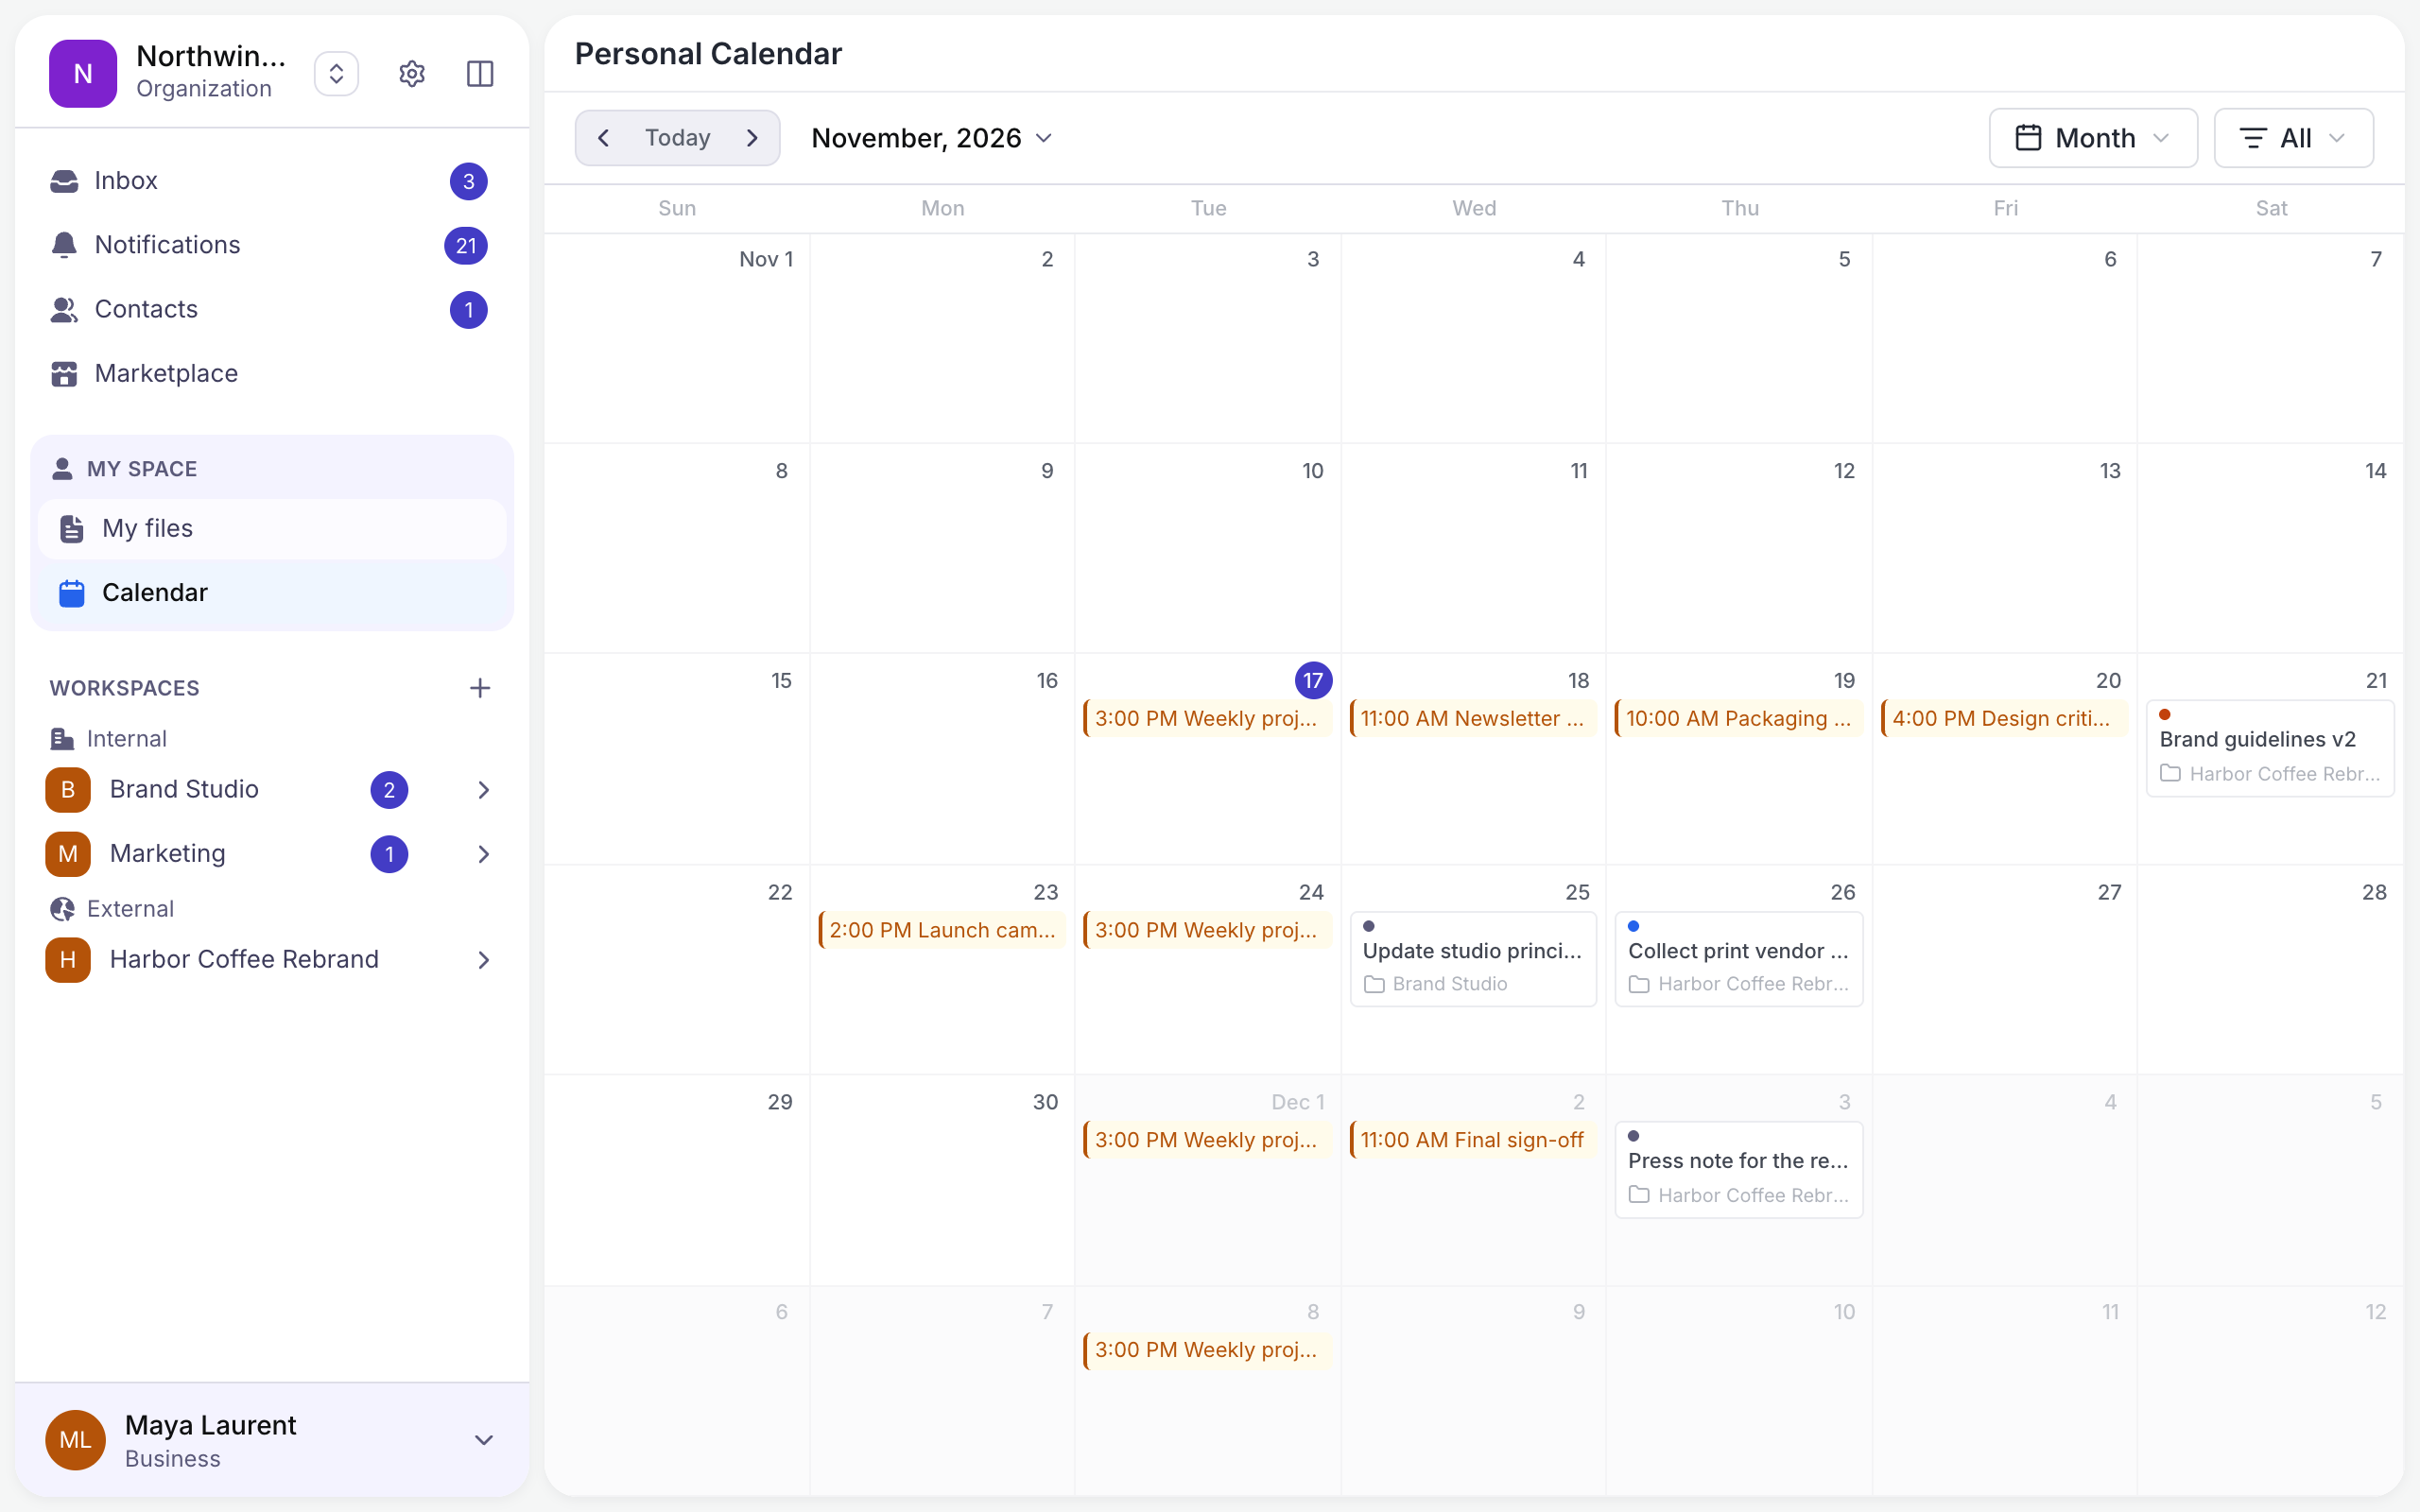
Calendar, under My space, shows your meetings and the deadlines of your tasks from every workspace in one place.
1.2 Account Settings
Open the account menu at the bottom of the sidebar and choose Account.
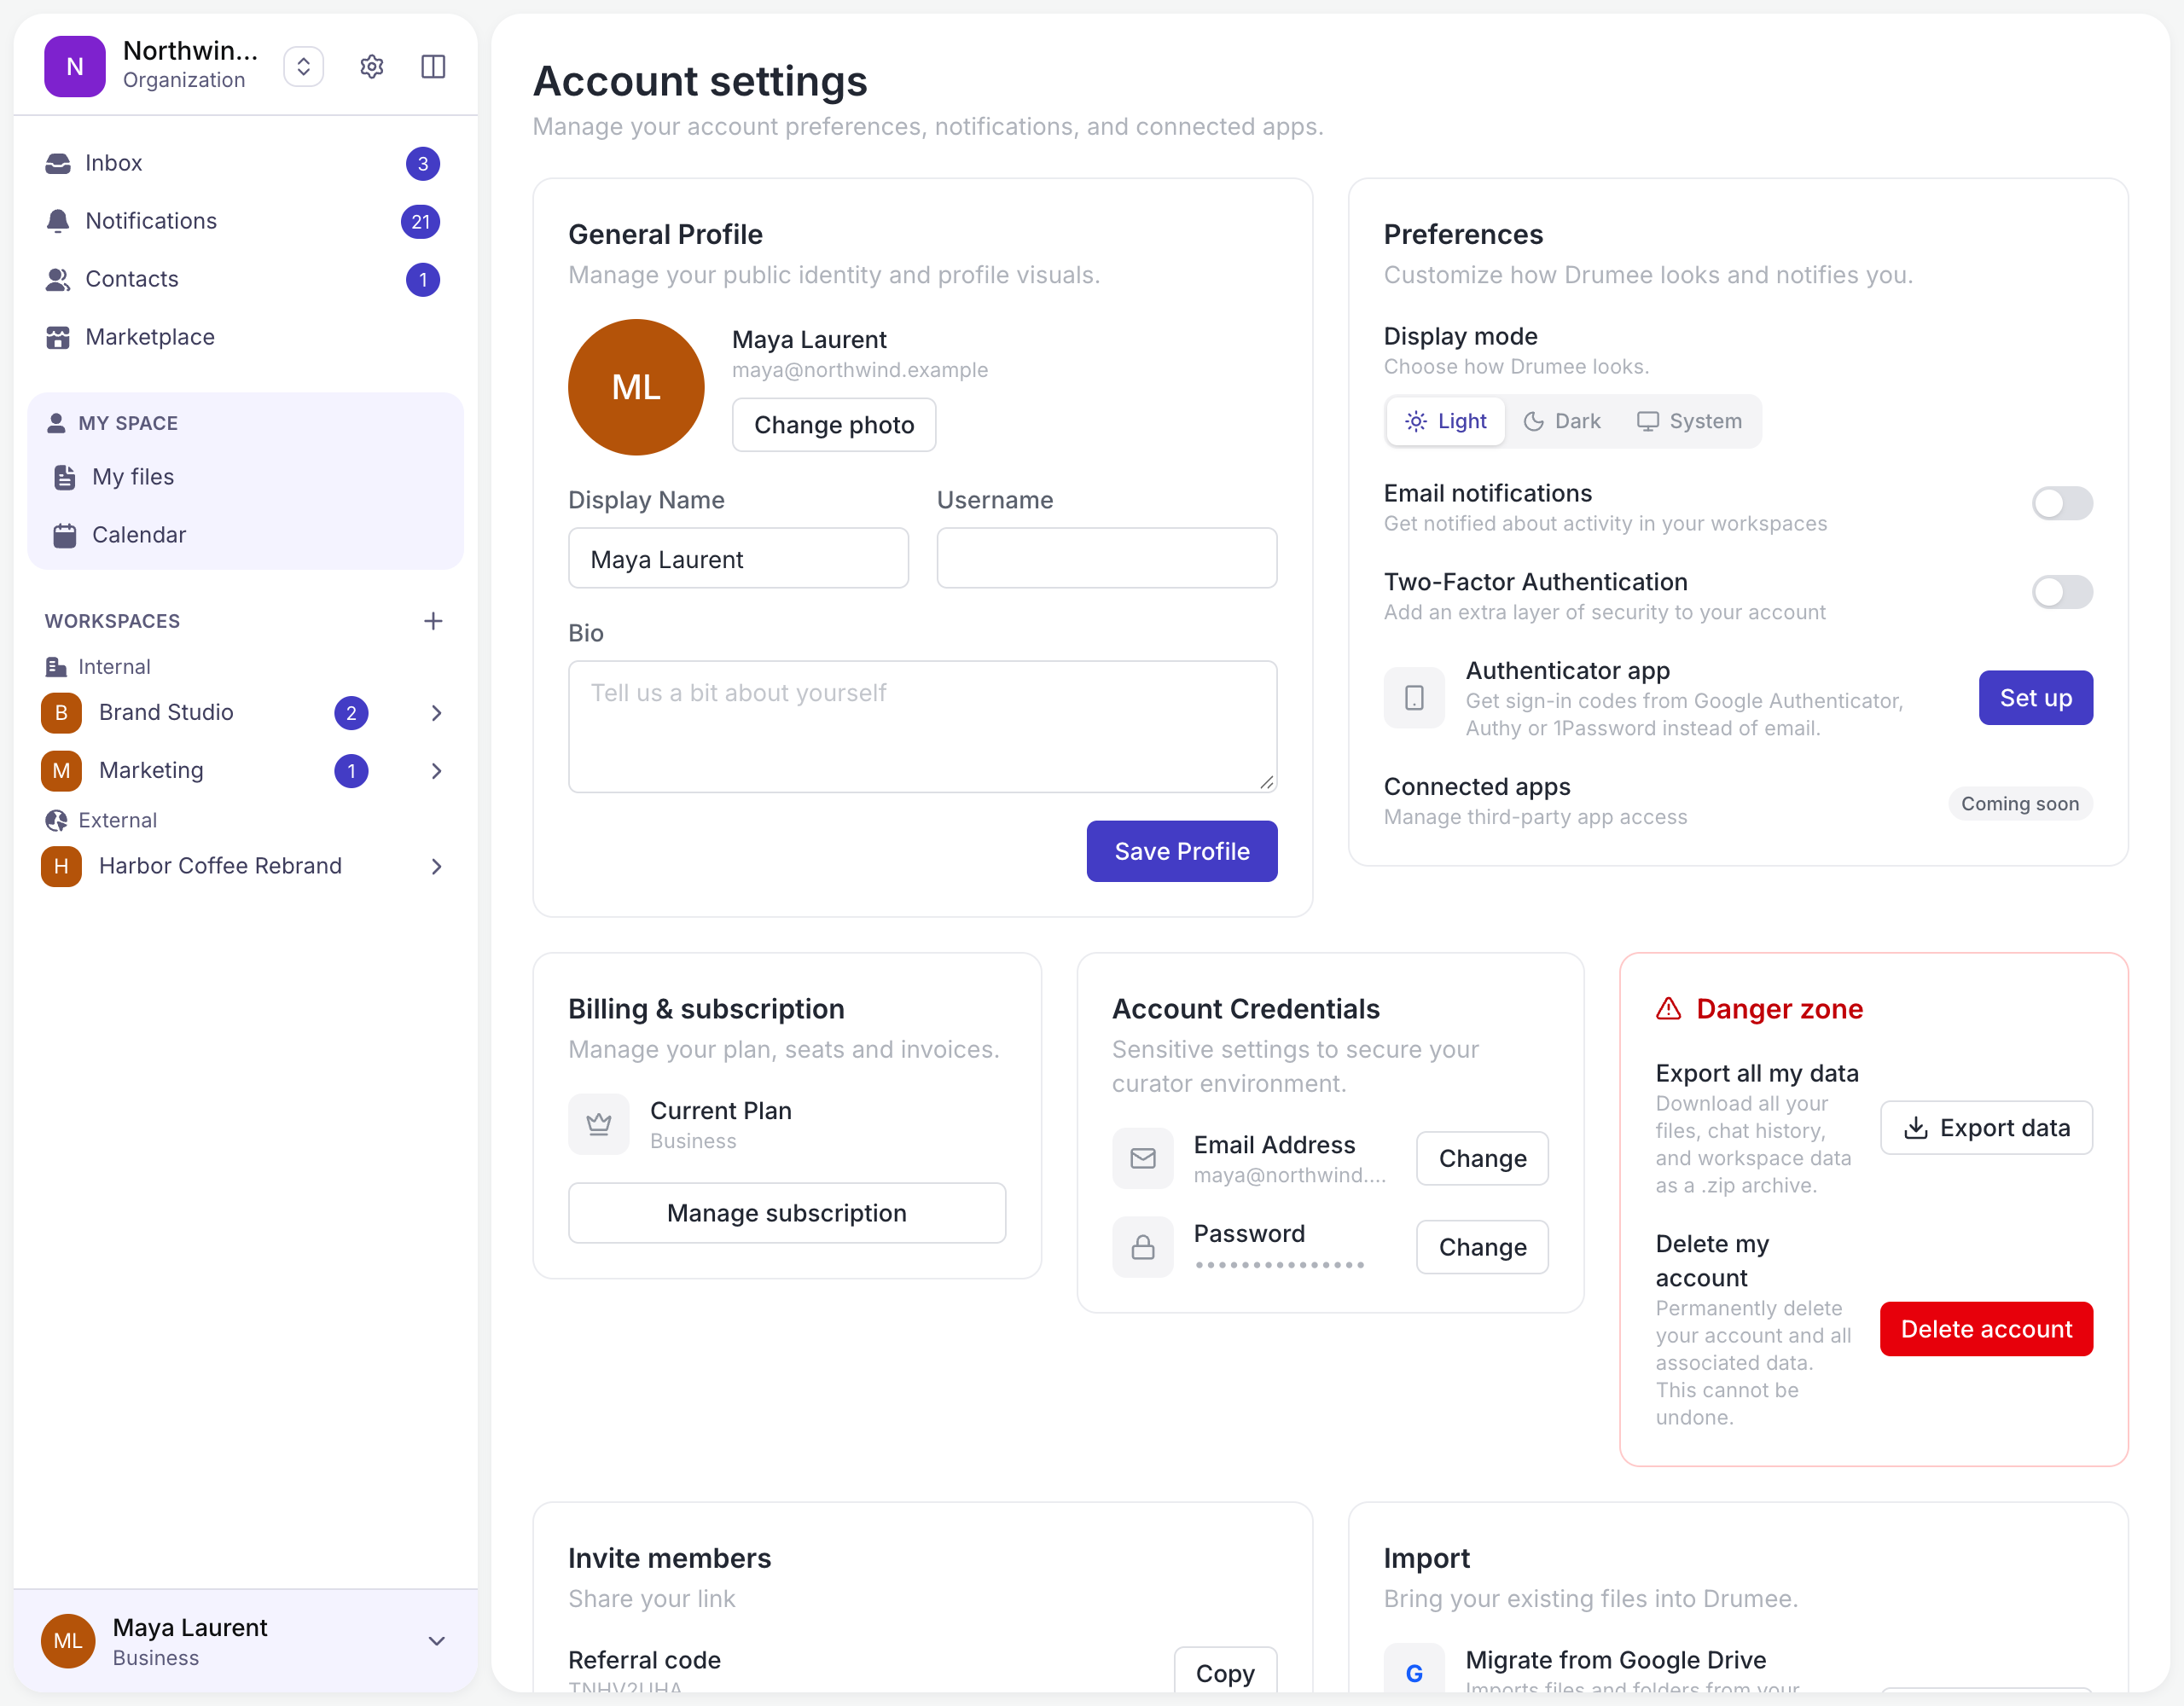
- General Profile: your photo, display name, username and a short bio.
- Preferences: display mode (Light, Dark or System), email notifications, two-factor authentication and an authenticator app.
- Billing & subscription: your current plan, and Manage subscription.
- Account Credentials: change the email address or the password of your account.
- Danger zone:
- Export data — download your files, chat history and workspace data as a .zip archive.
- Delete account — permanently delete your account and its data.
Further down the same page:
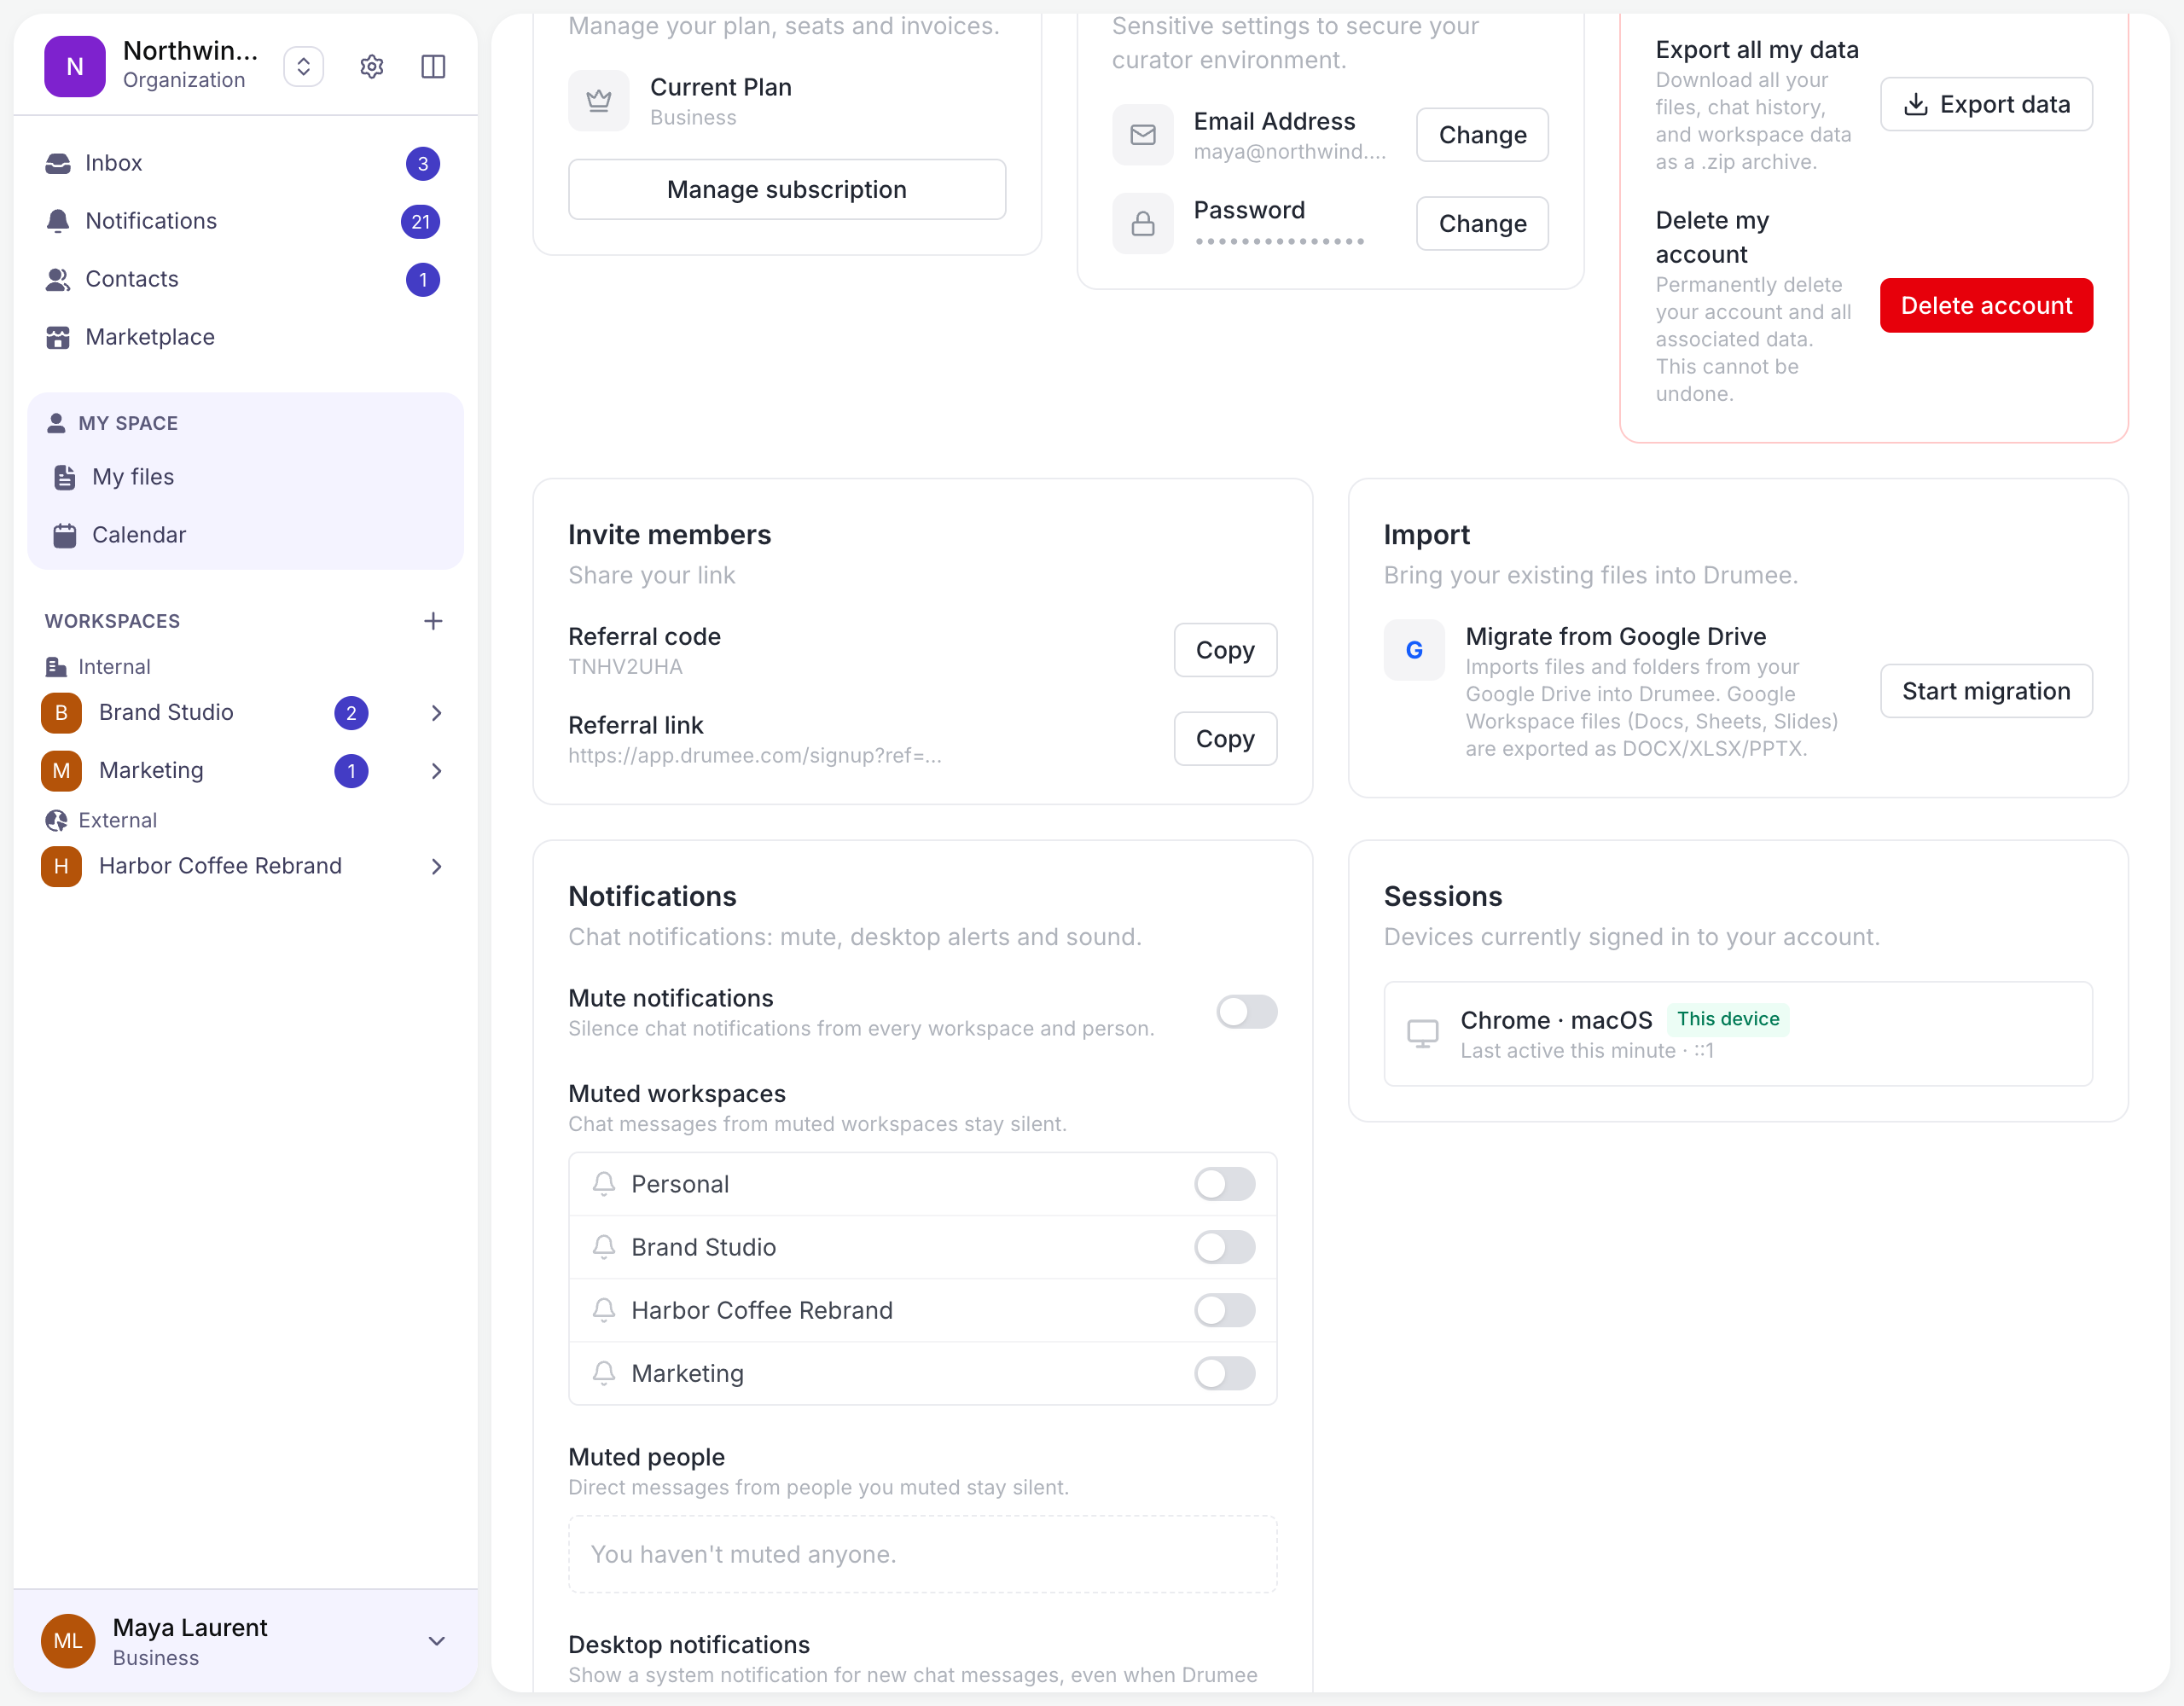
- Invite members: your referral code and referral link.
- Import: bring your existing files in with Migrate from Google Drive.
- Notifications: mute everything, mute single workspaces or people, and turn on desktop notifications.
- Sessions: every device signed in to your account. Revoke signs a device out immediately.
1.3 Team & Organization Settings
Click the gear next to the switcher to manage the team or organization you are in. What you see depends on your role there and on its plan.
1.3.1 Members
Who belongs to the organization, with their role and teams. The panel on the right explains what each role can do.
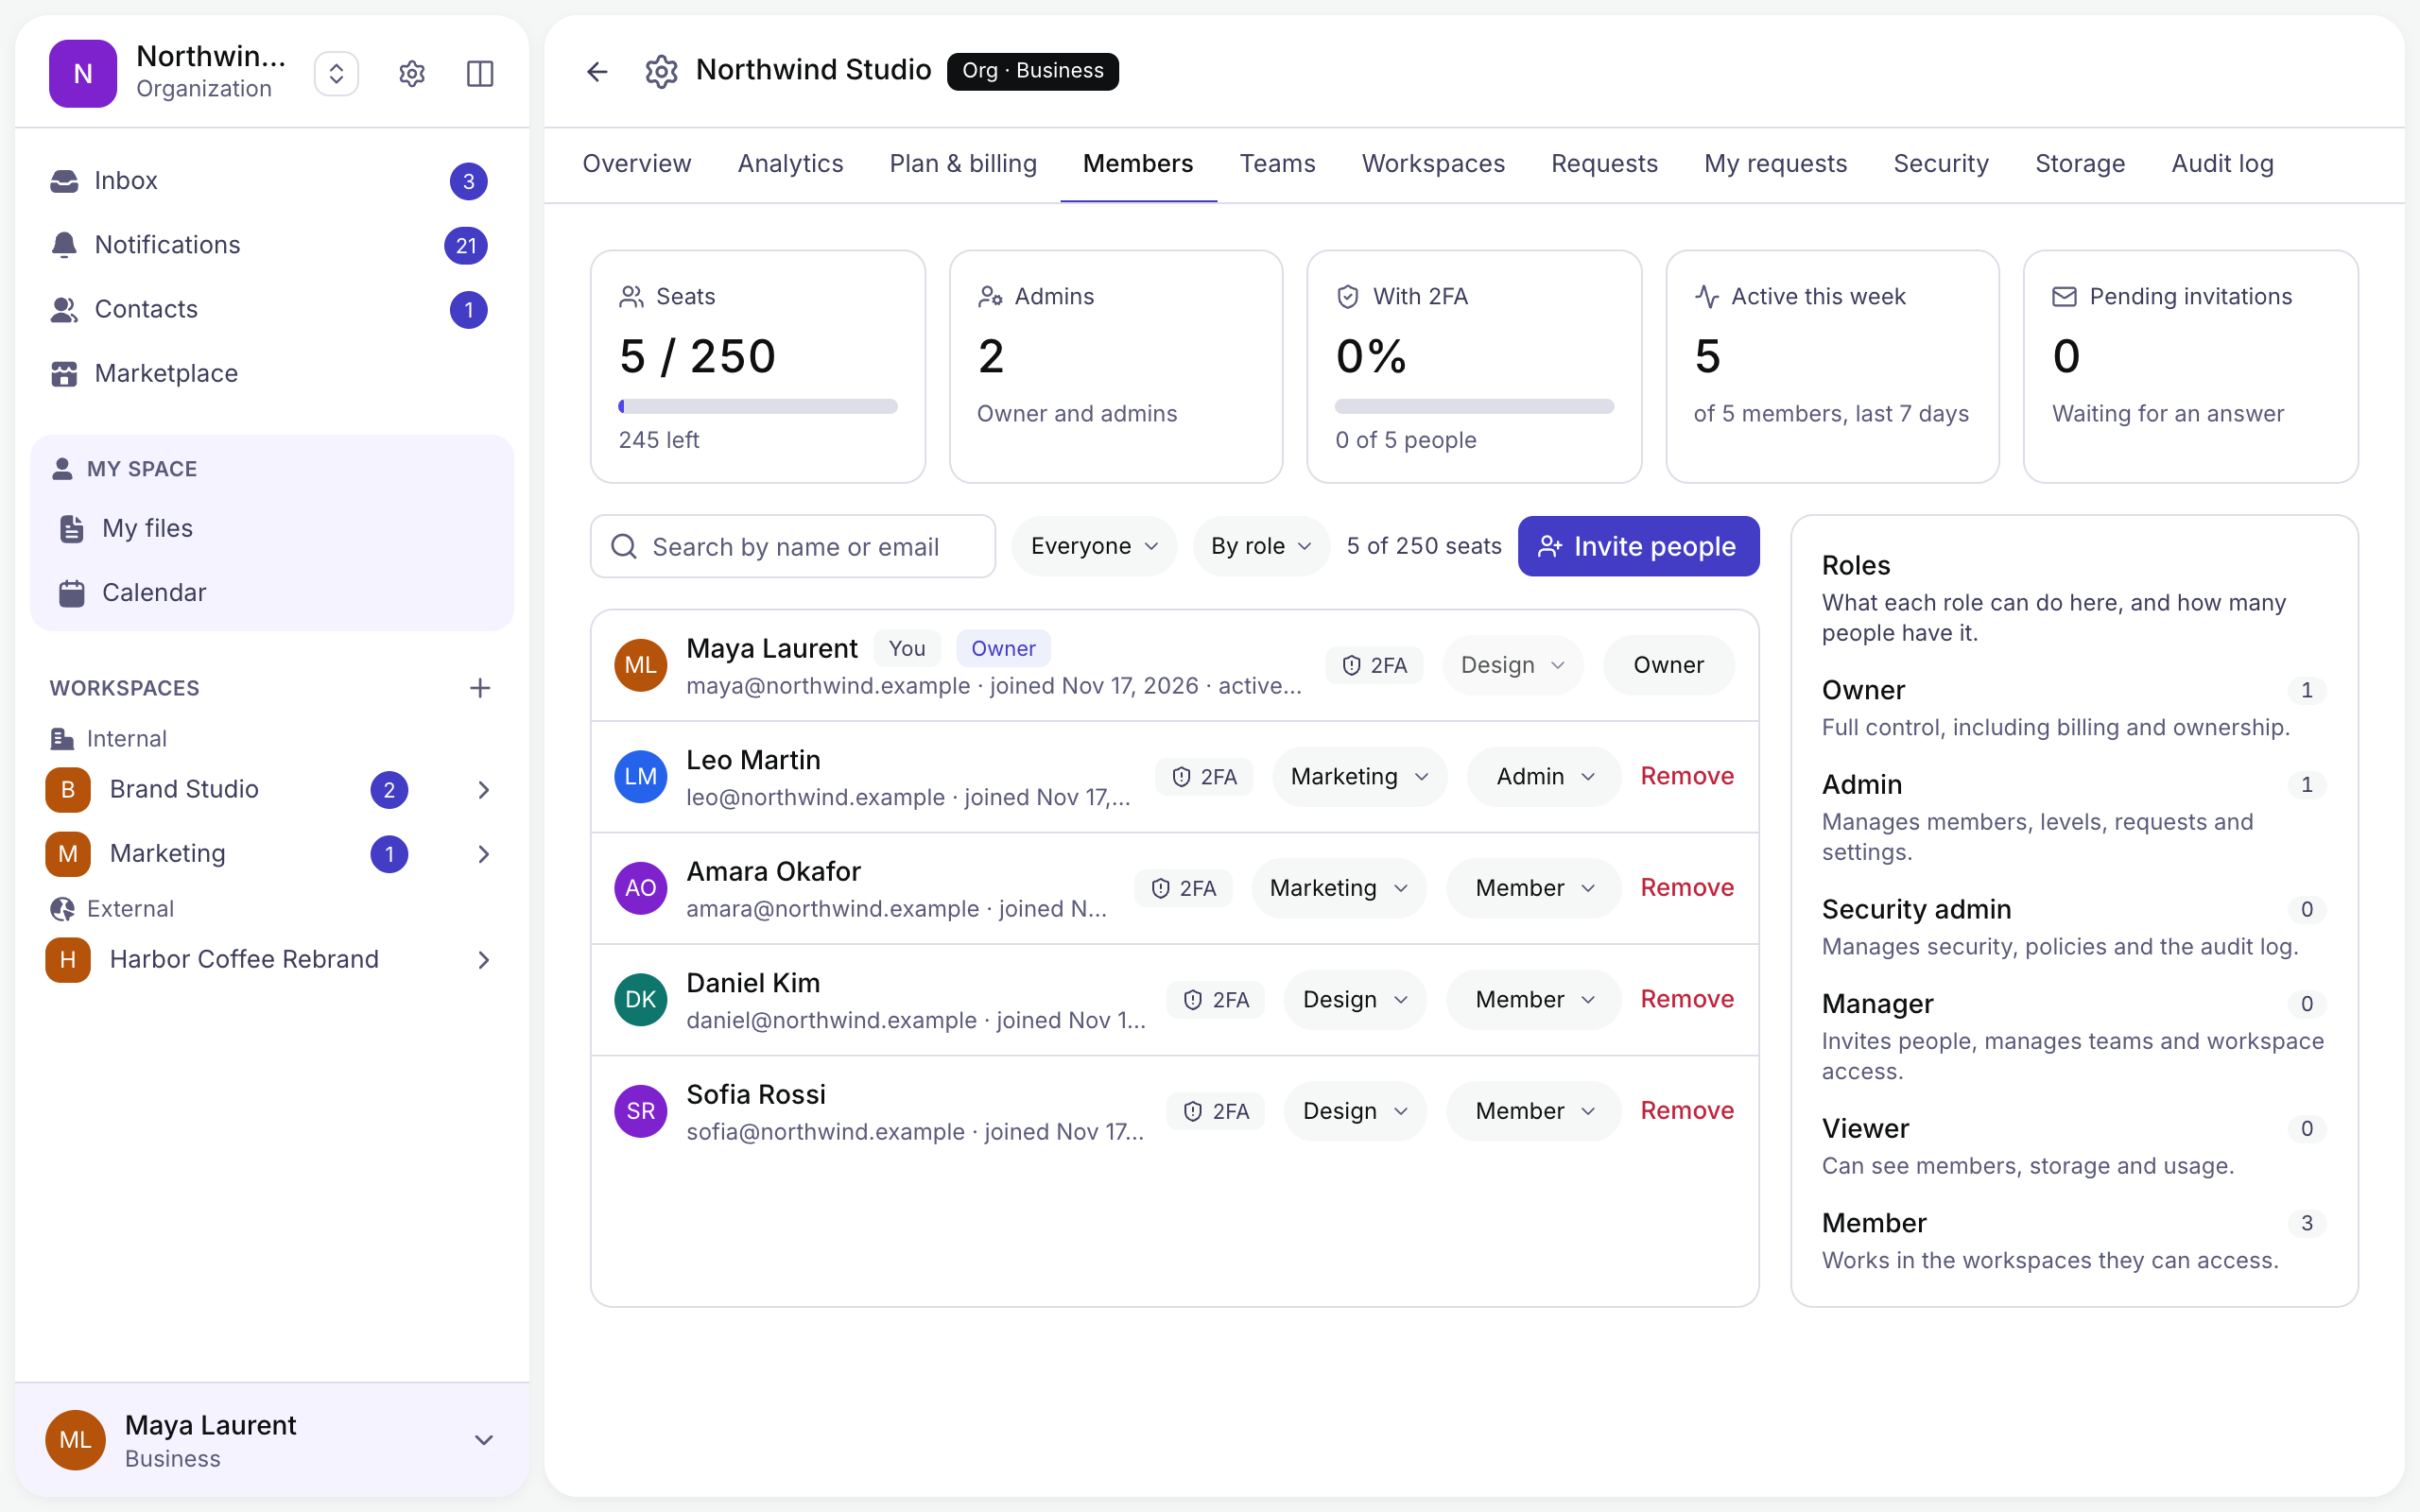
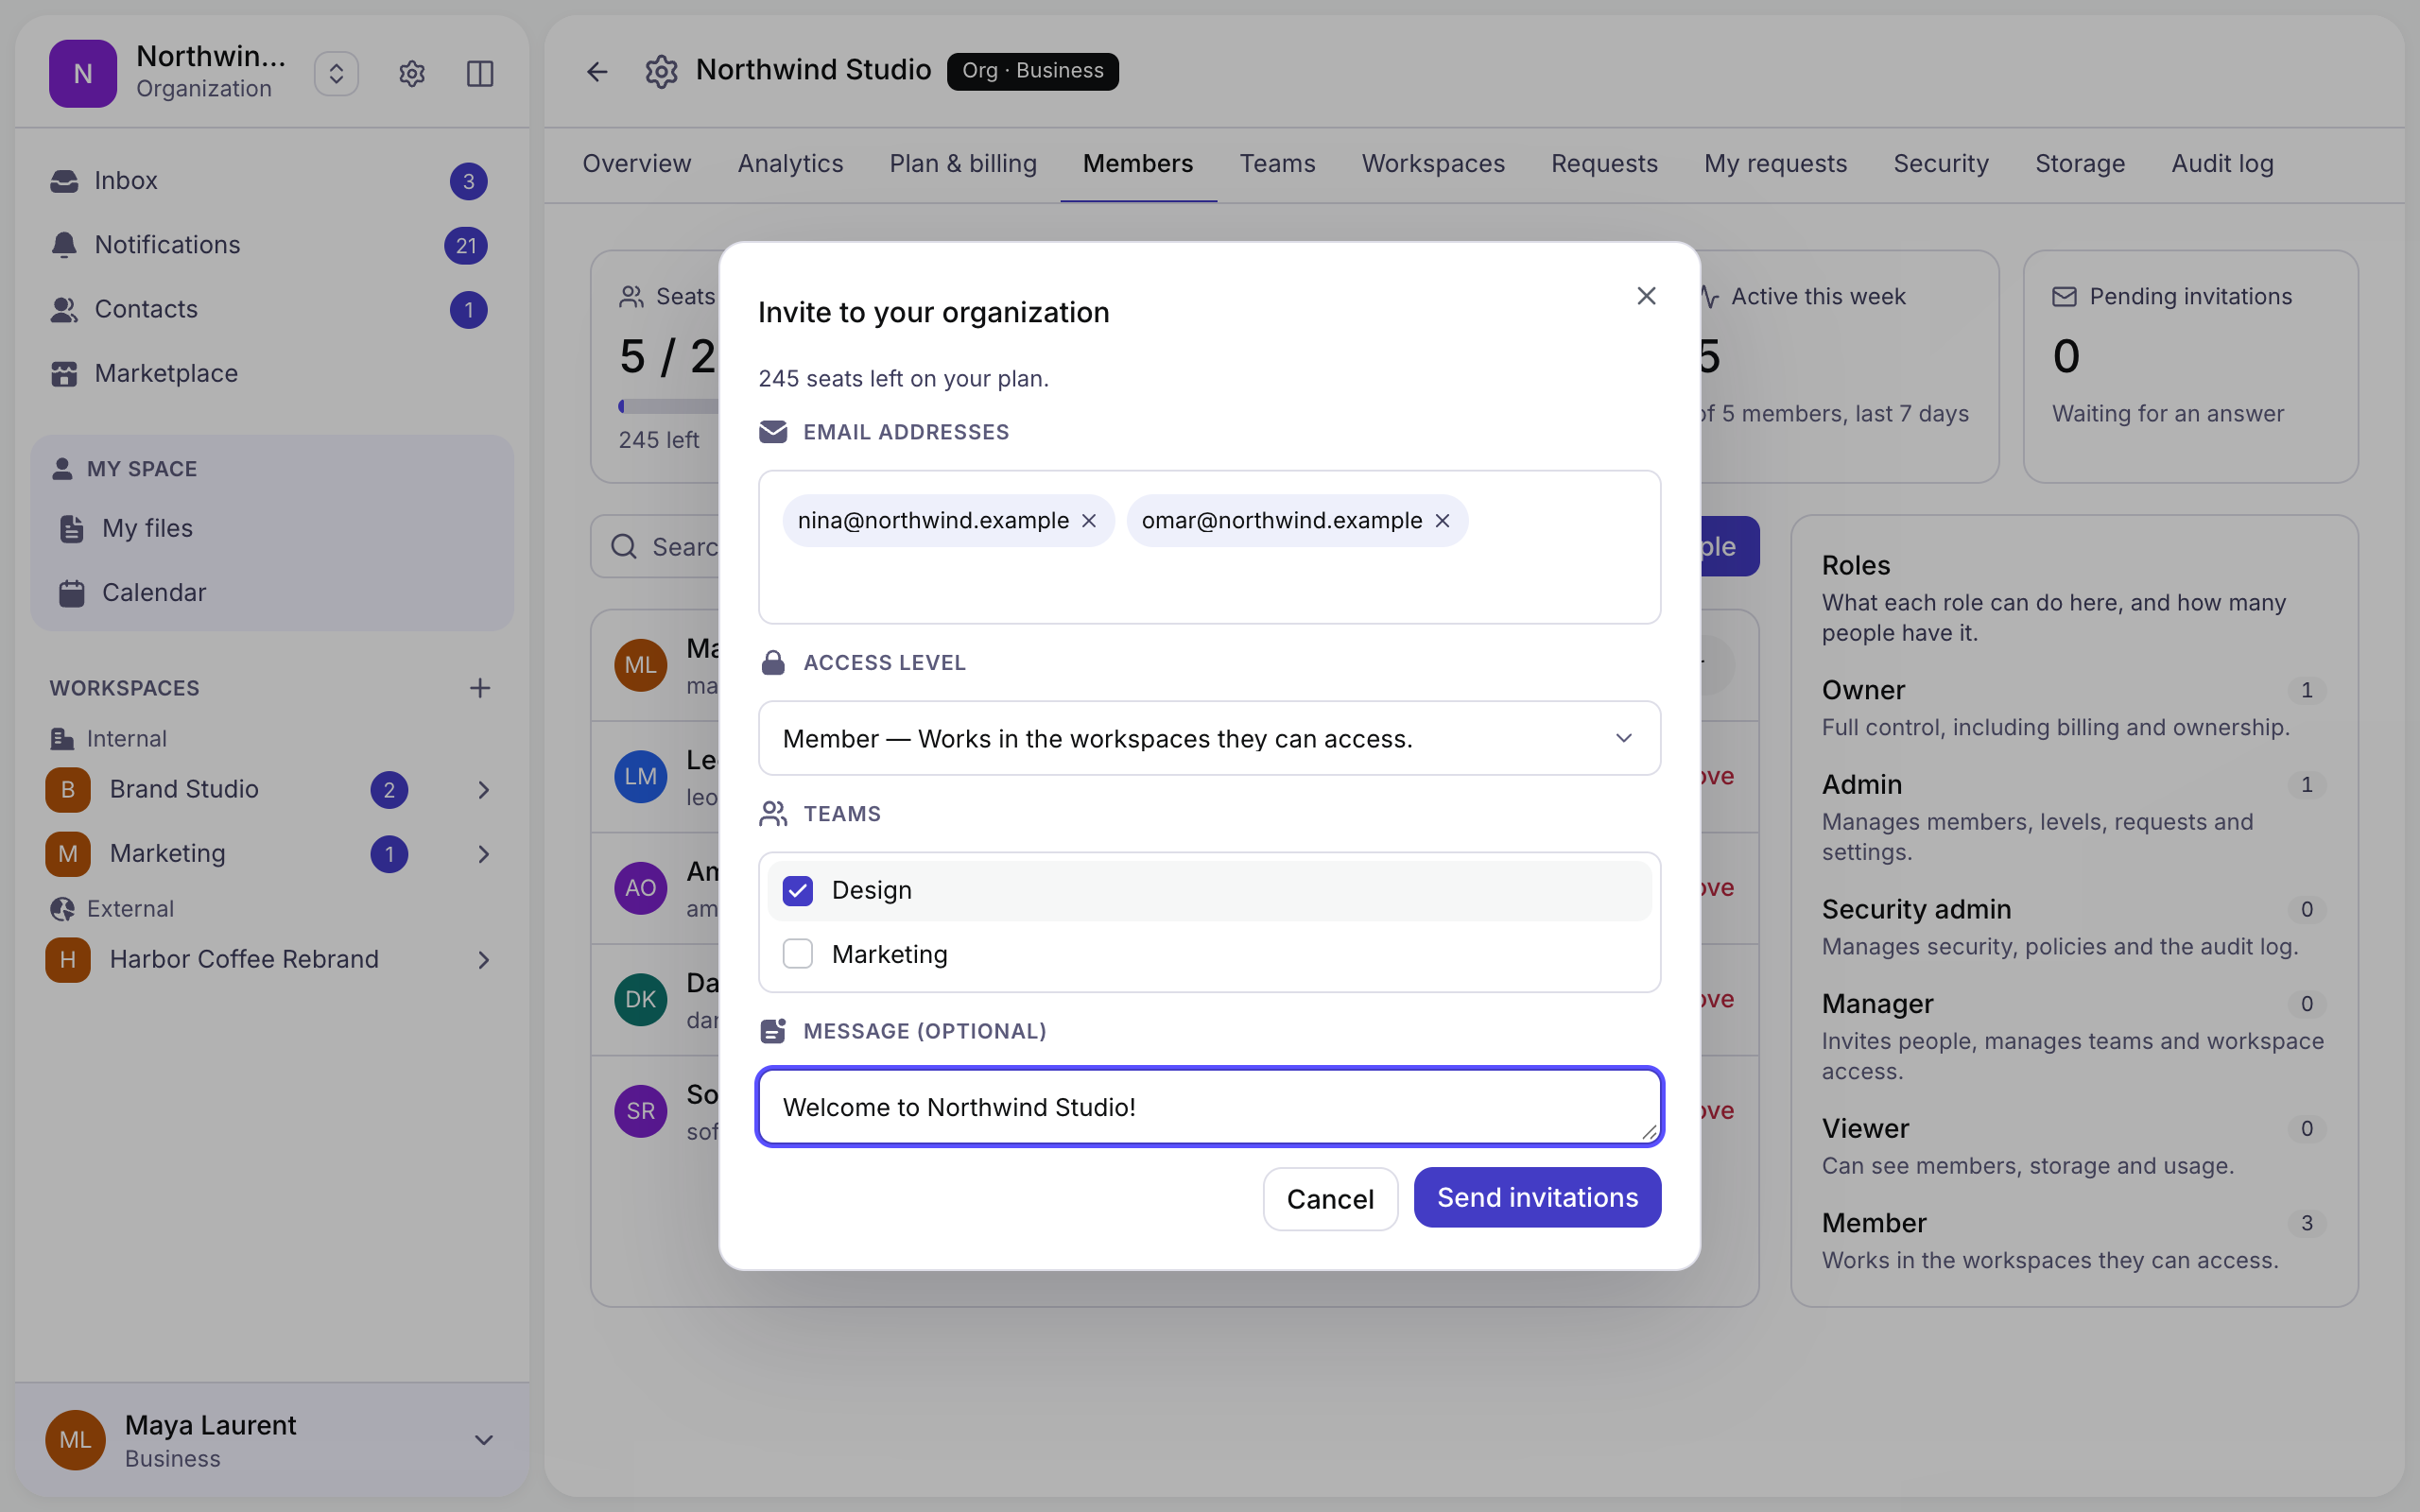
Invite a member
Step 1: Open the Members tab => Click Invite people.
Step 2: Enter one or several email addresses.
Step 3: Choose the access level — Member, Viewer, Manager, Security admin or Admin — and, if you like, the teams the new members join straight away.
Step 4: Add a personal note => Click Send invitations. Each person receives an email and appears under Pending invitations until they accept.
To change someone’s role or teams later, use the menus on their row. Remove takes them out of the organization.
1.3.2 Teams
Teams group people so that you can give them access to workspaces together. A person can be in several teams.
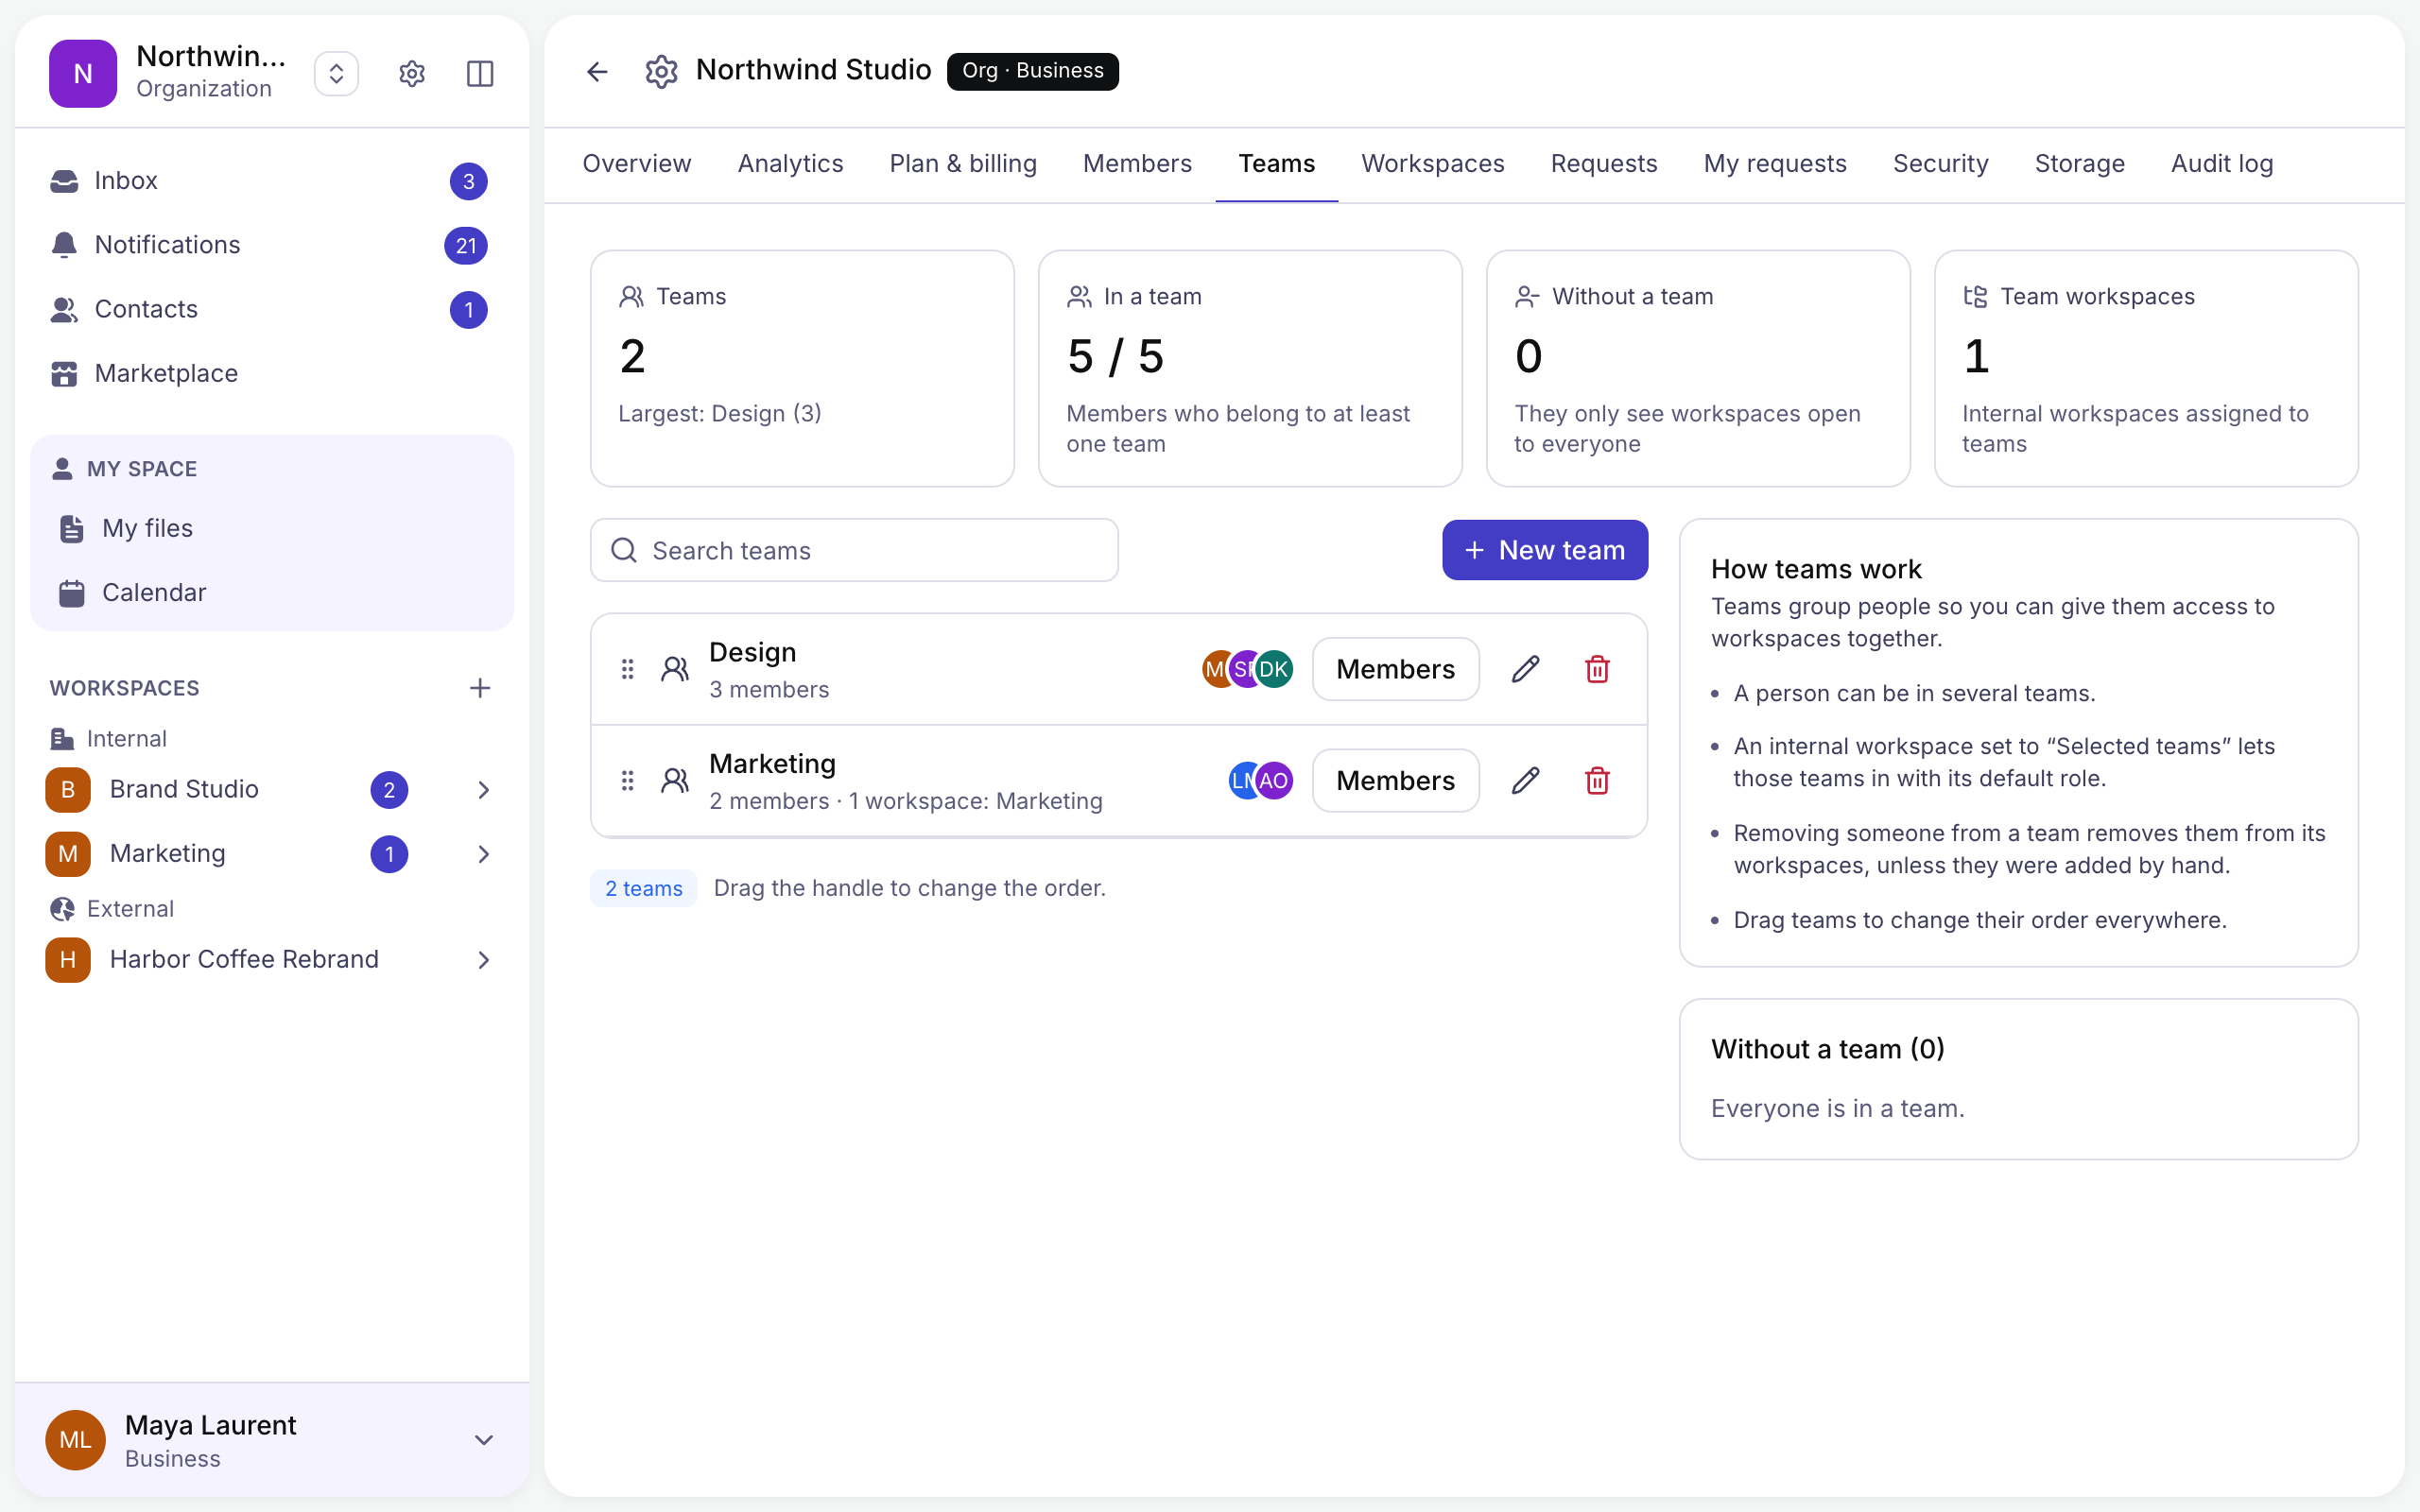
Create a team
Step 1: Open the Teams tab => Click New team.
Step 2: Type the team’s name => Press Enter.
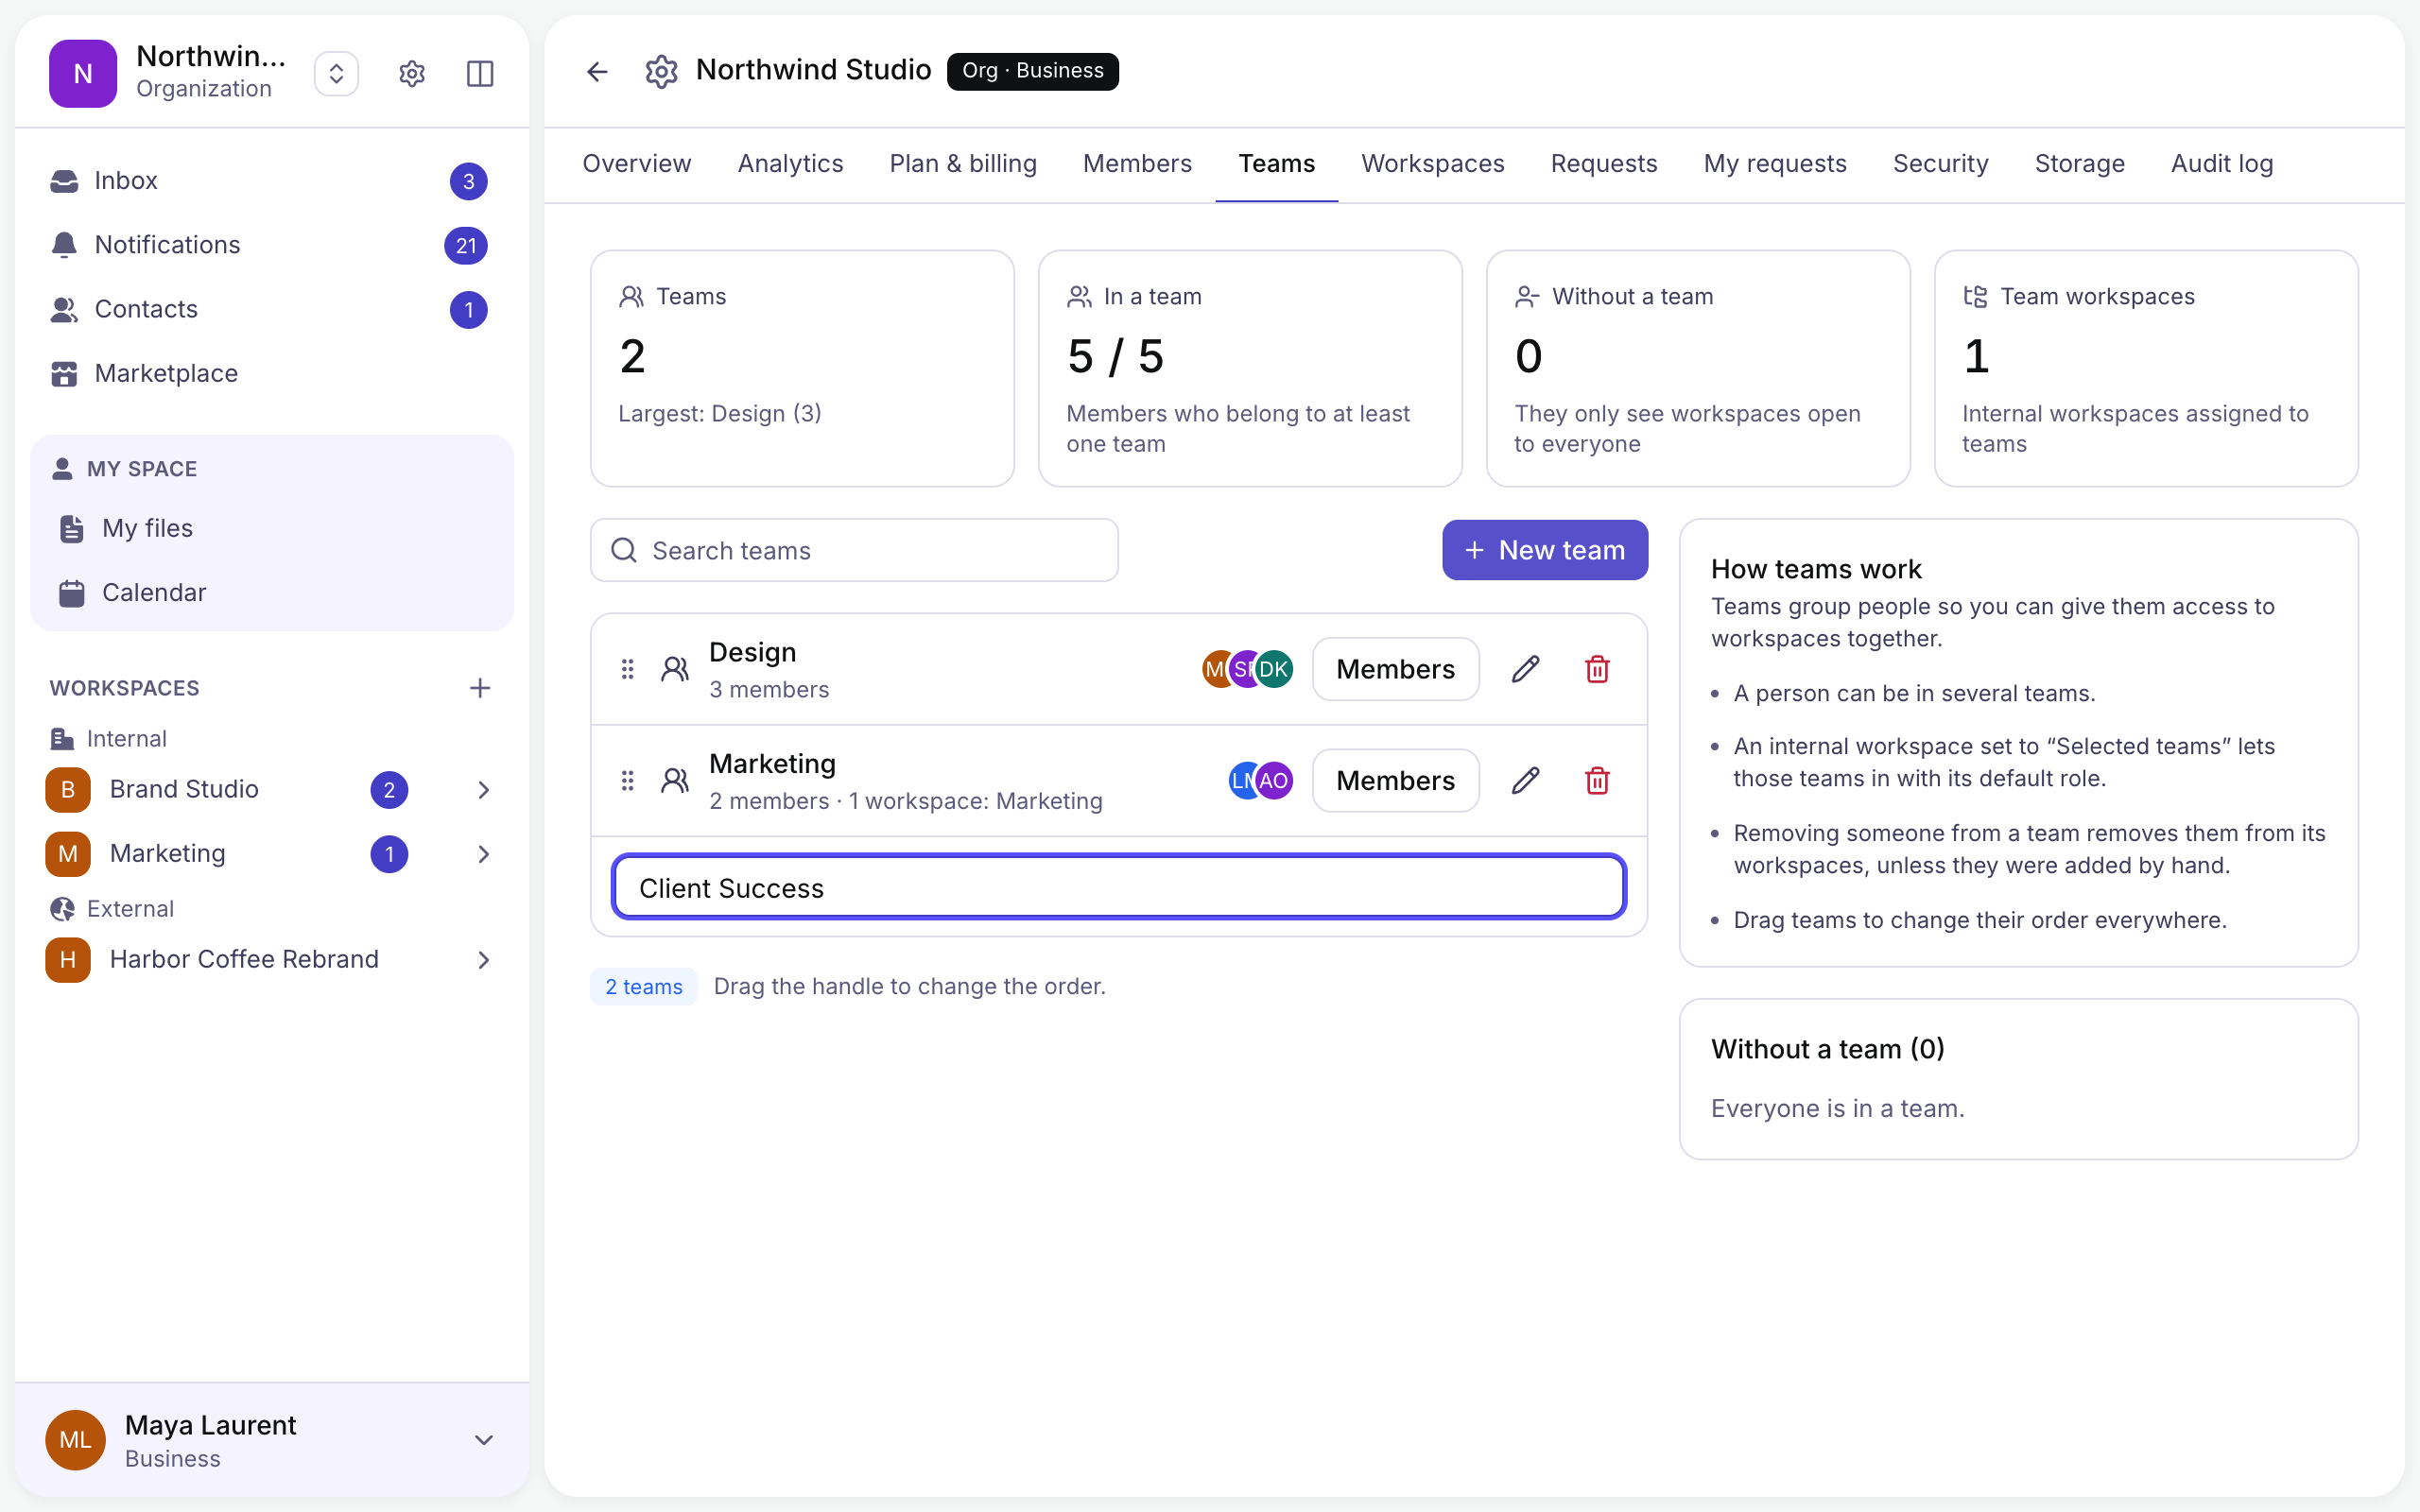
Step 3: Click Members on the team => Tick the people who belong to it => Click Save.
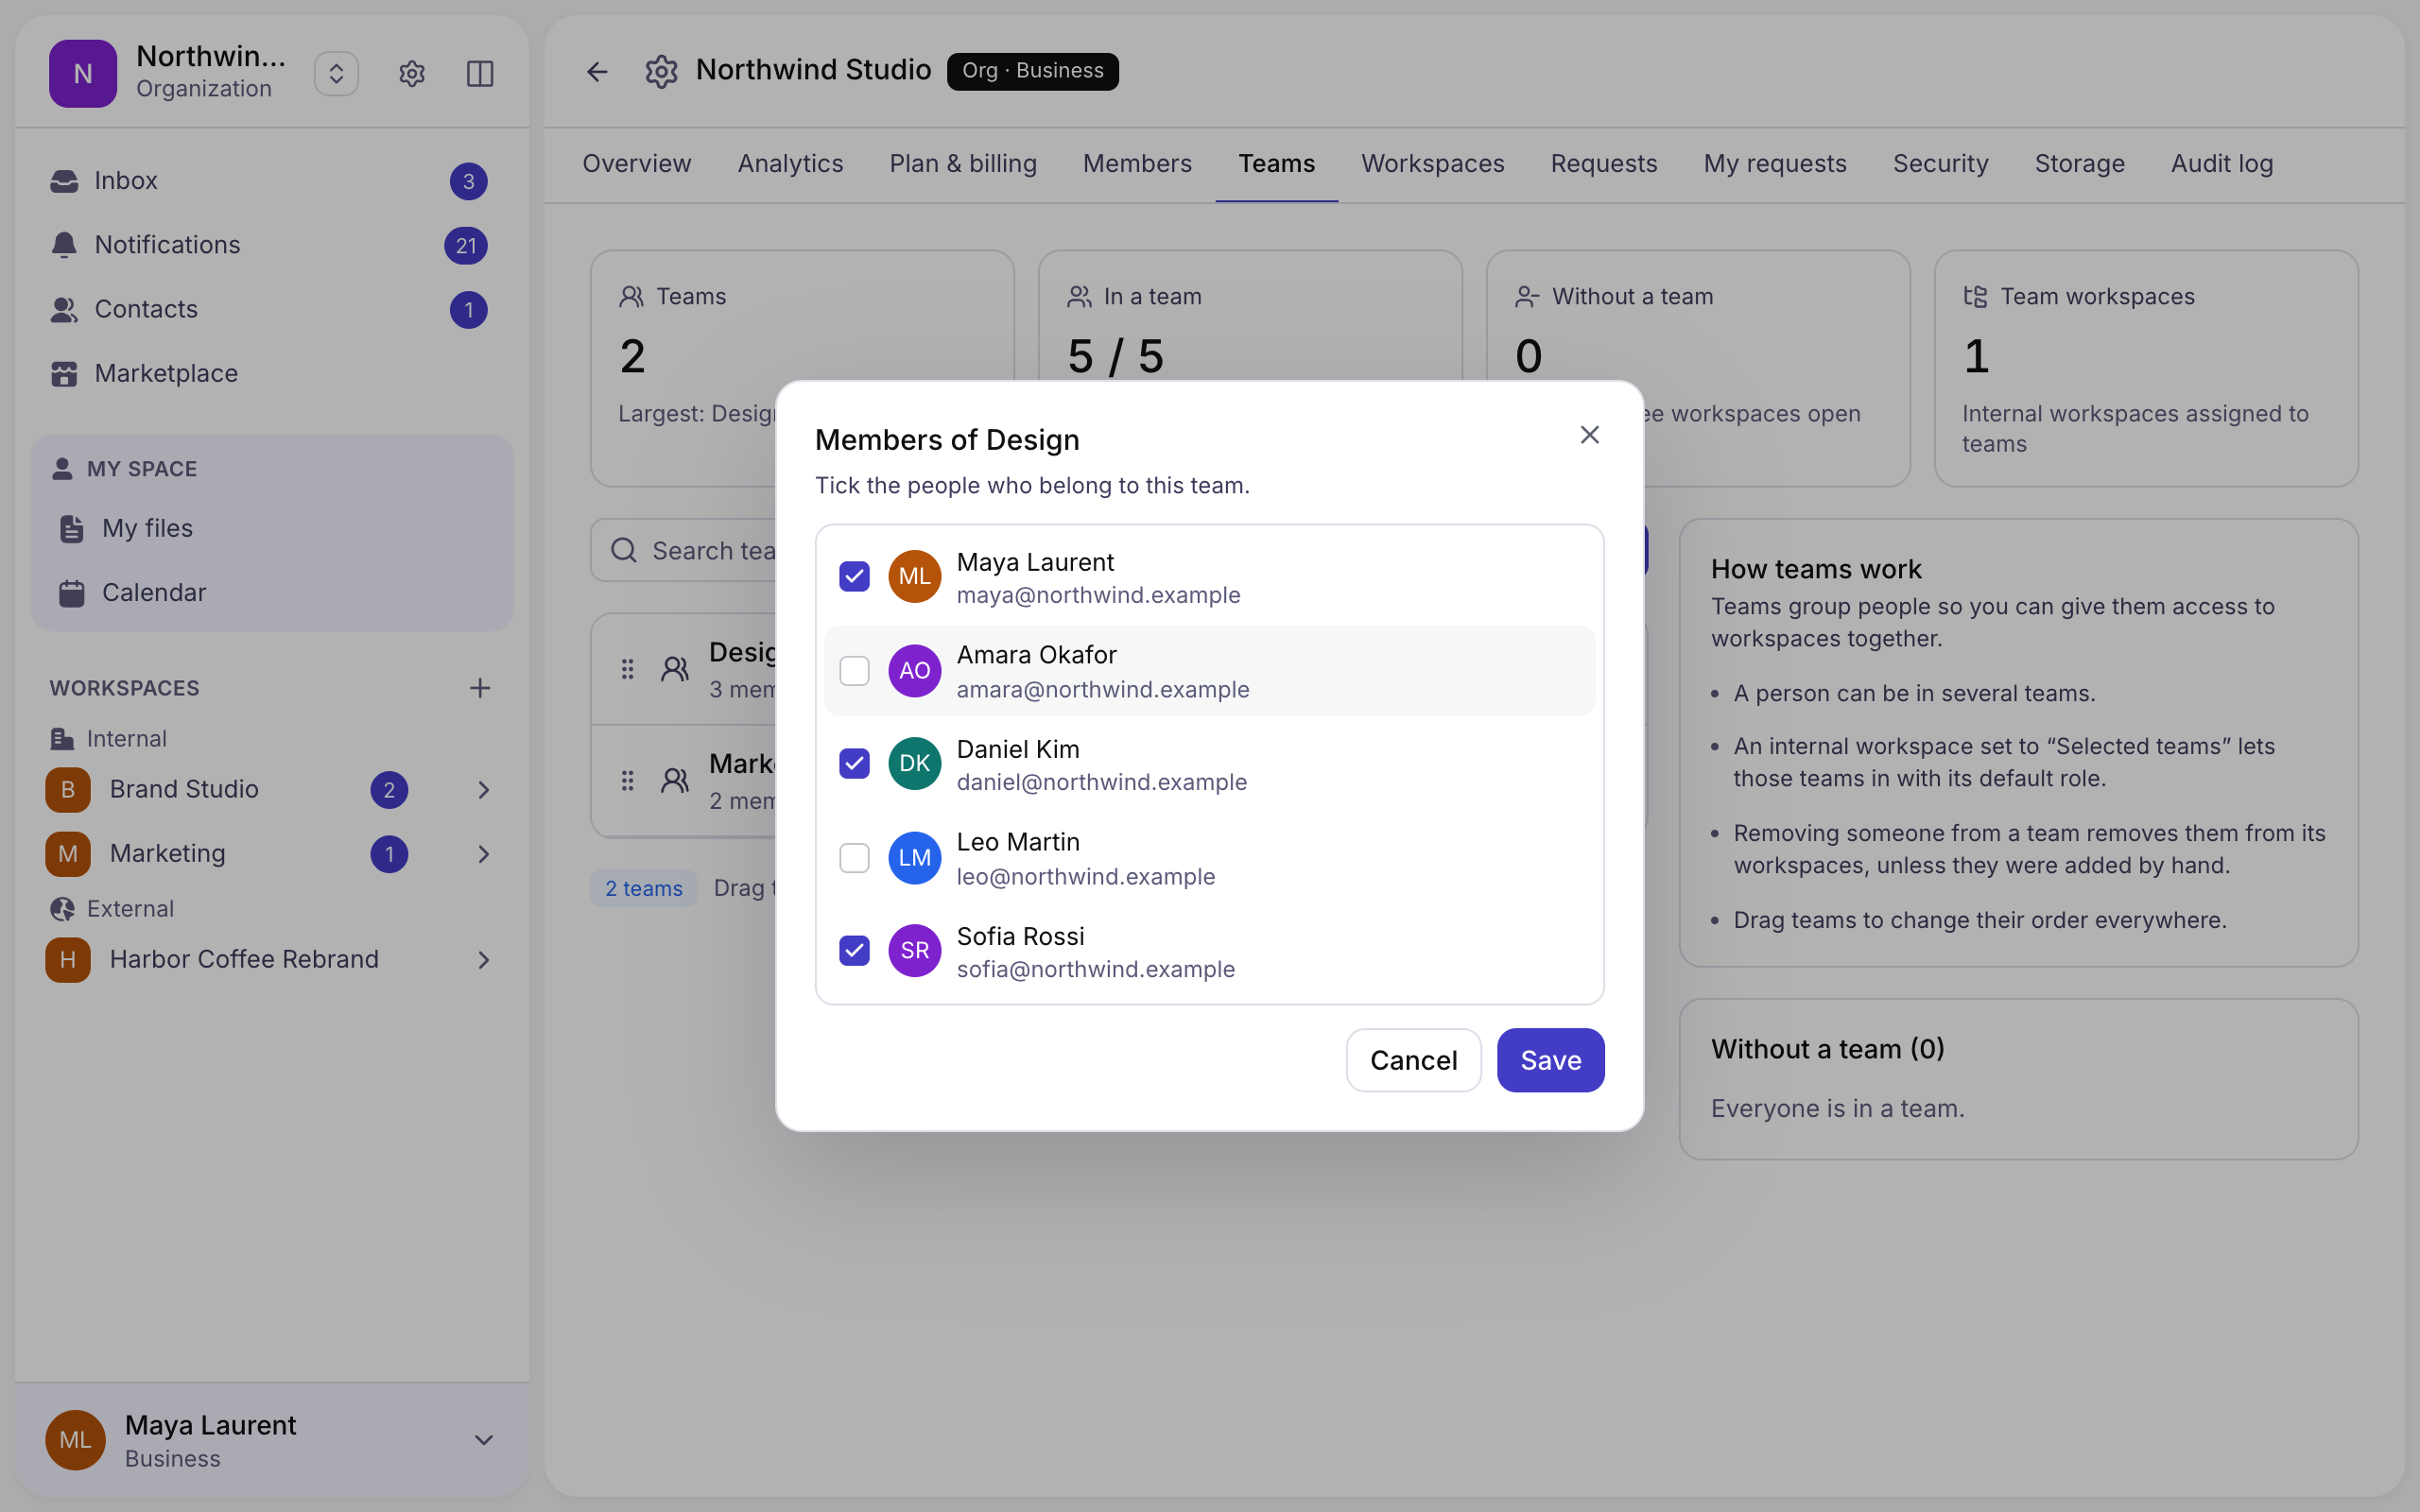
The pencil renames a team, the bin deletes it, and the handle on the left changes the order of the teams everywhere they are listed.
1.3.3 Workspaces
Every workspace of the organization in one list: who it is visible to, the role people join with, its members, and the workspace trash.
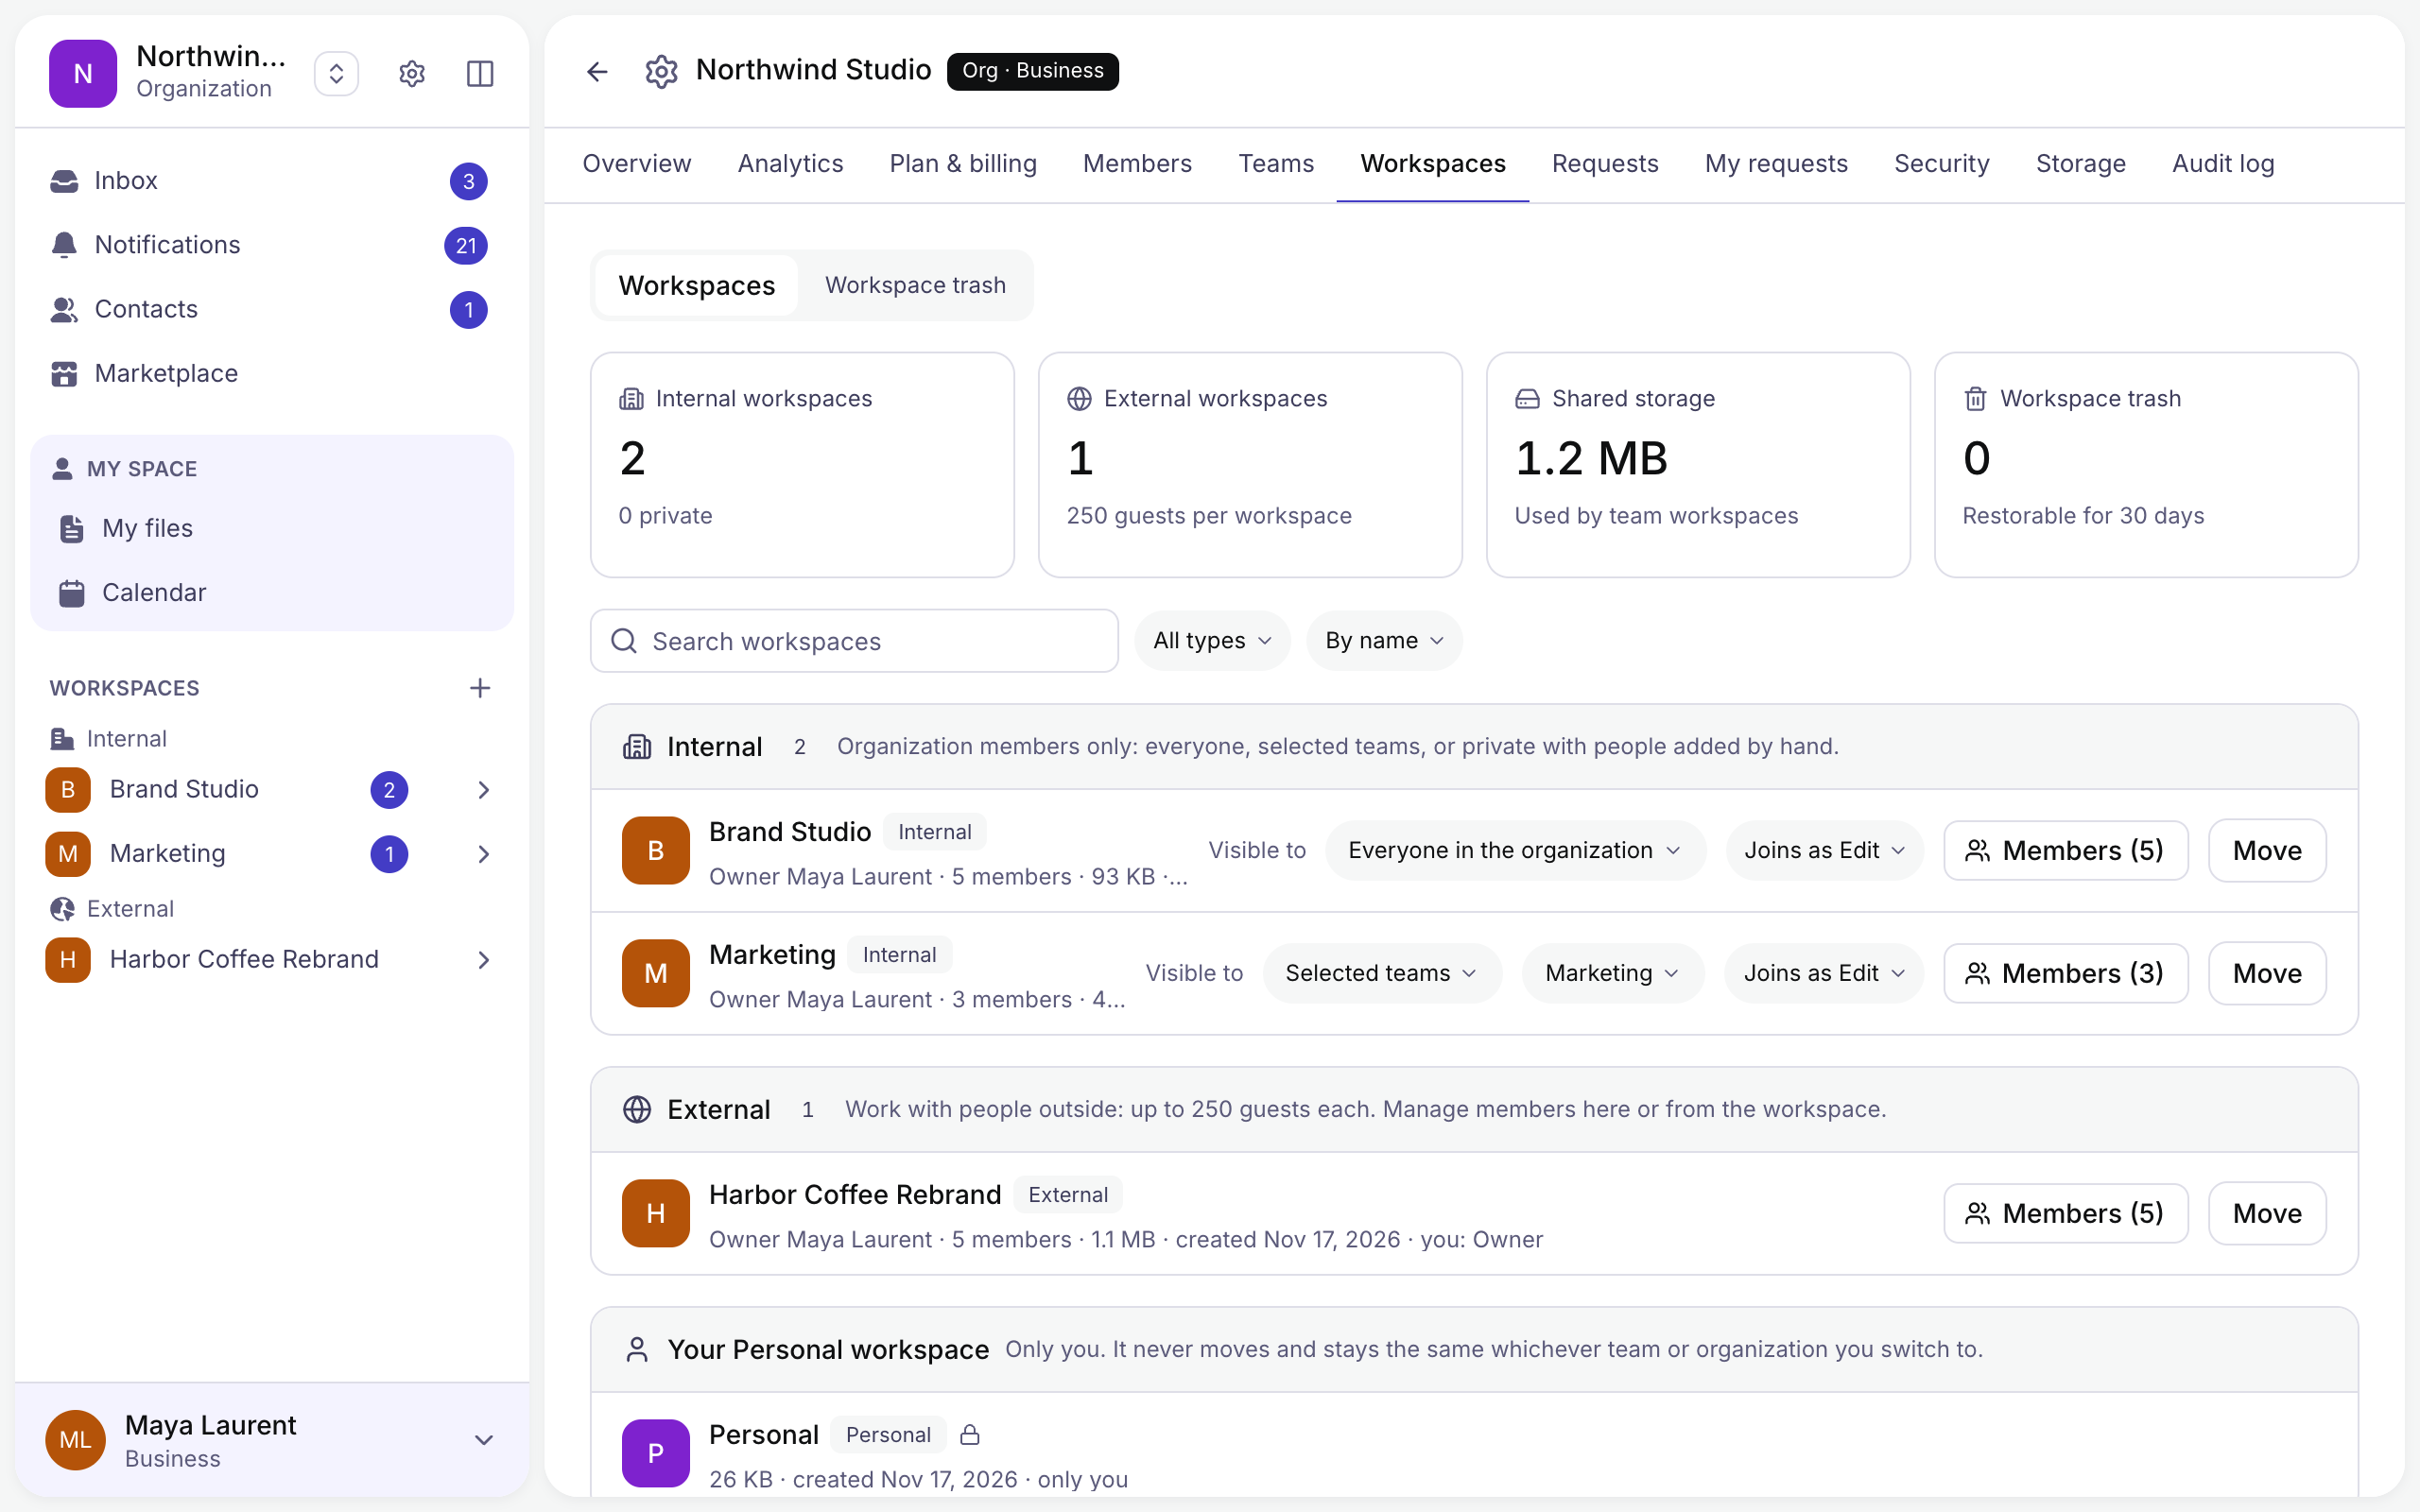
Assign a workspace to teams
Step 1: Open the Workspaces tab => Find the internal workspace.
Step 2: Under Visible to, choose who joins it:
- Everyone in the organization — every member sees it, now and when they join.
- Selected teams — the members of the teams you pick join automatically.
- Private — only the people you add by hand.
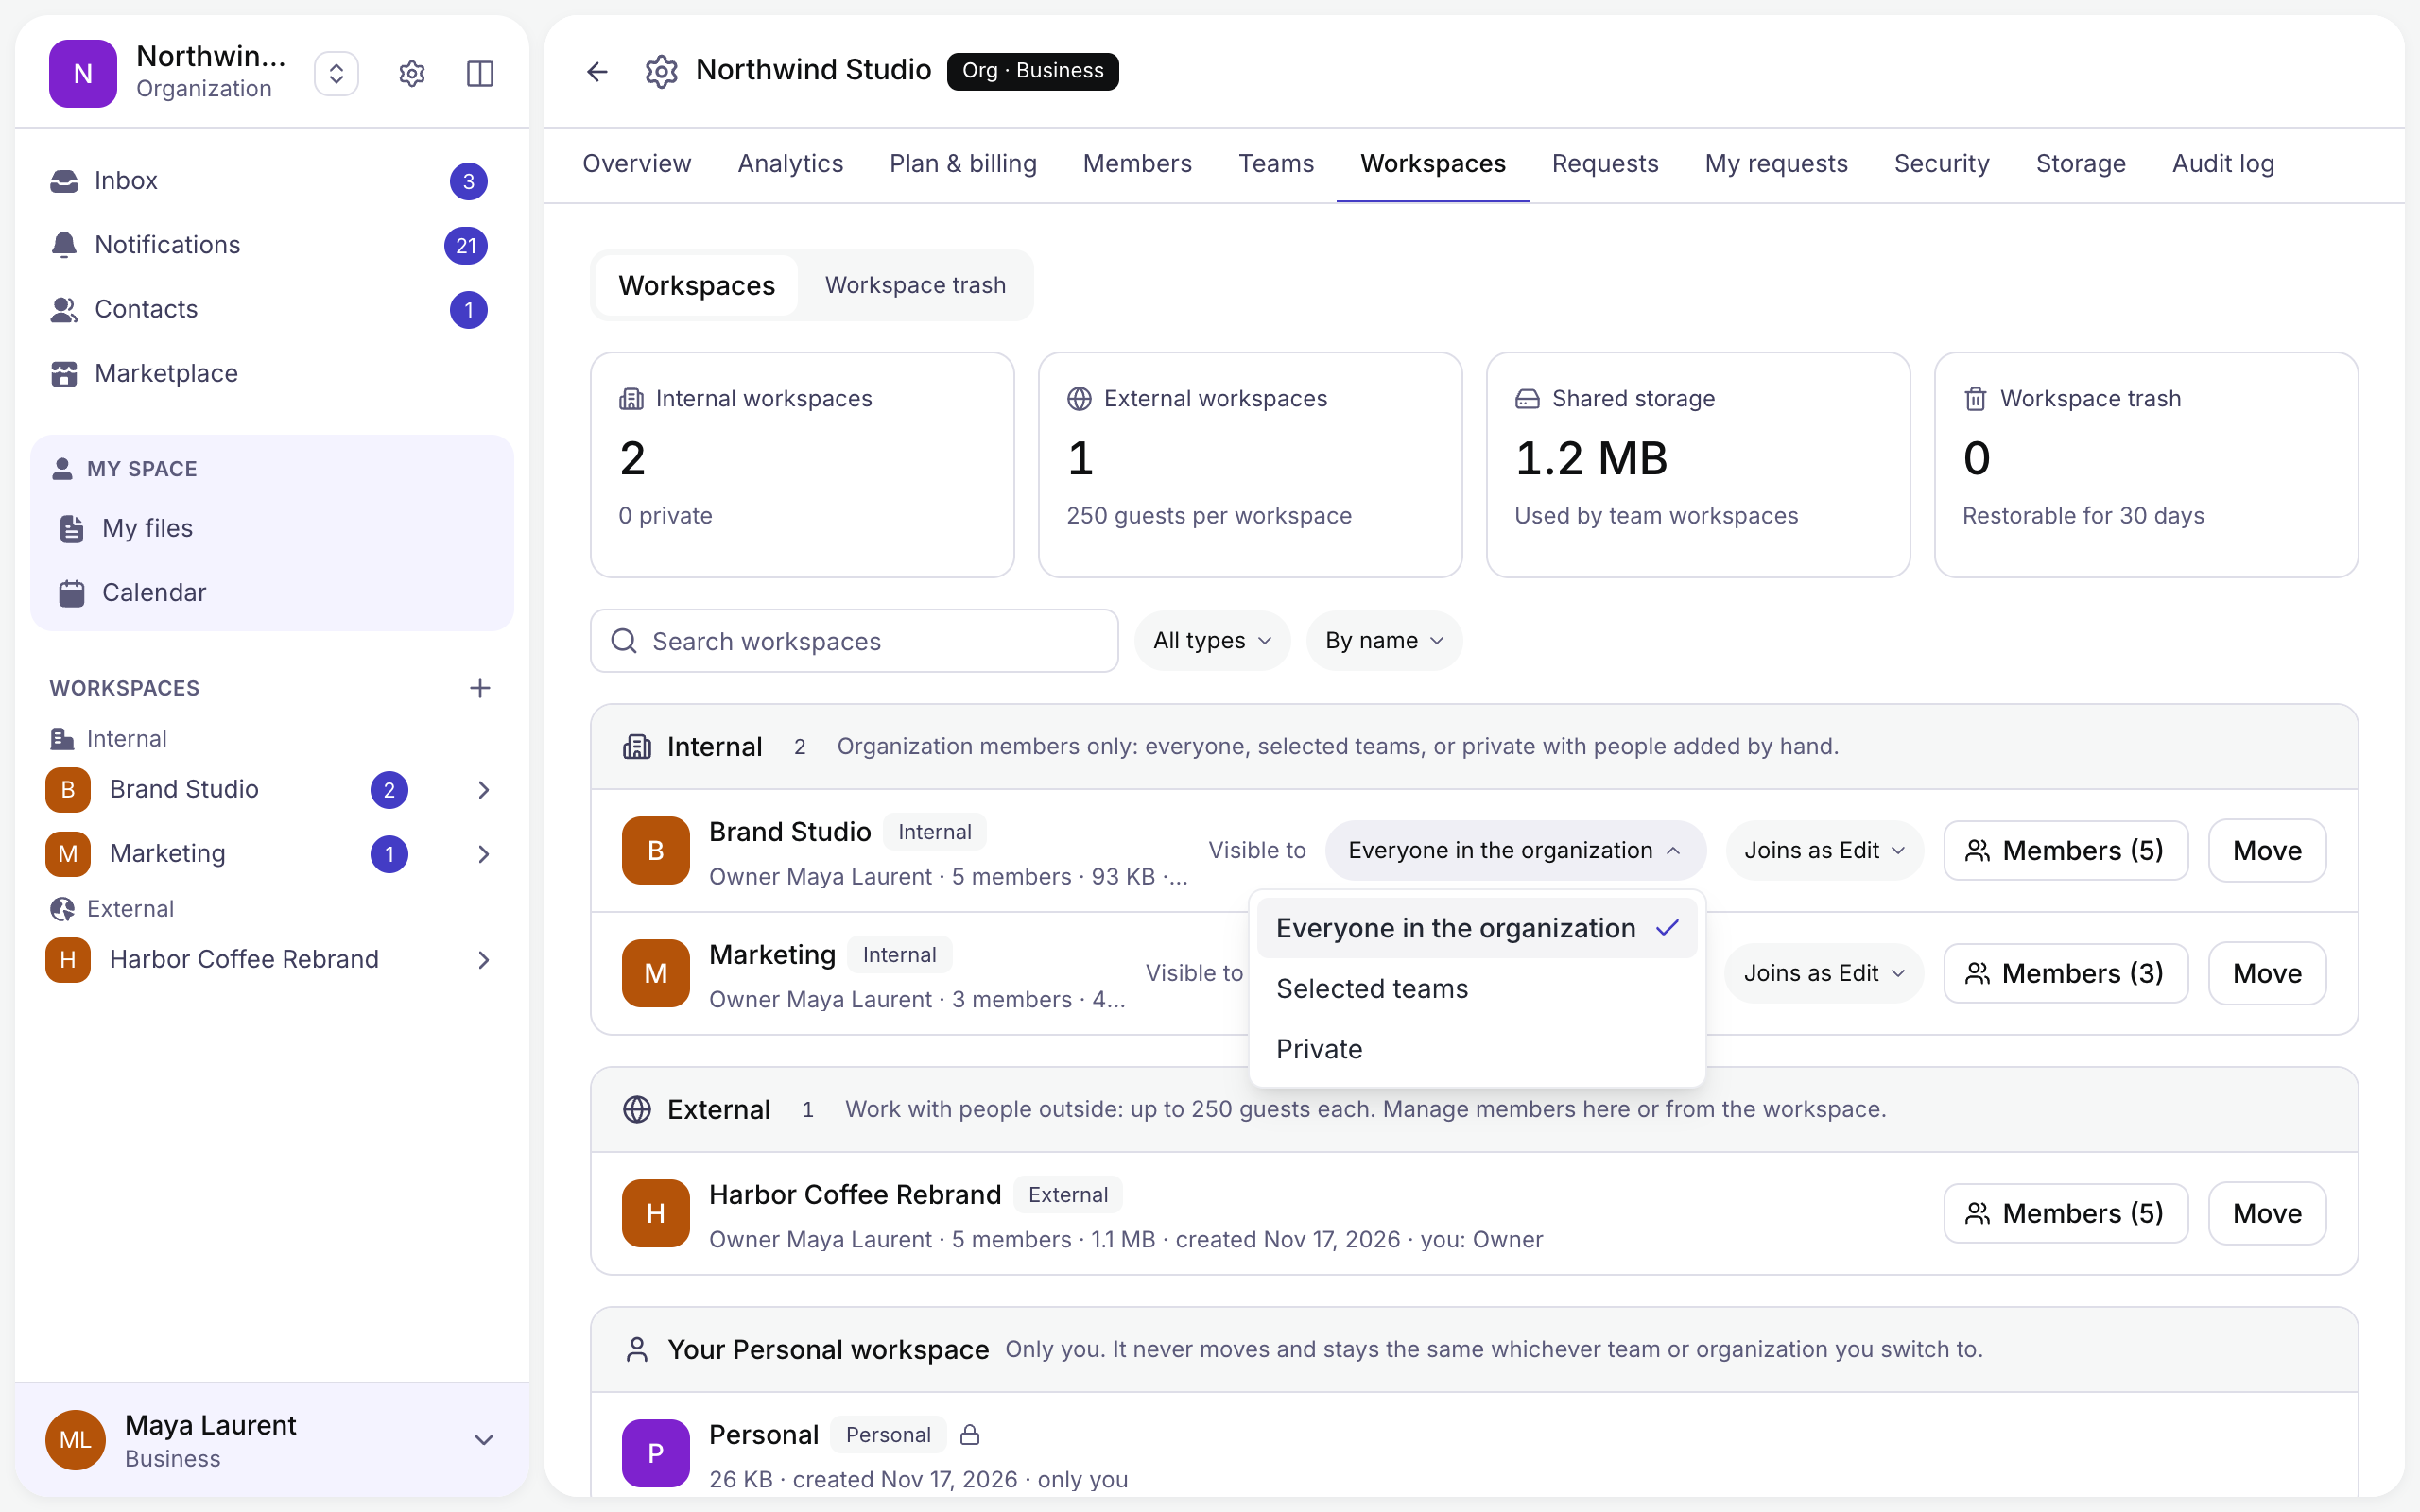
Step 3: With Selected teams, click the team menu next to it => Tick the teams.
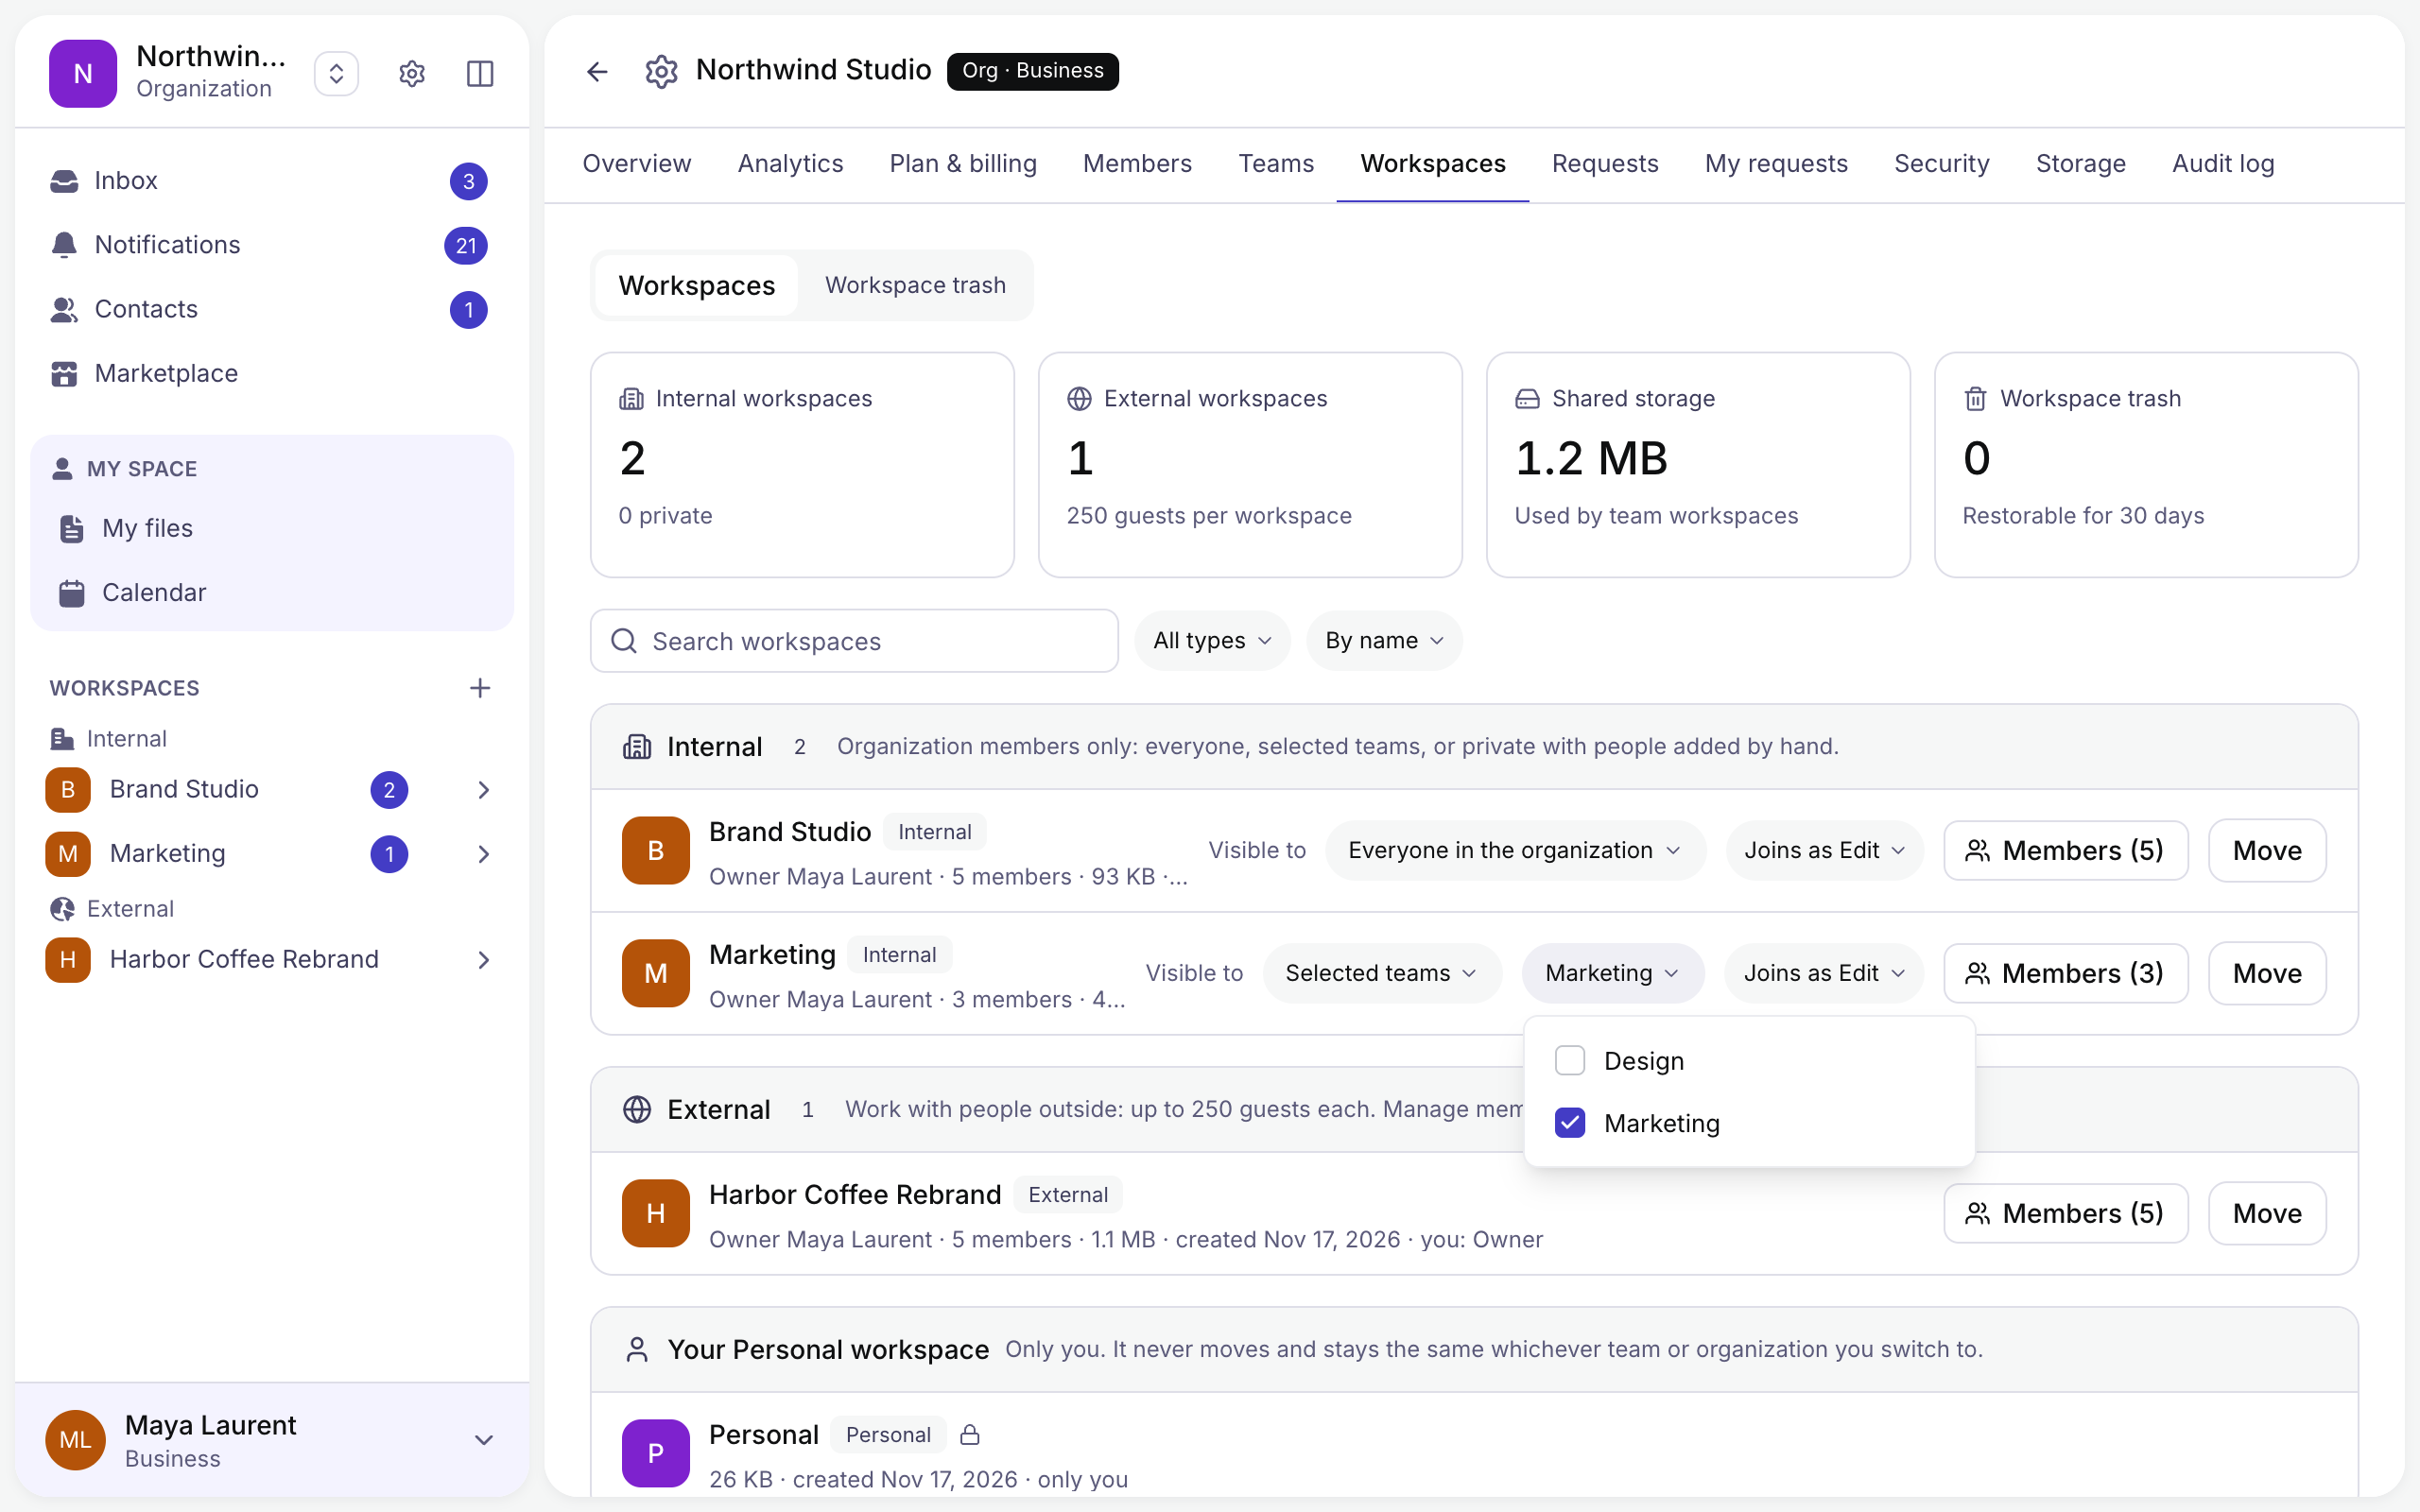
The members of those teams join the workspace at once, with the role shown under Joins as. Removing someone from the team removes them from the workspace too, unless they were added by hand.
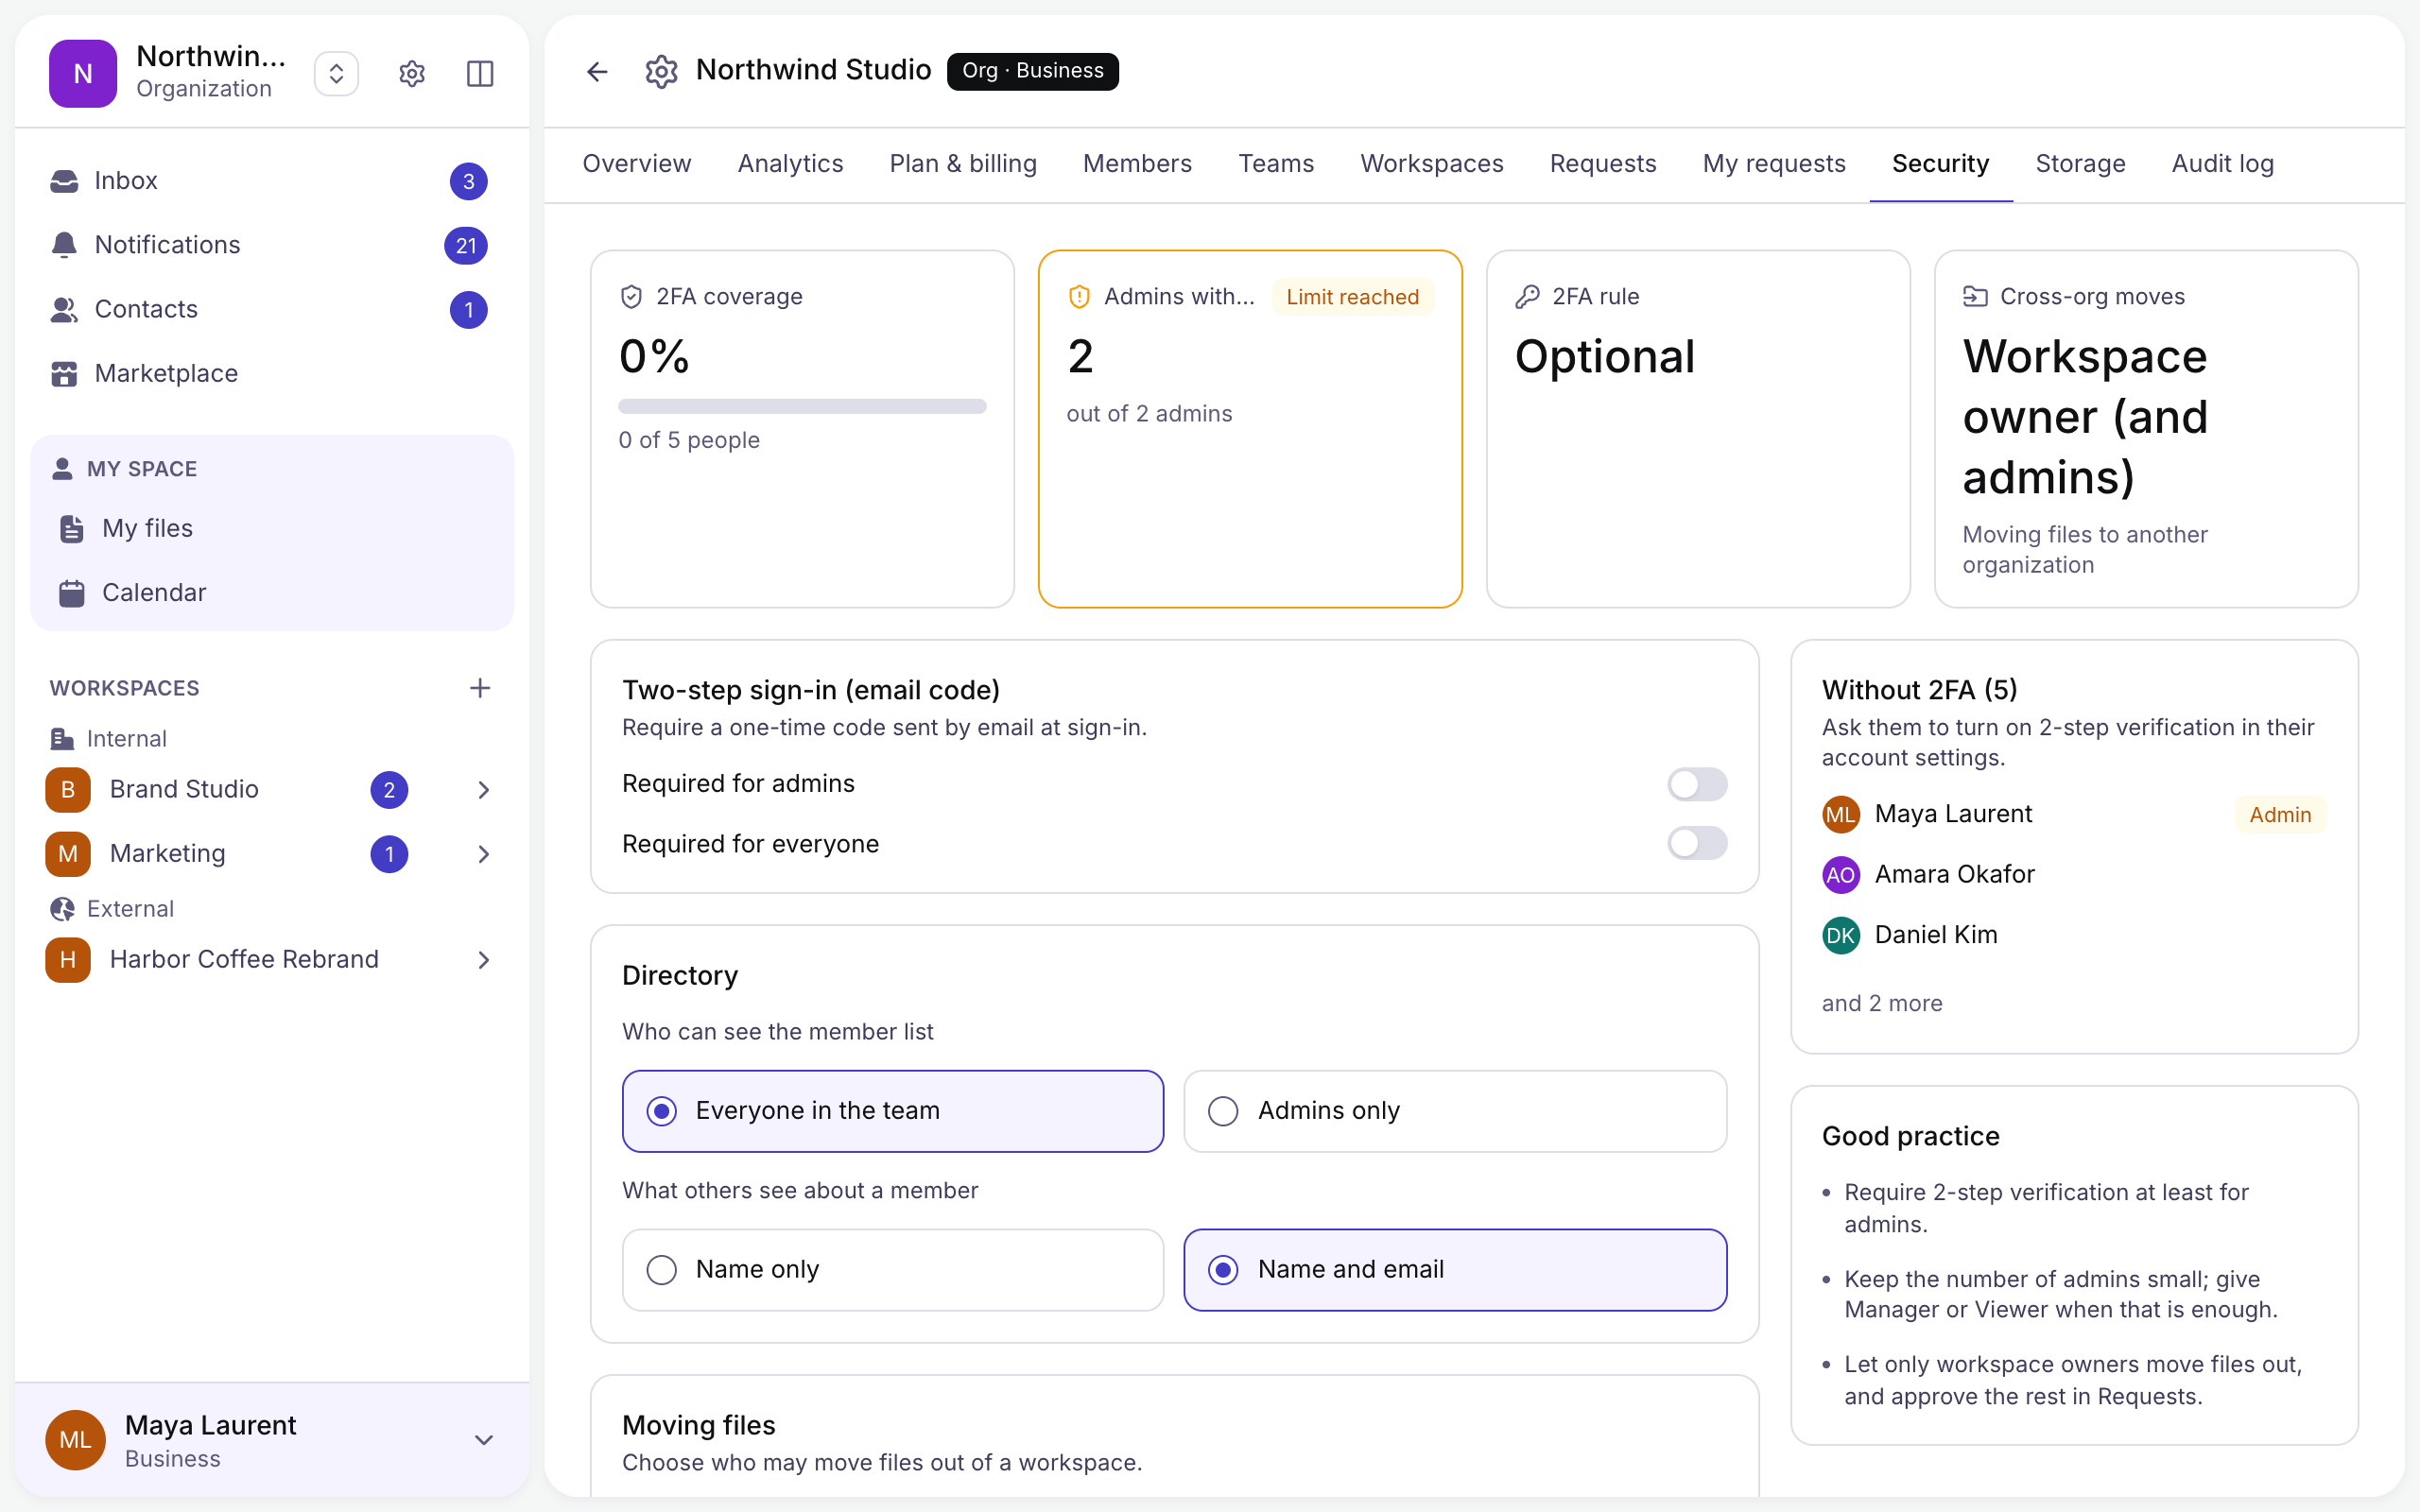
1.3.4 Security
Require two-step sign-in for administrators or for everyone, decide who can see the member list and how much of it, and set who may move files out of a workspace.
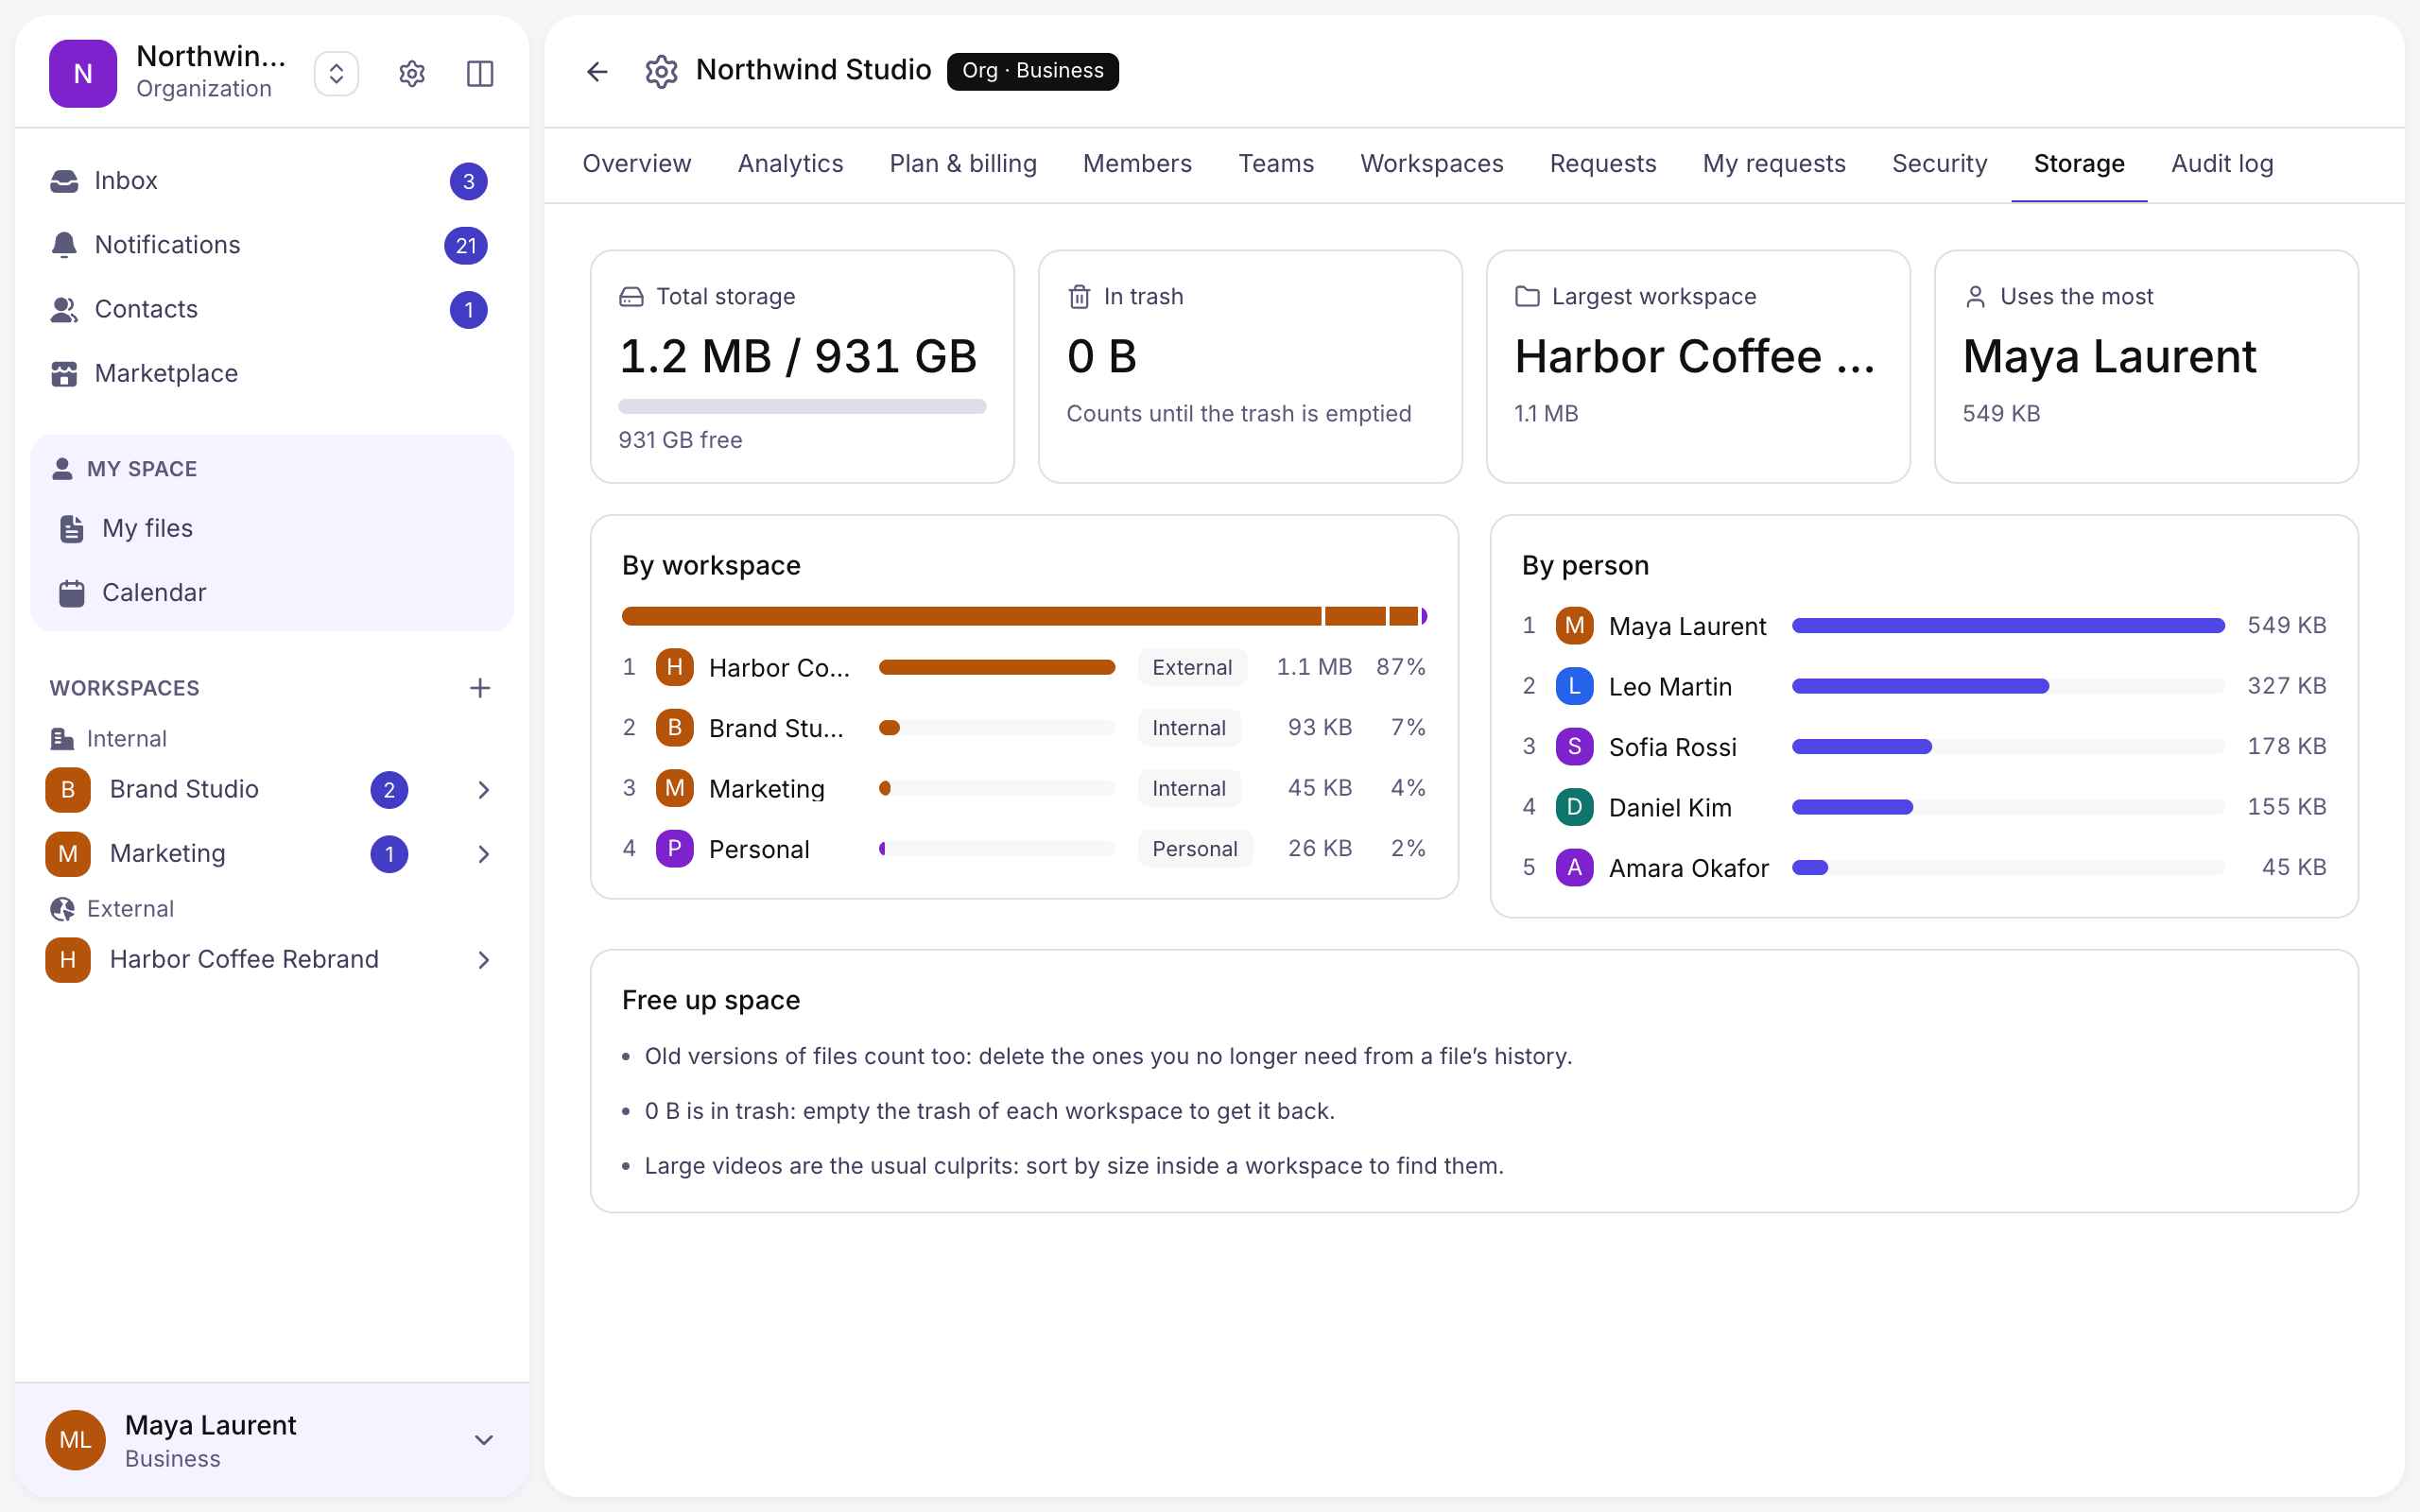
1.3.5 Storage
How much storage is used, by workspace and by person, and what can be freed.
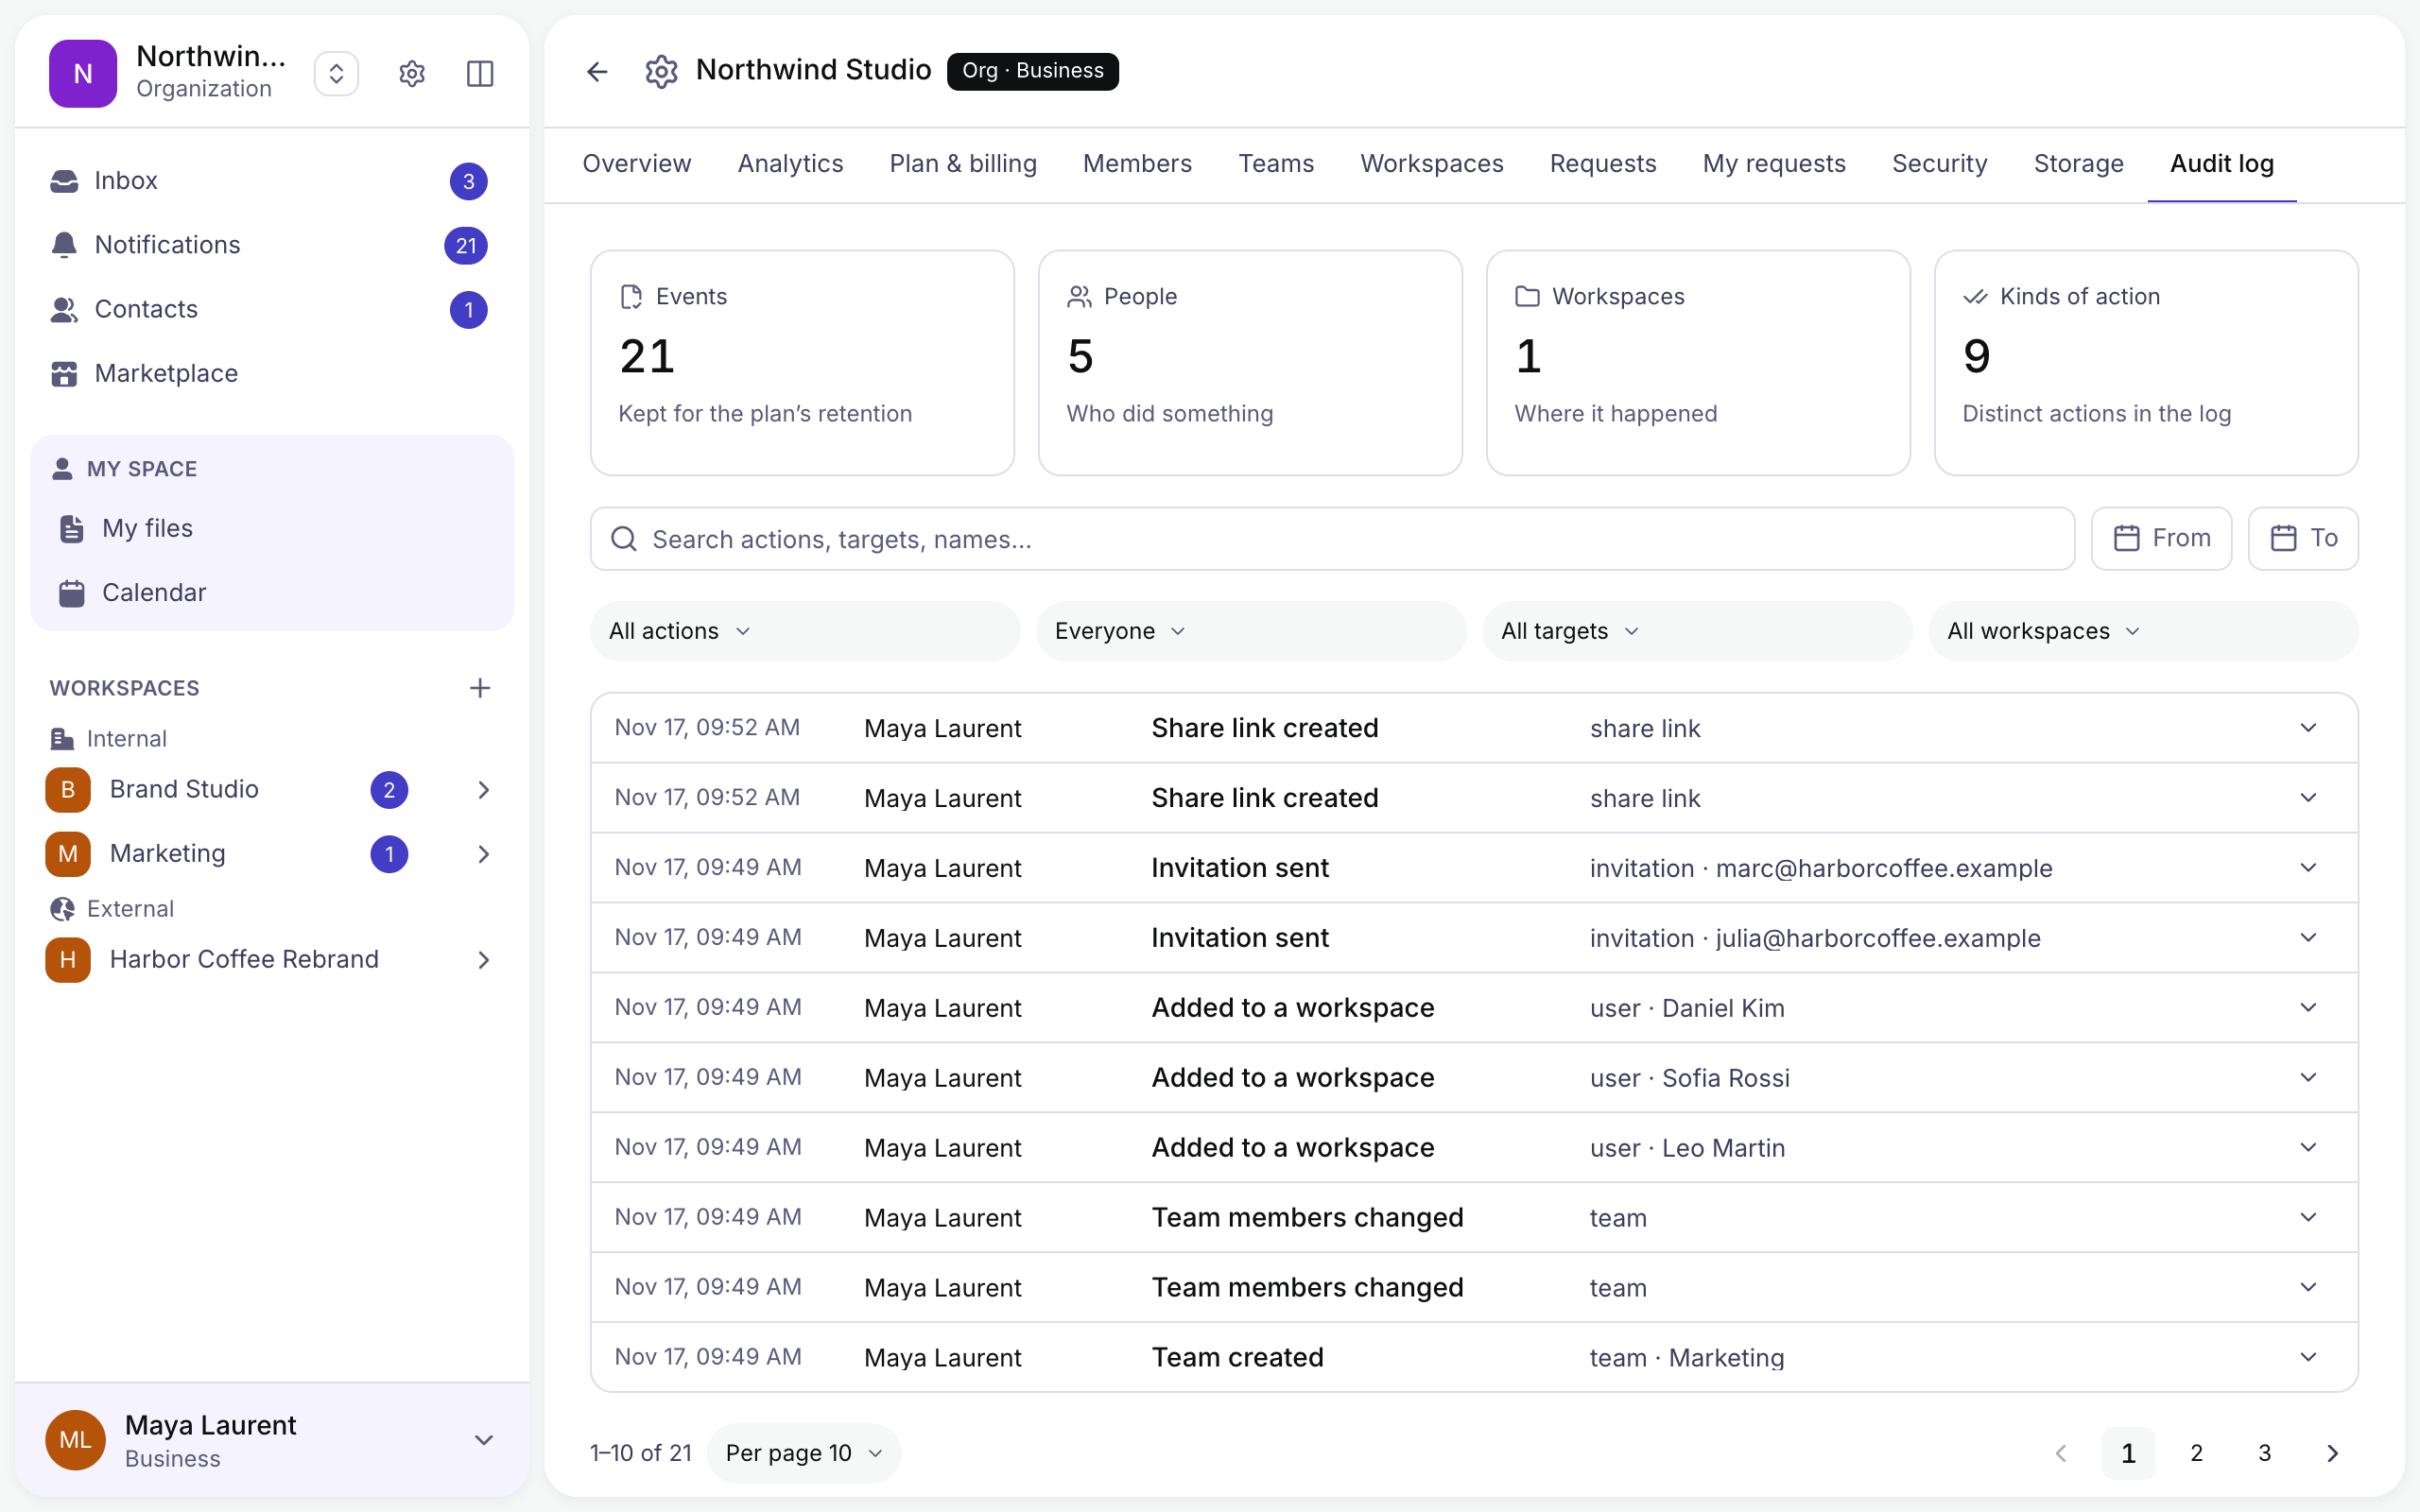
1.3.6 Audit Log
A record of who did what: members added or removed, roles changed, invitations, share links, settings. Search it, or filter by action, person, workspace and date.
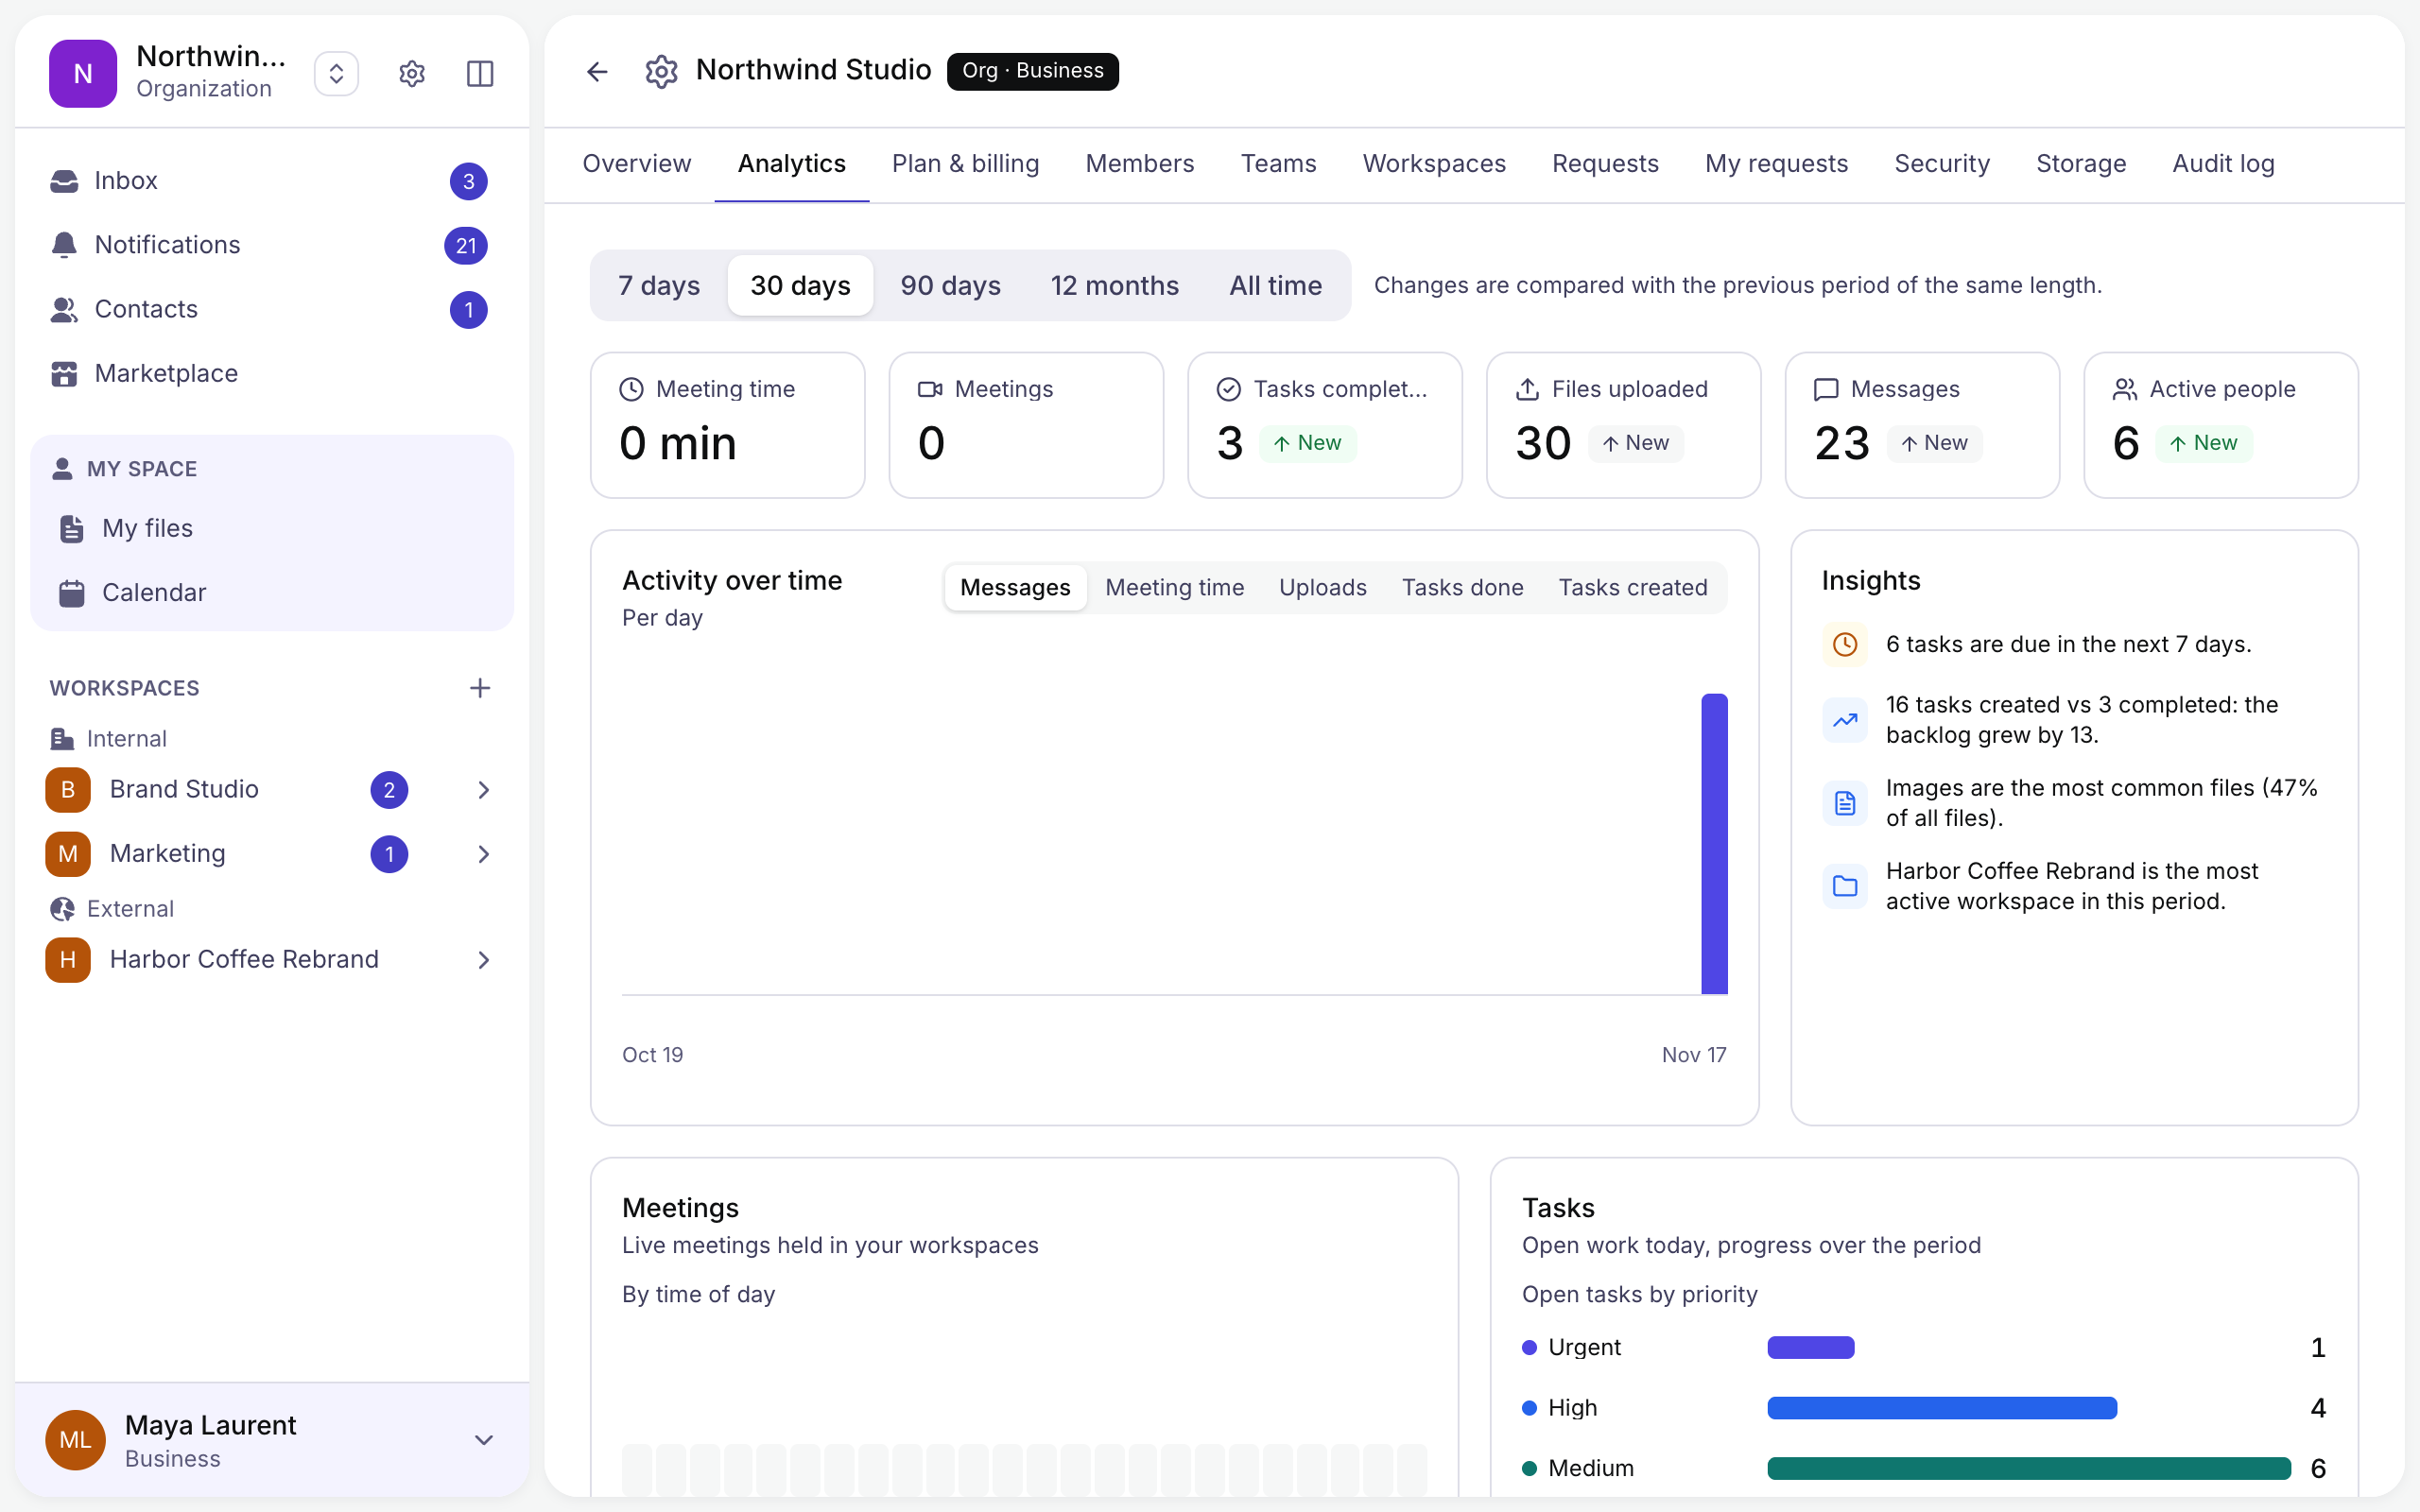
1.3.7 Analytics
Activity over a chosen period: messages, uploads, meetings, tasks completed and active people, with a few insights.
1.4 Files
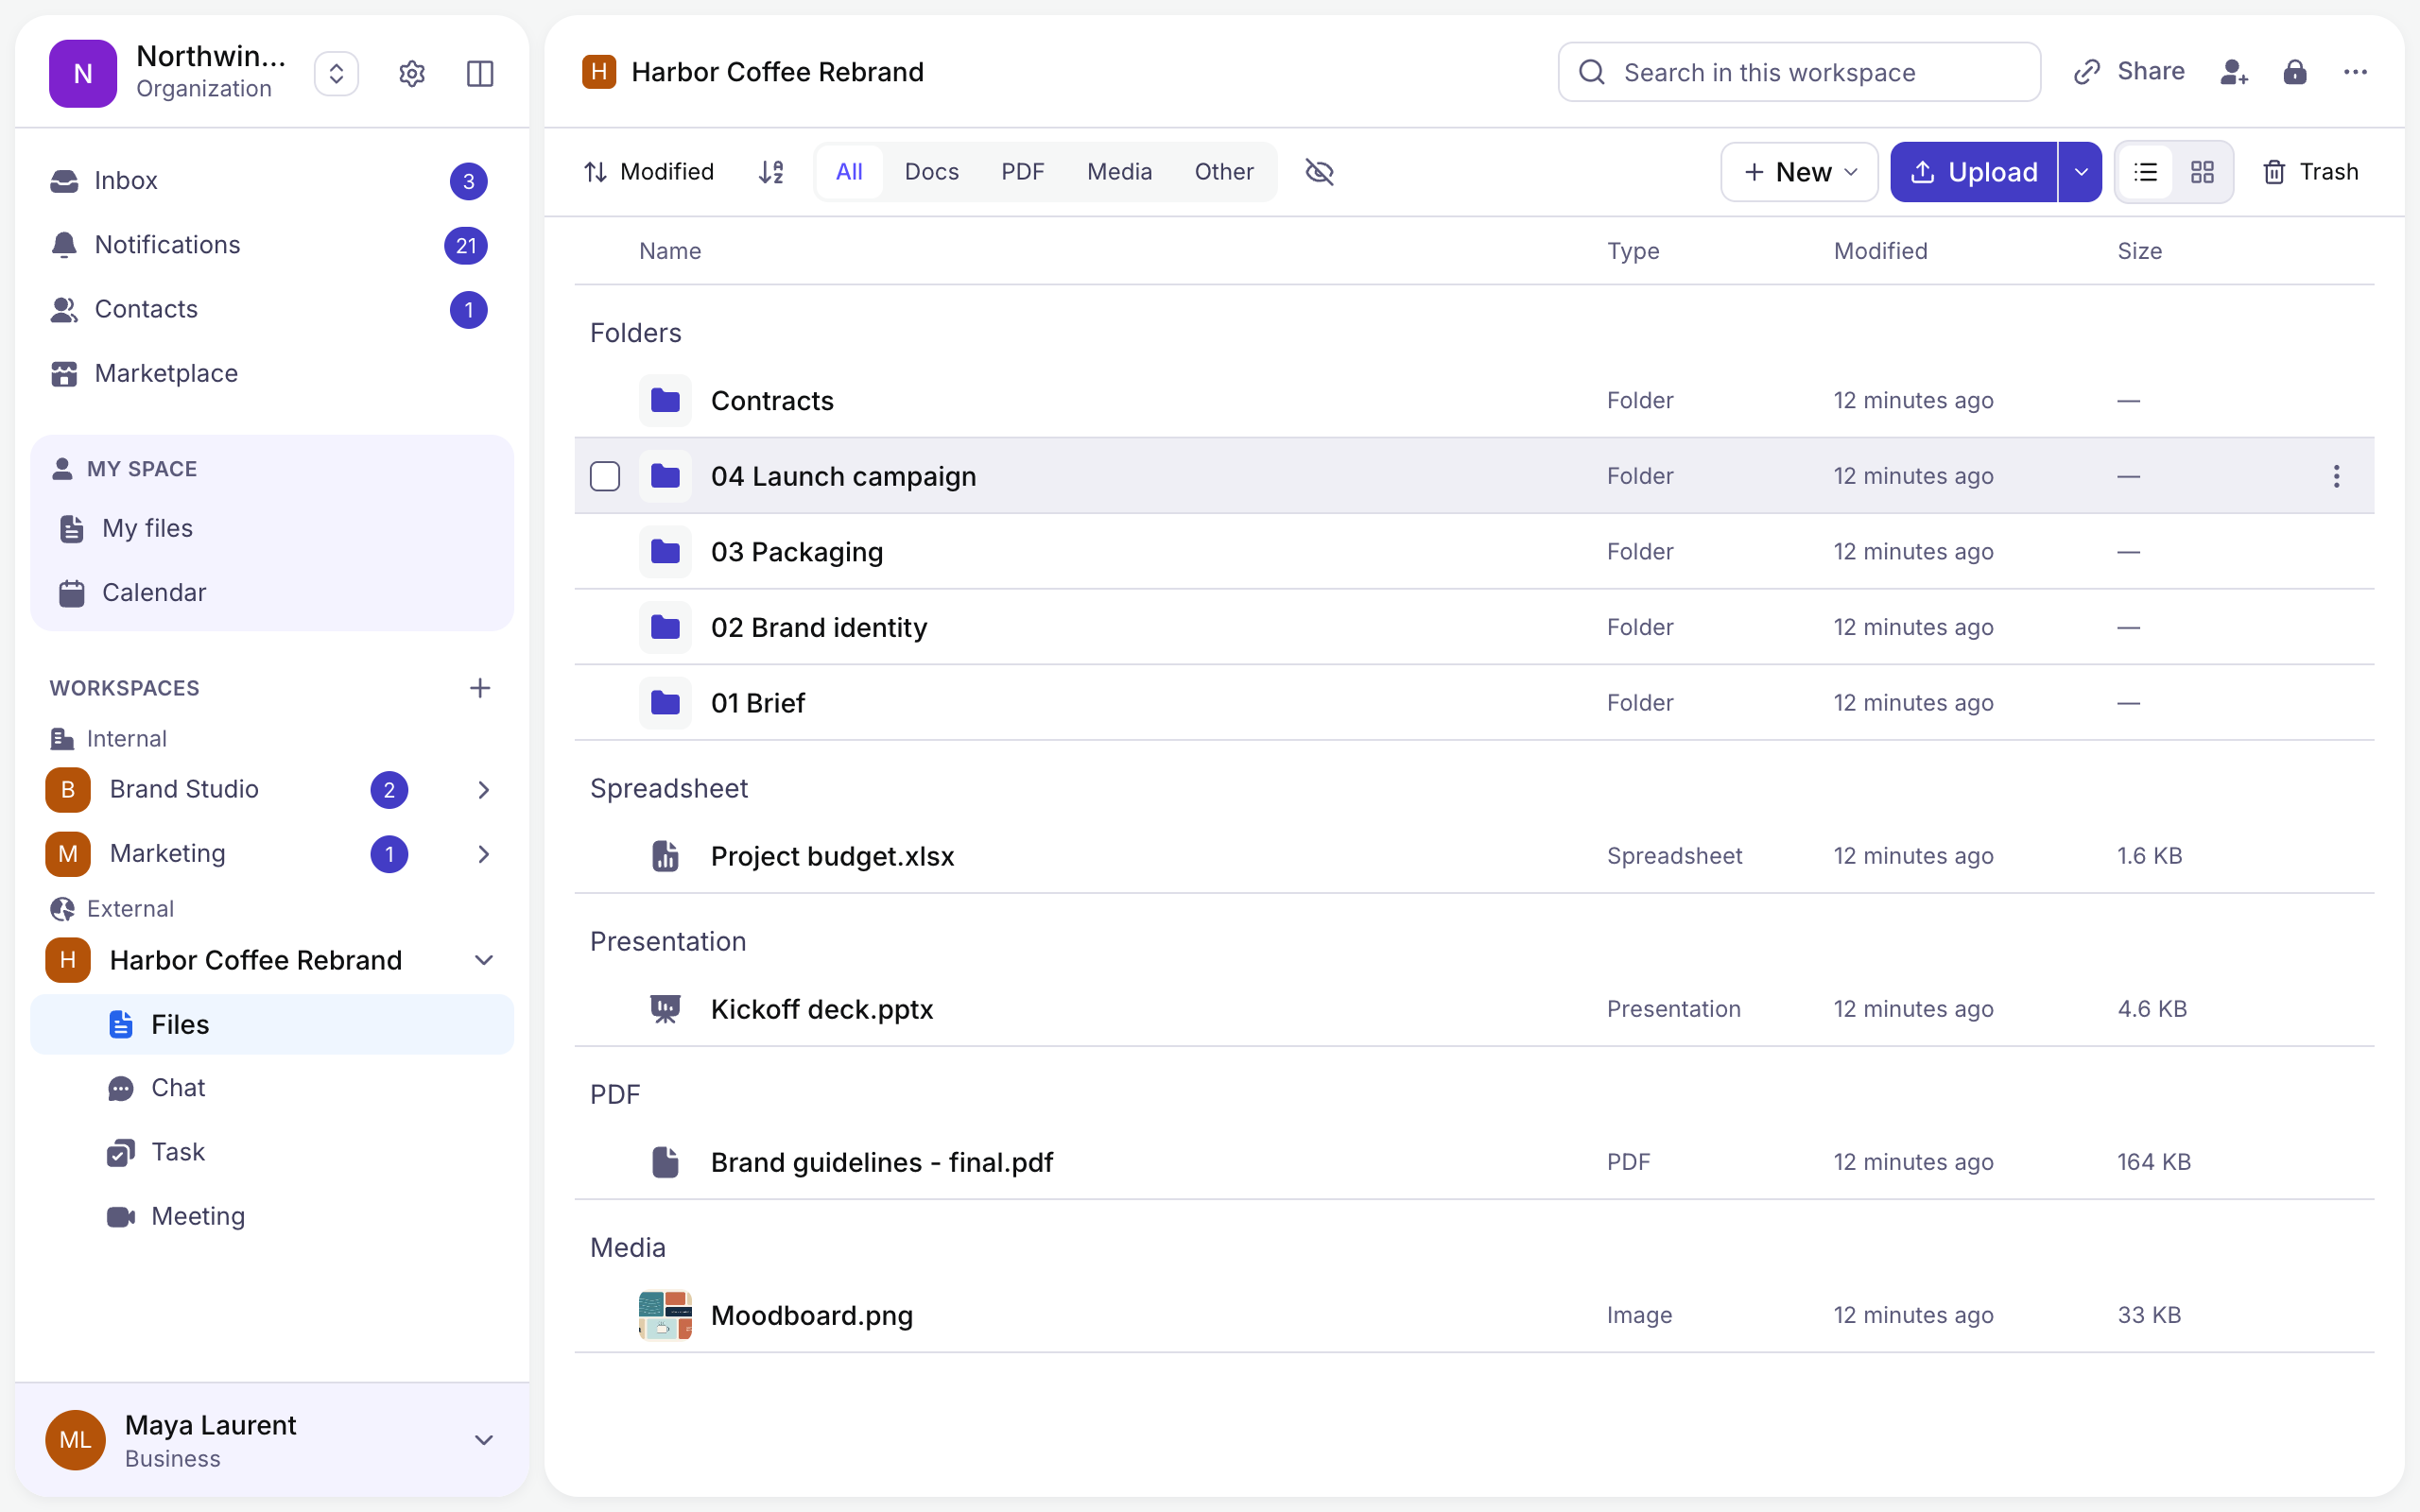
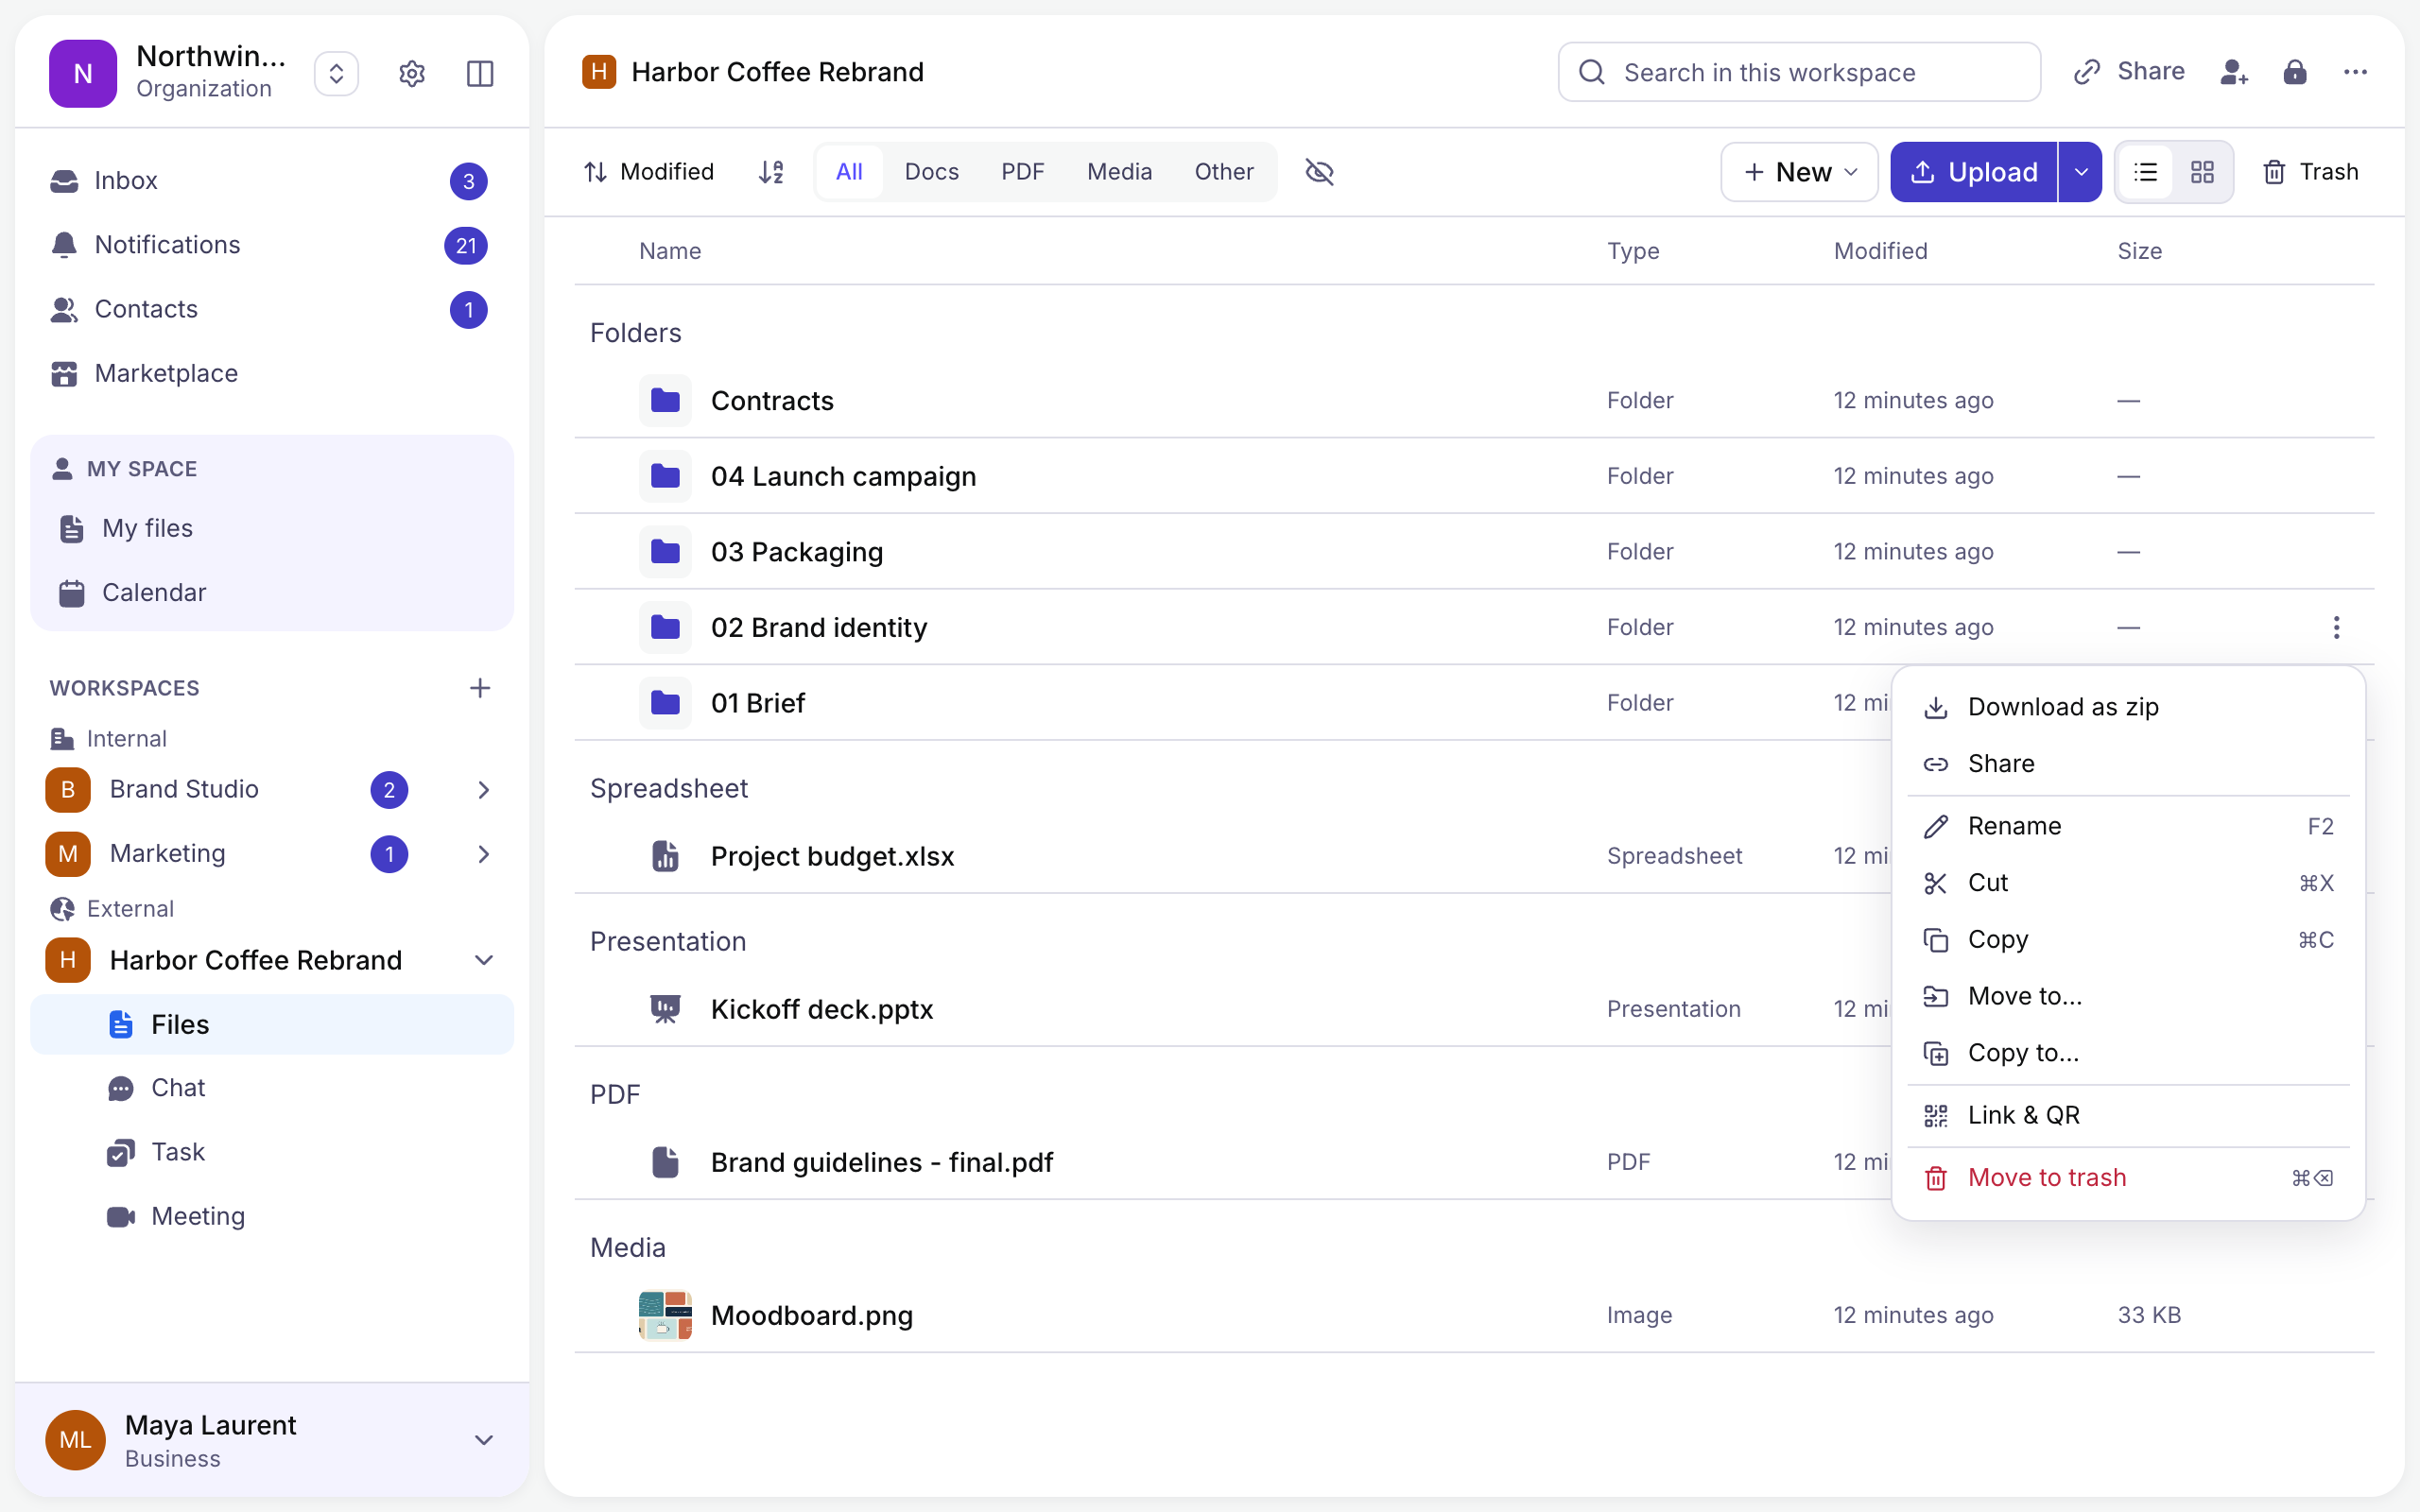
The Files view of a workspace shows its folders and files. The toolbar lets you sort, filter by kind (Docs, PDF, Media, Other), create with New, add with Upload, and switch between two layouts.
1.4.1 List view
Names with their type, last change and size, grouped by kind.
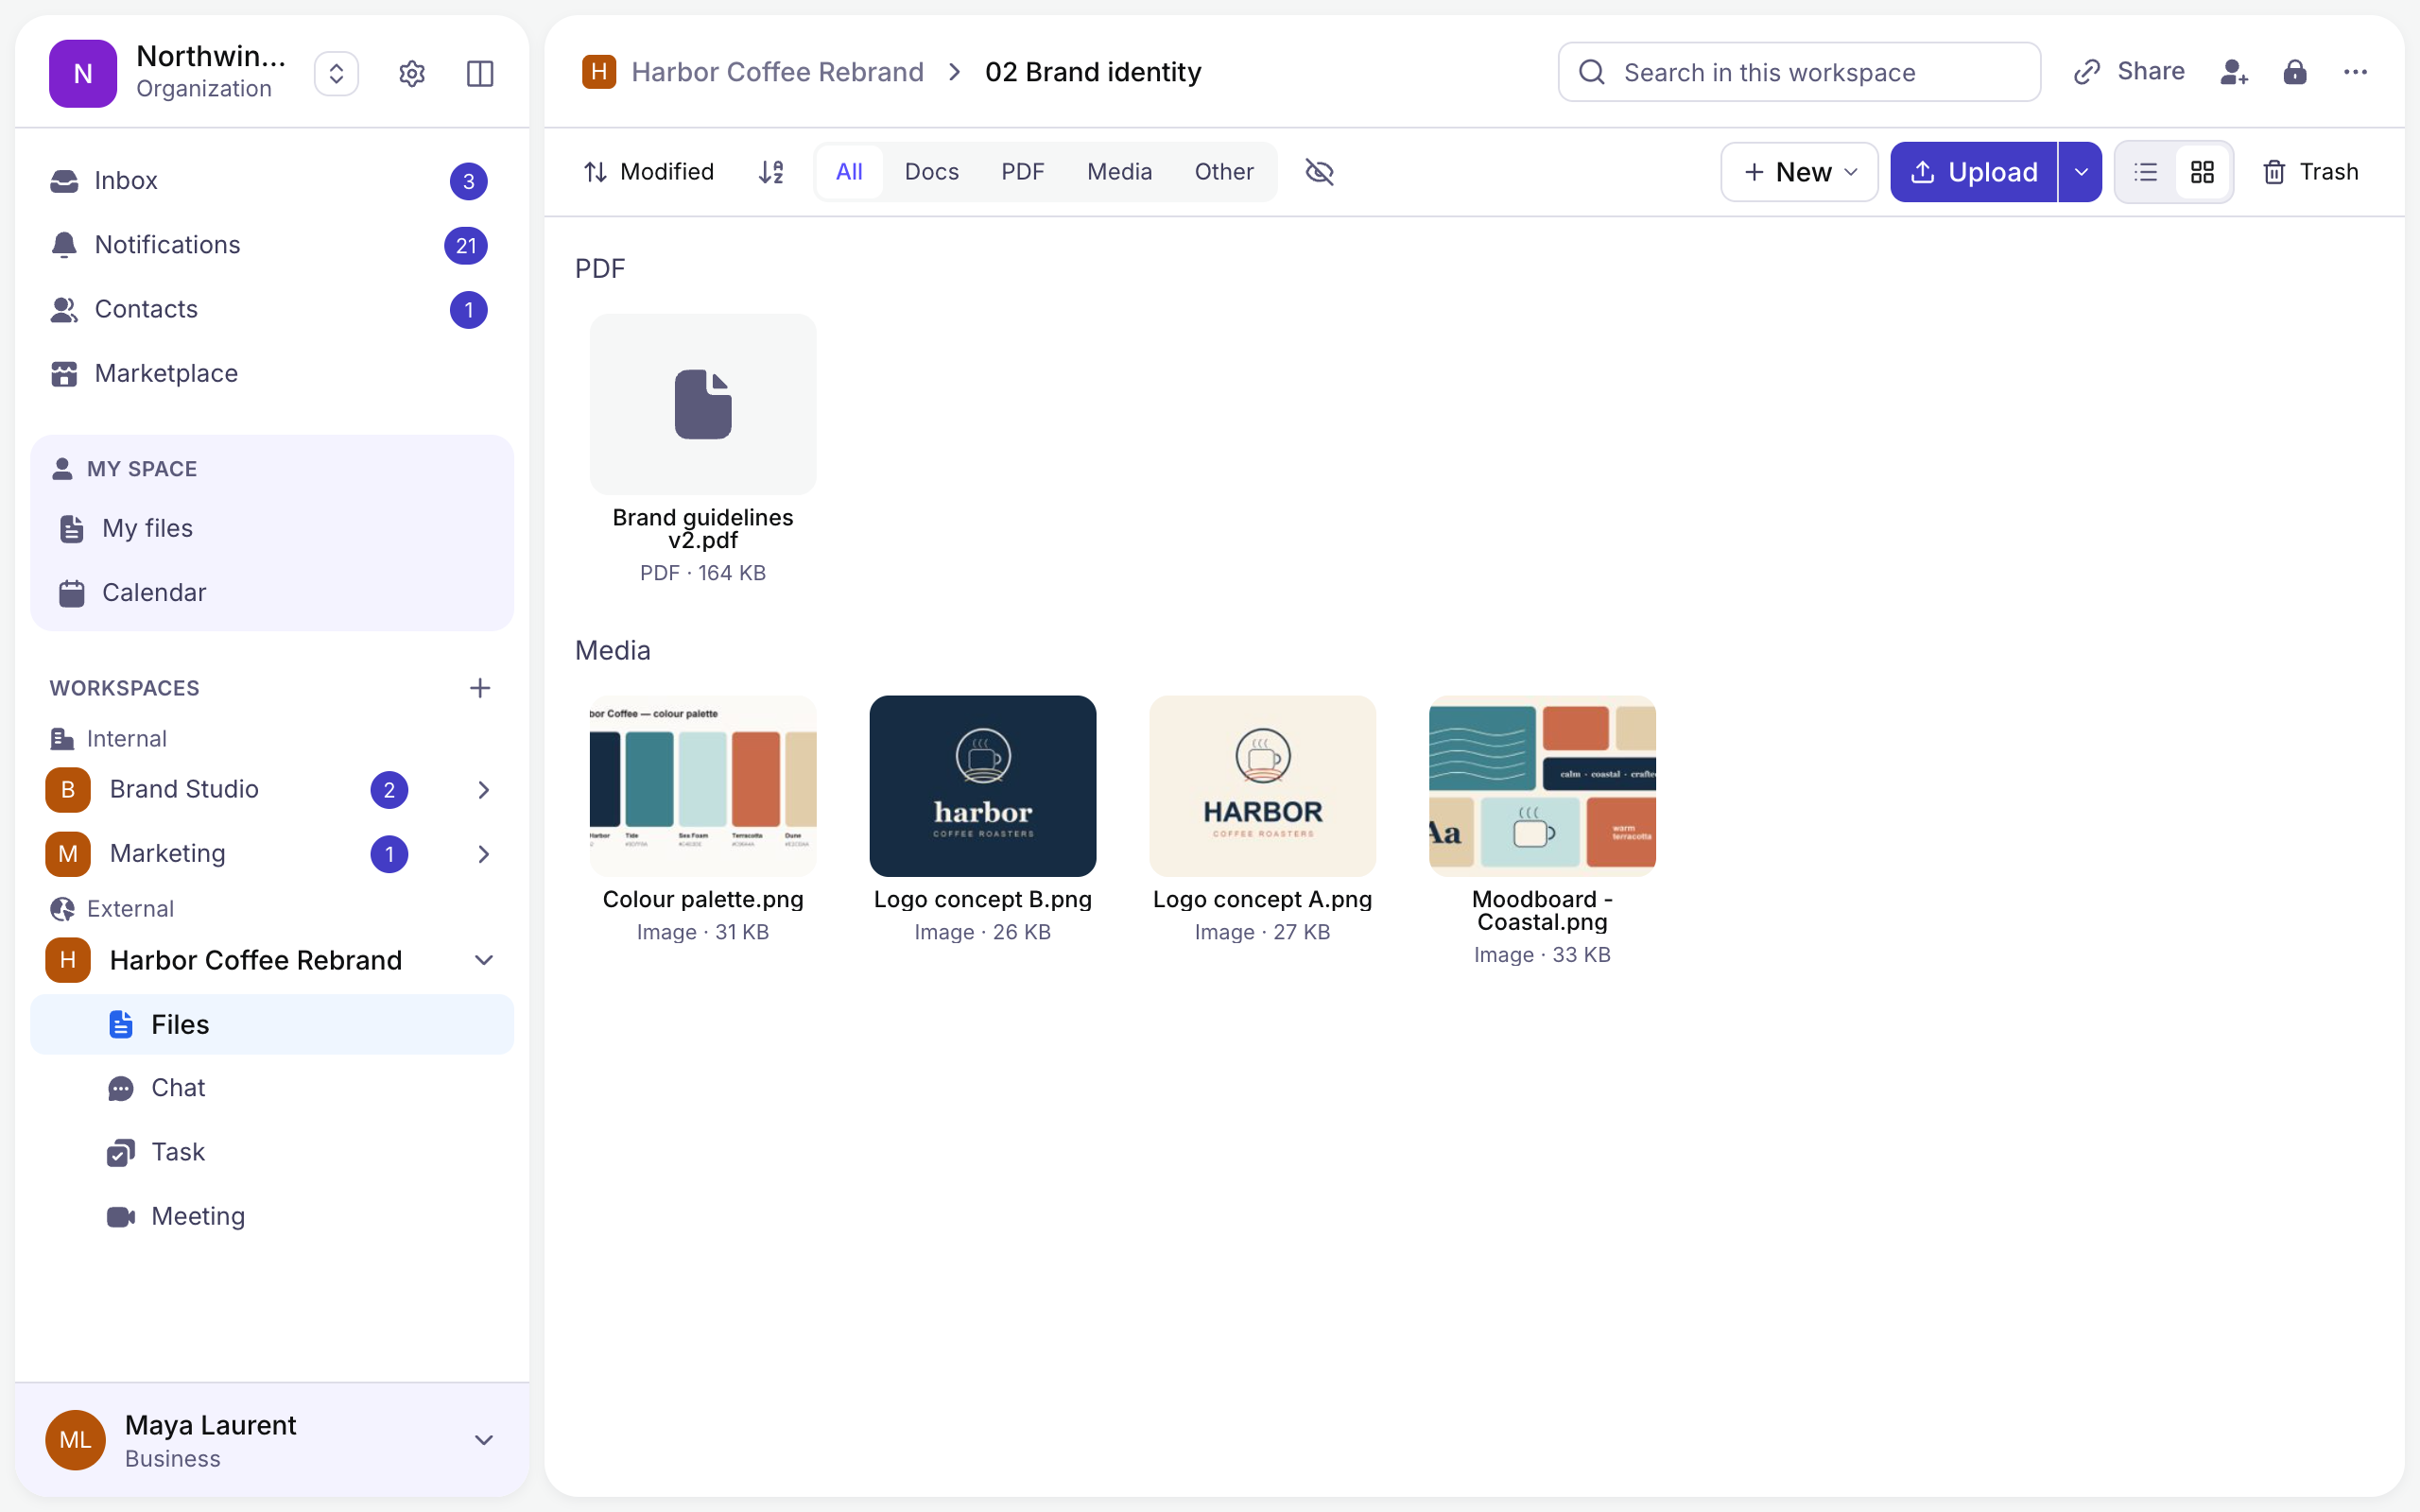
1.4.2 Grid view
Thumbnails first — the quickest way through images and videos.
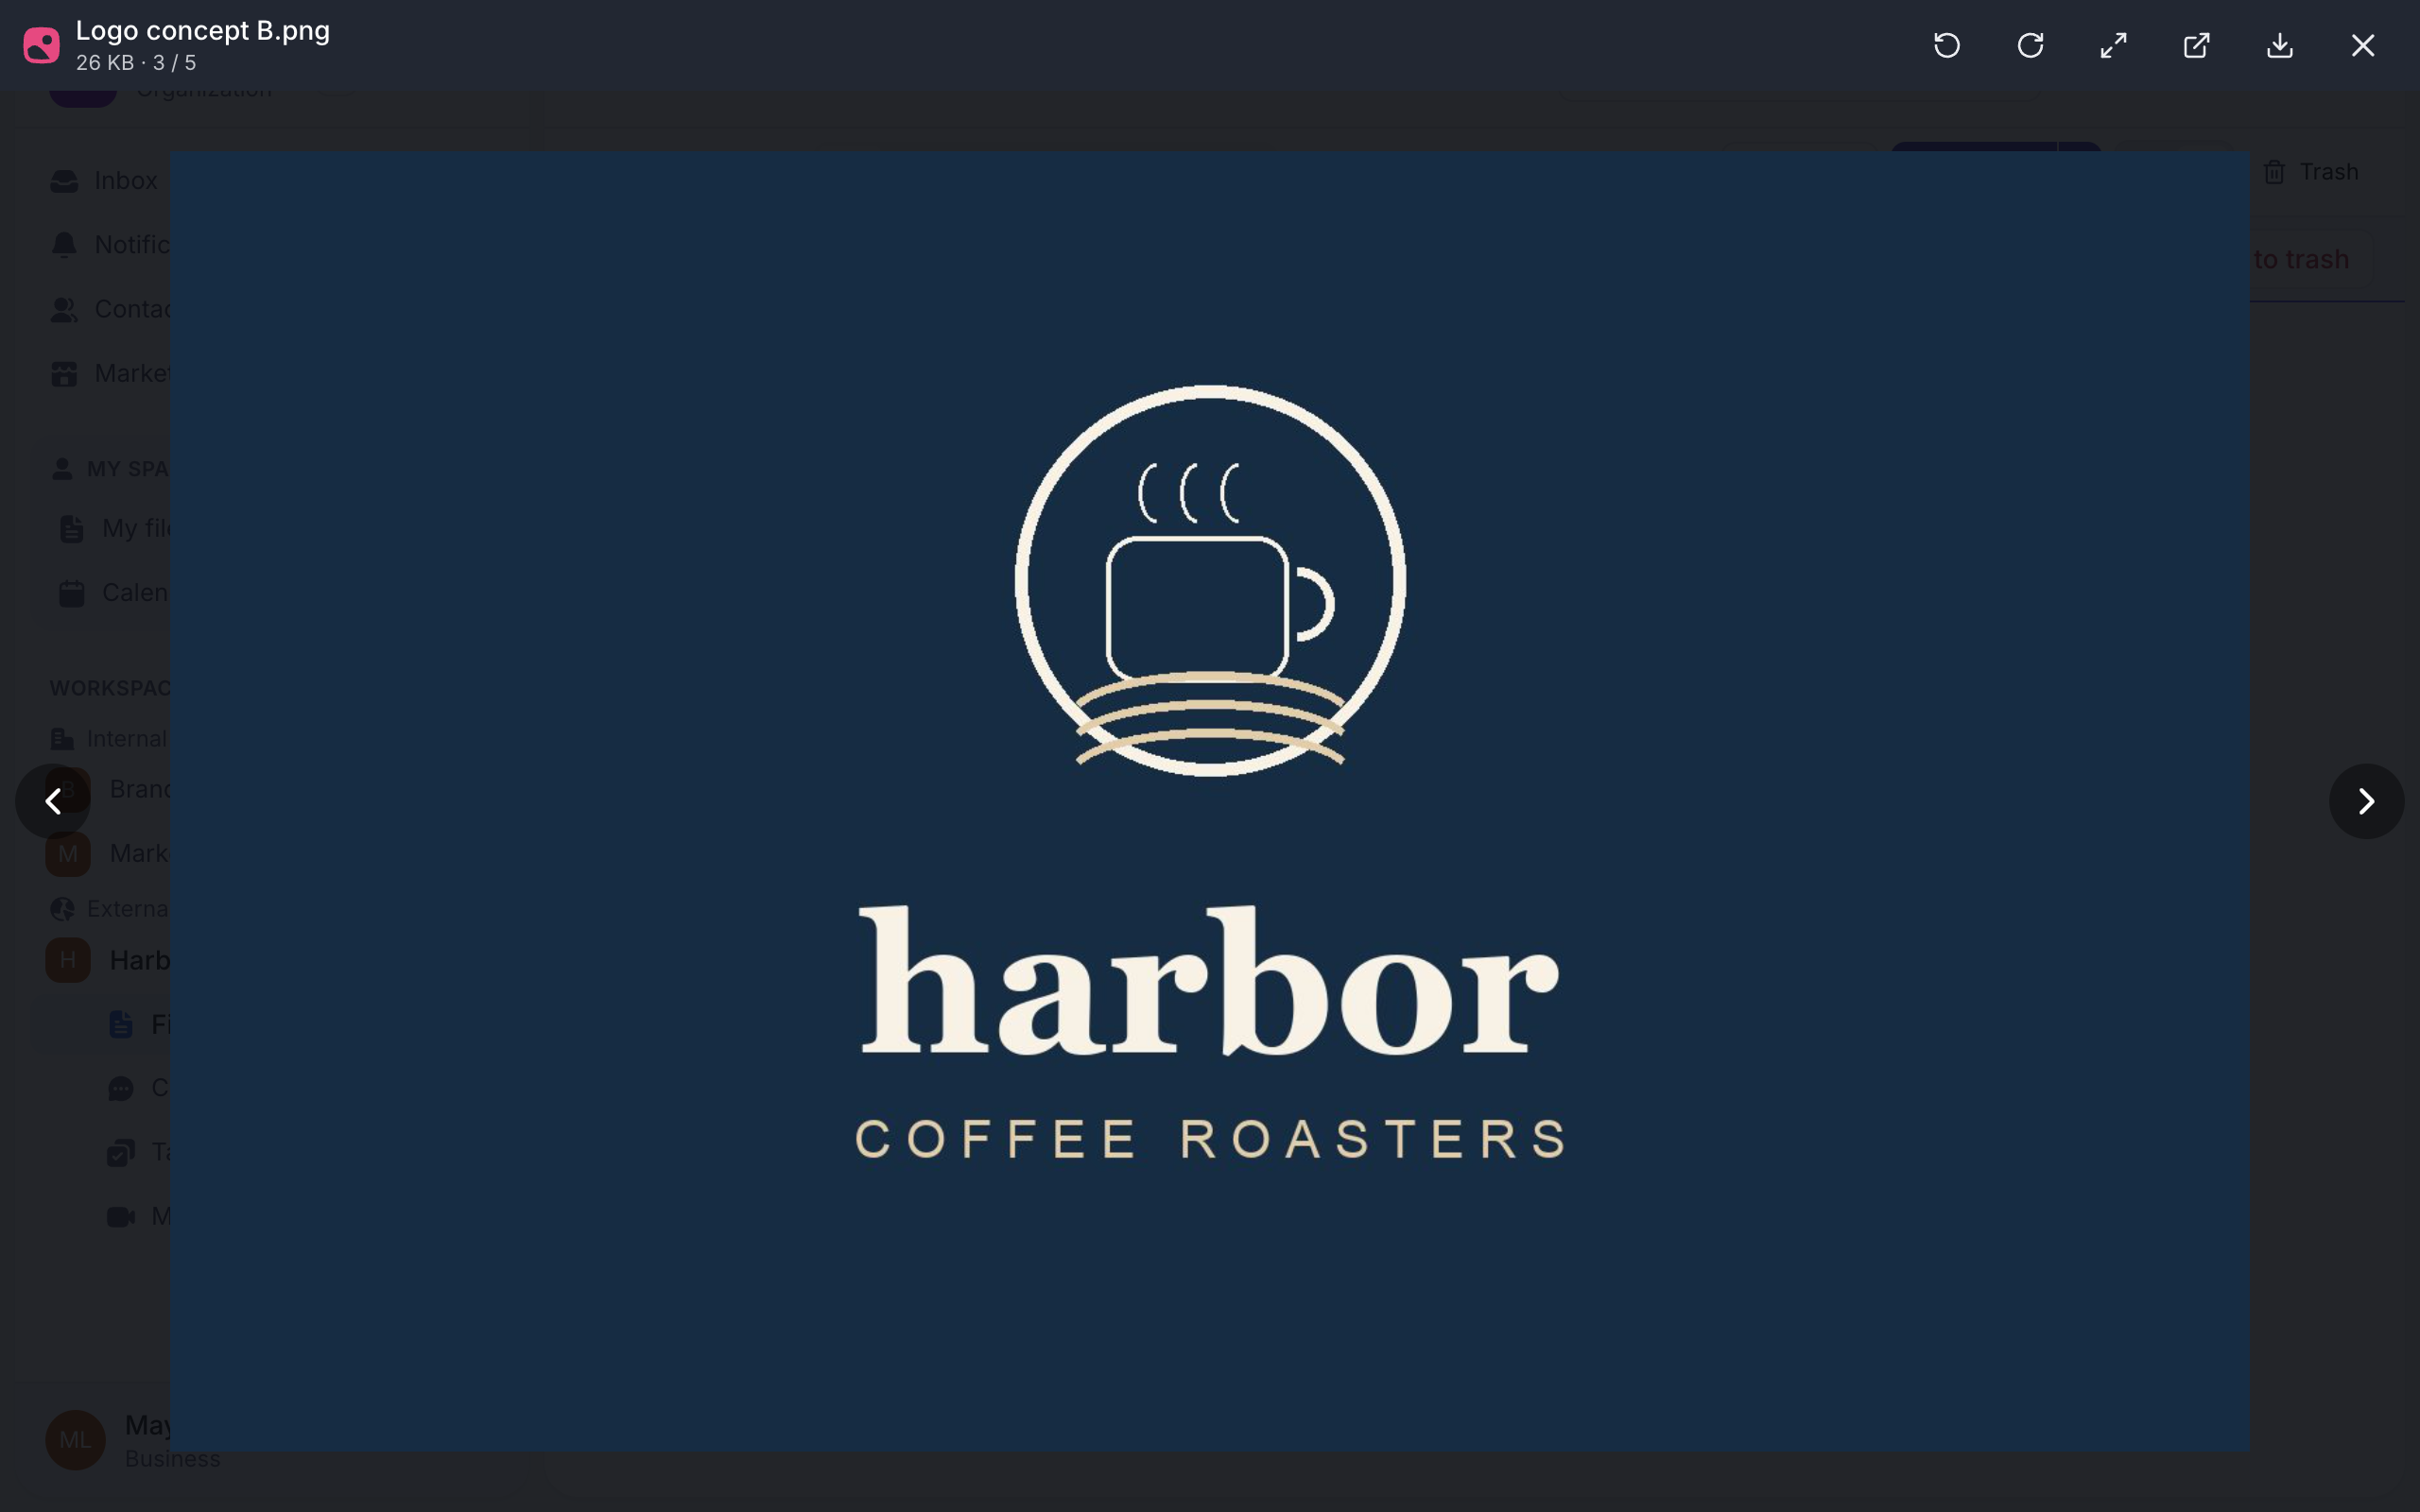
1.4.3 Viewer
Double-click a file to open it. Images, videos, PDFs and text open in the viewer; Word, Excel and PowerPoint files open in the editor, where several people can work at once.
1.4.4 Actions
The ⋮ menu of a file or folder: download, share, rename, cut and copy, move or copy elsewhere, get its link and QR code, or move it to the trash.
1.5 Task
The Task view of a workspace keeps its work in one place, in six layouts.
| View | What it shows |
|---|---|
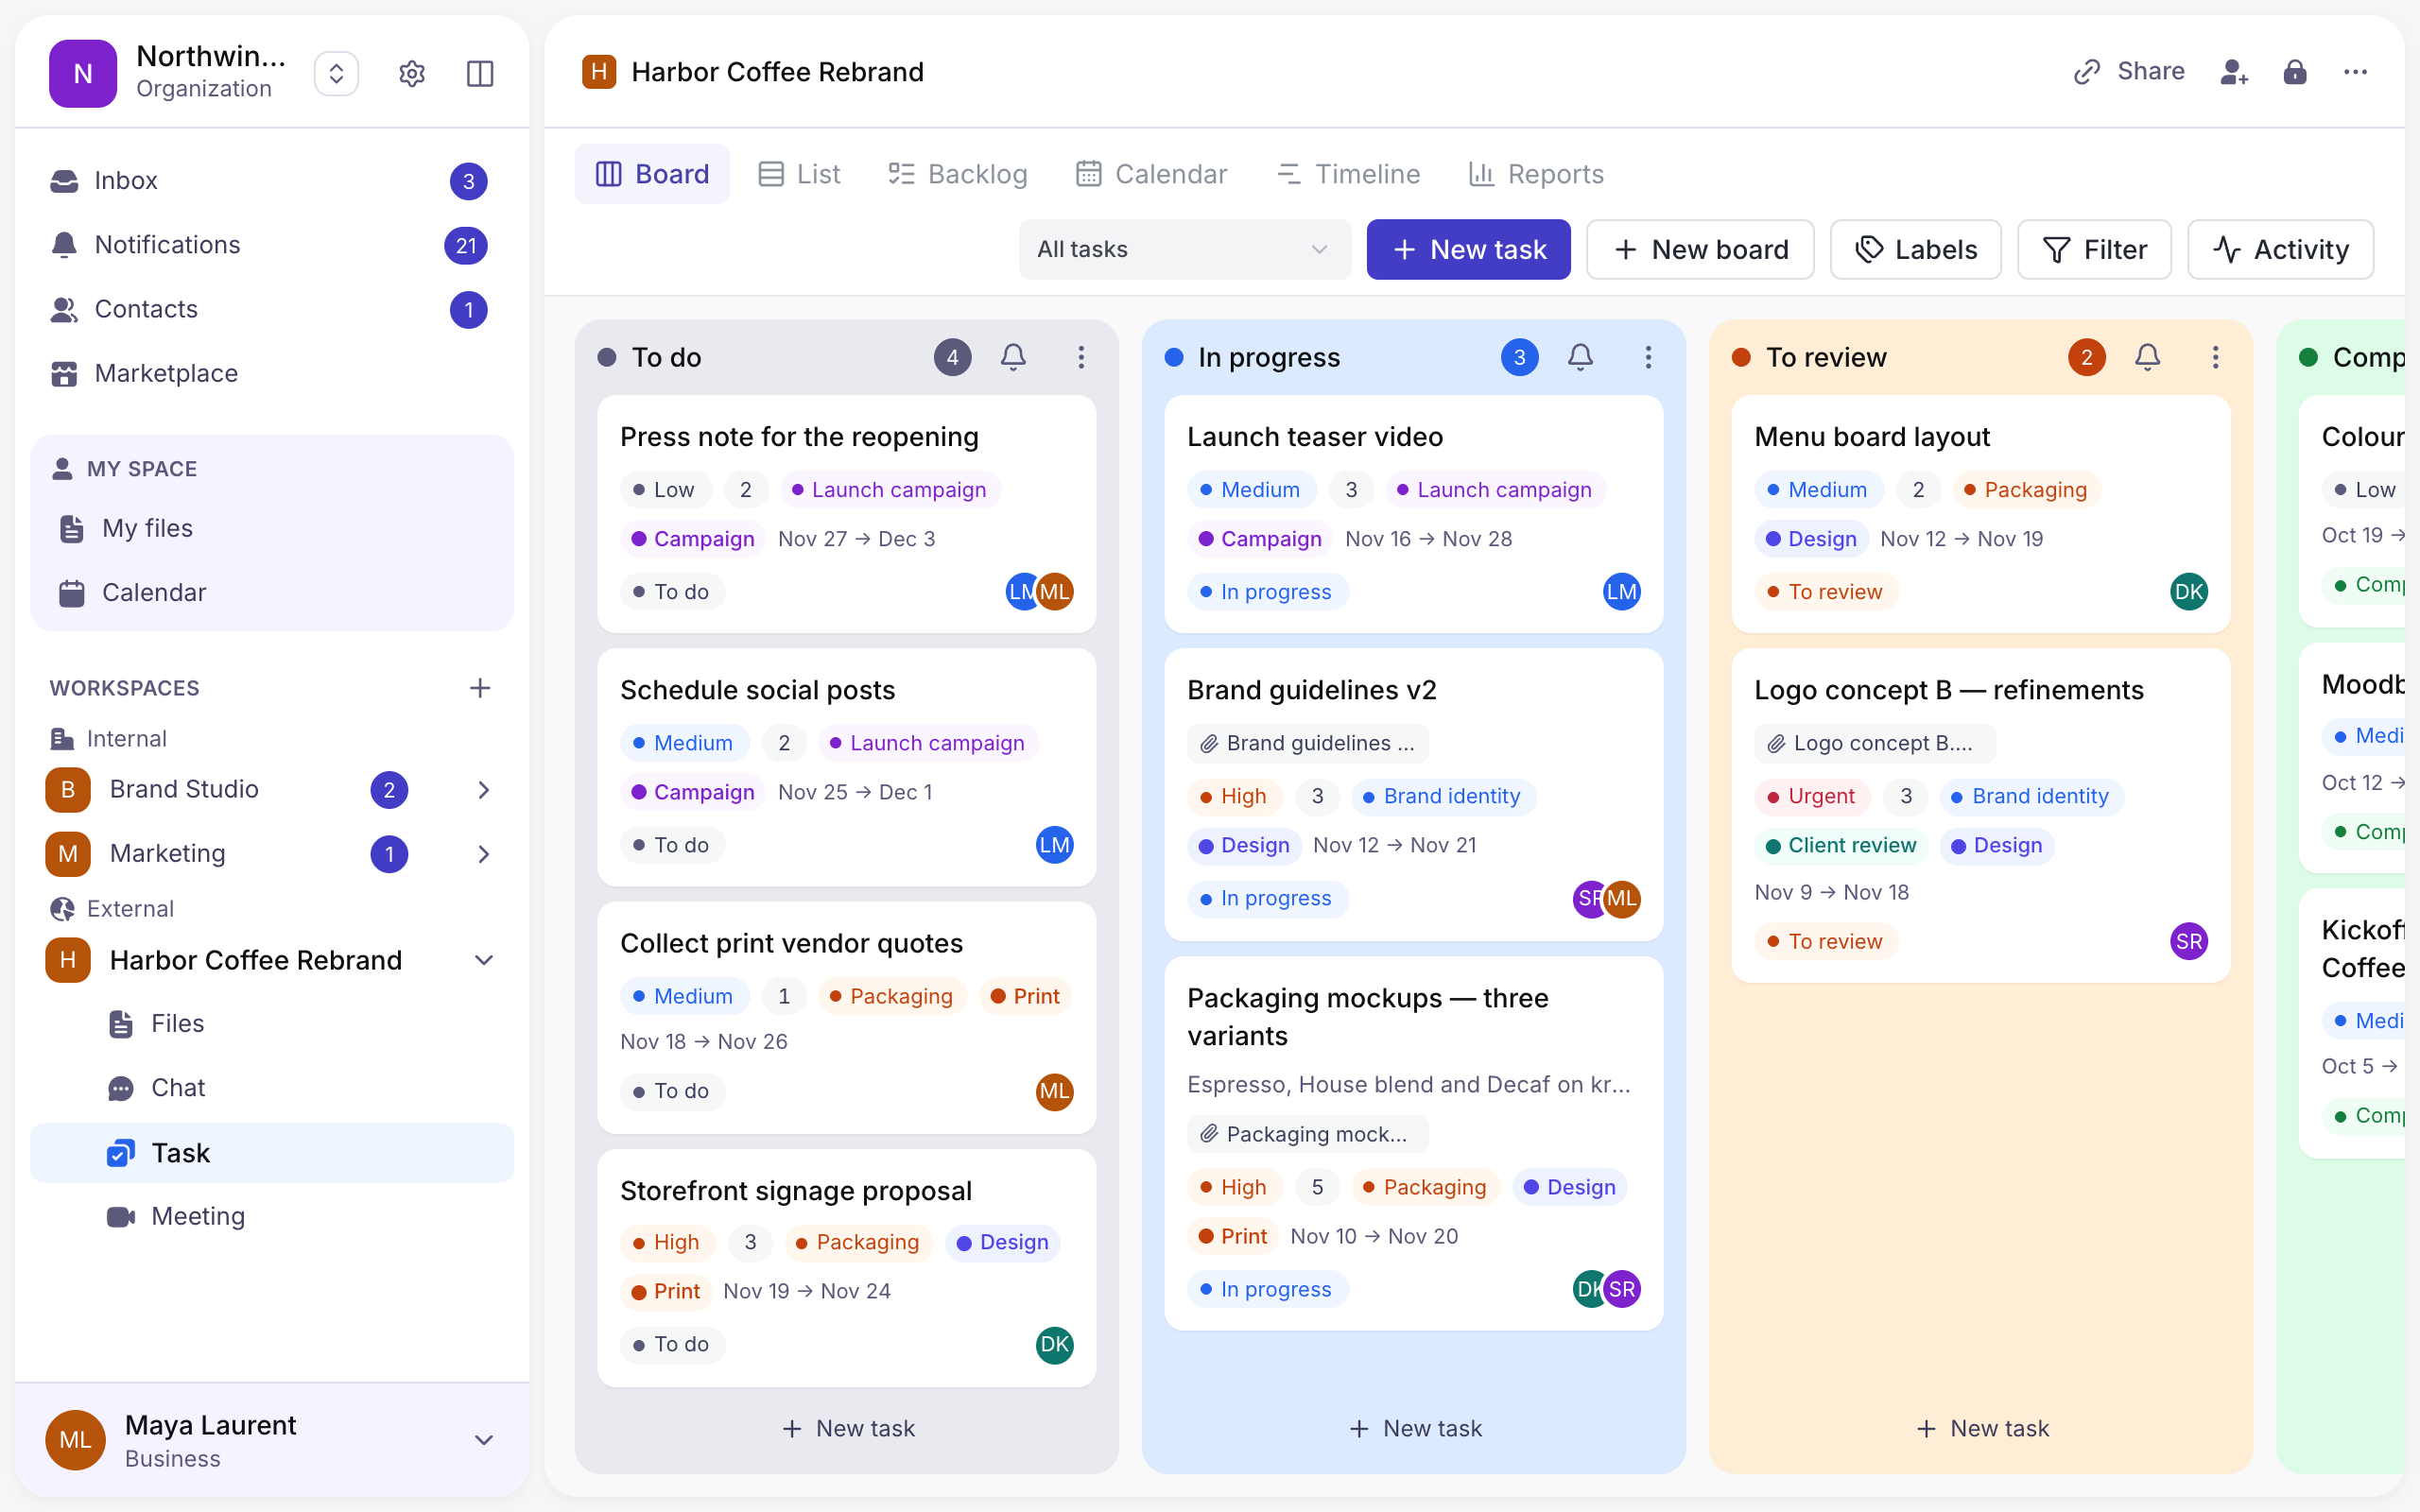
| Board | Tasks as cards in columns, from To do to Complete. |
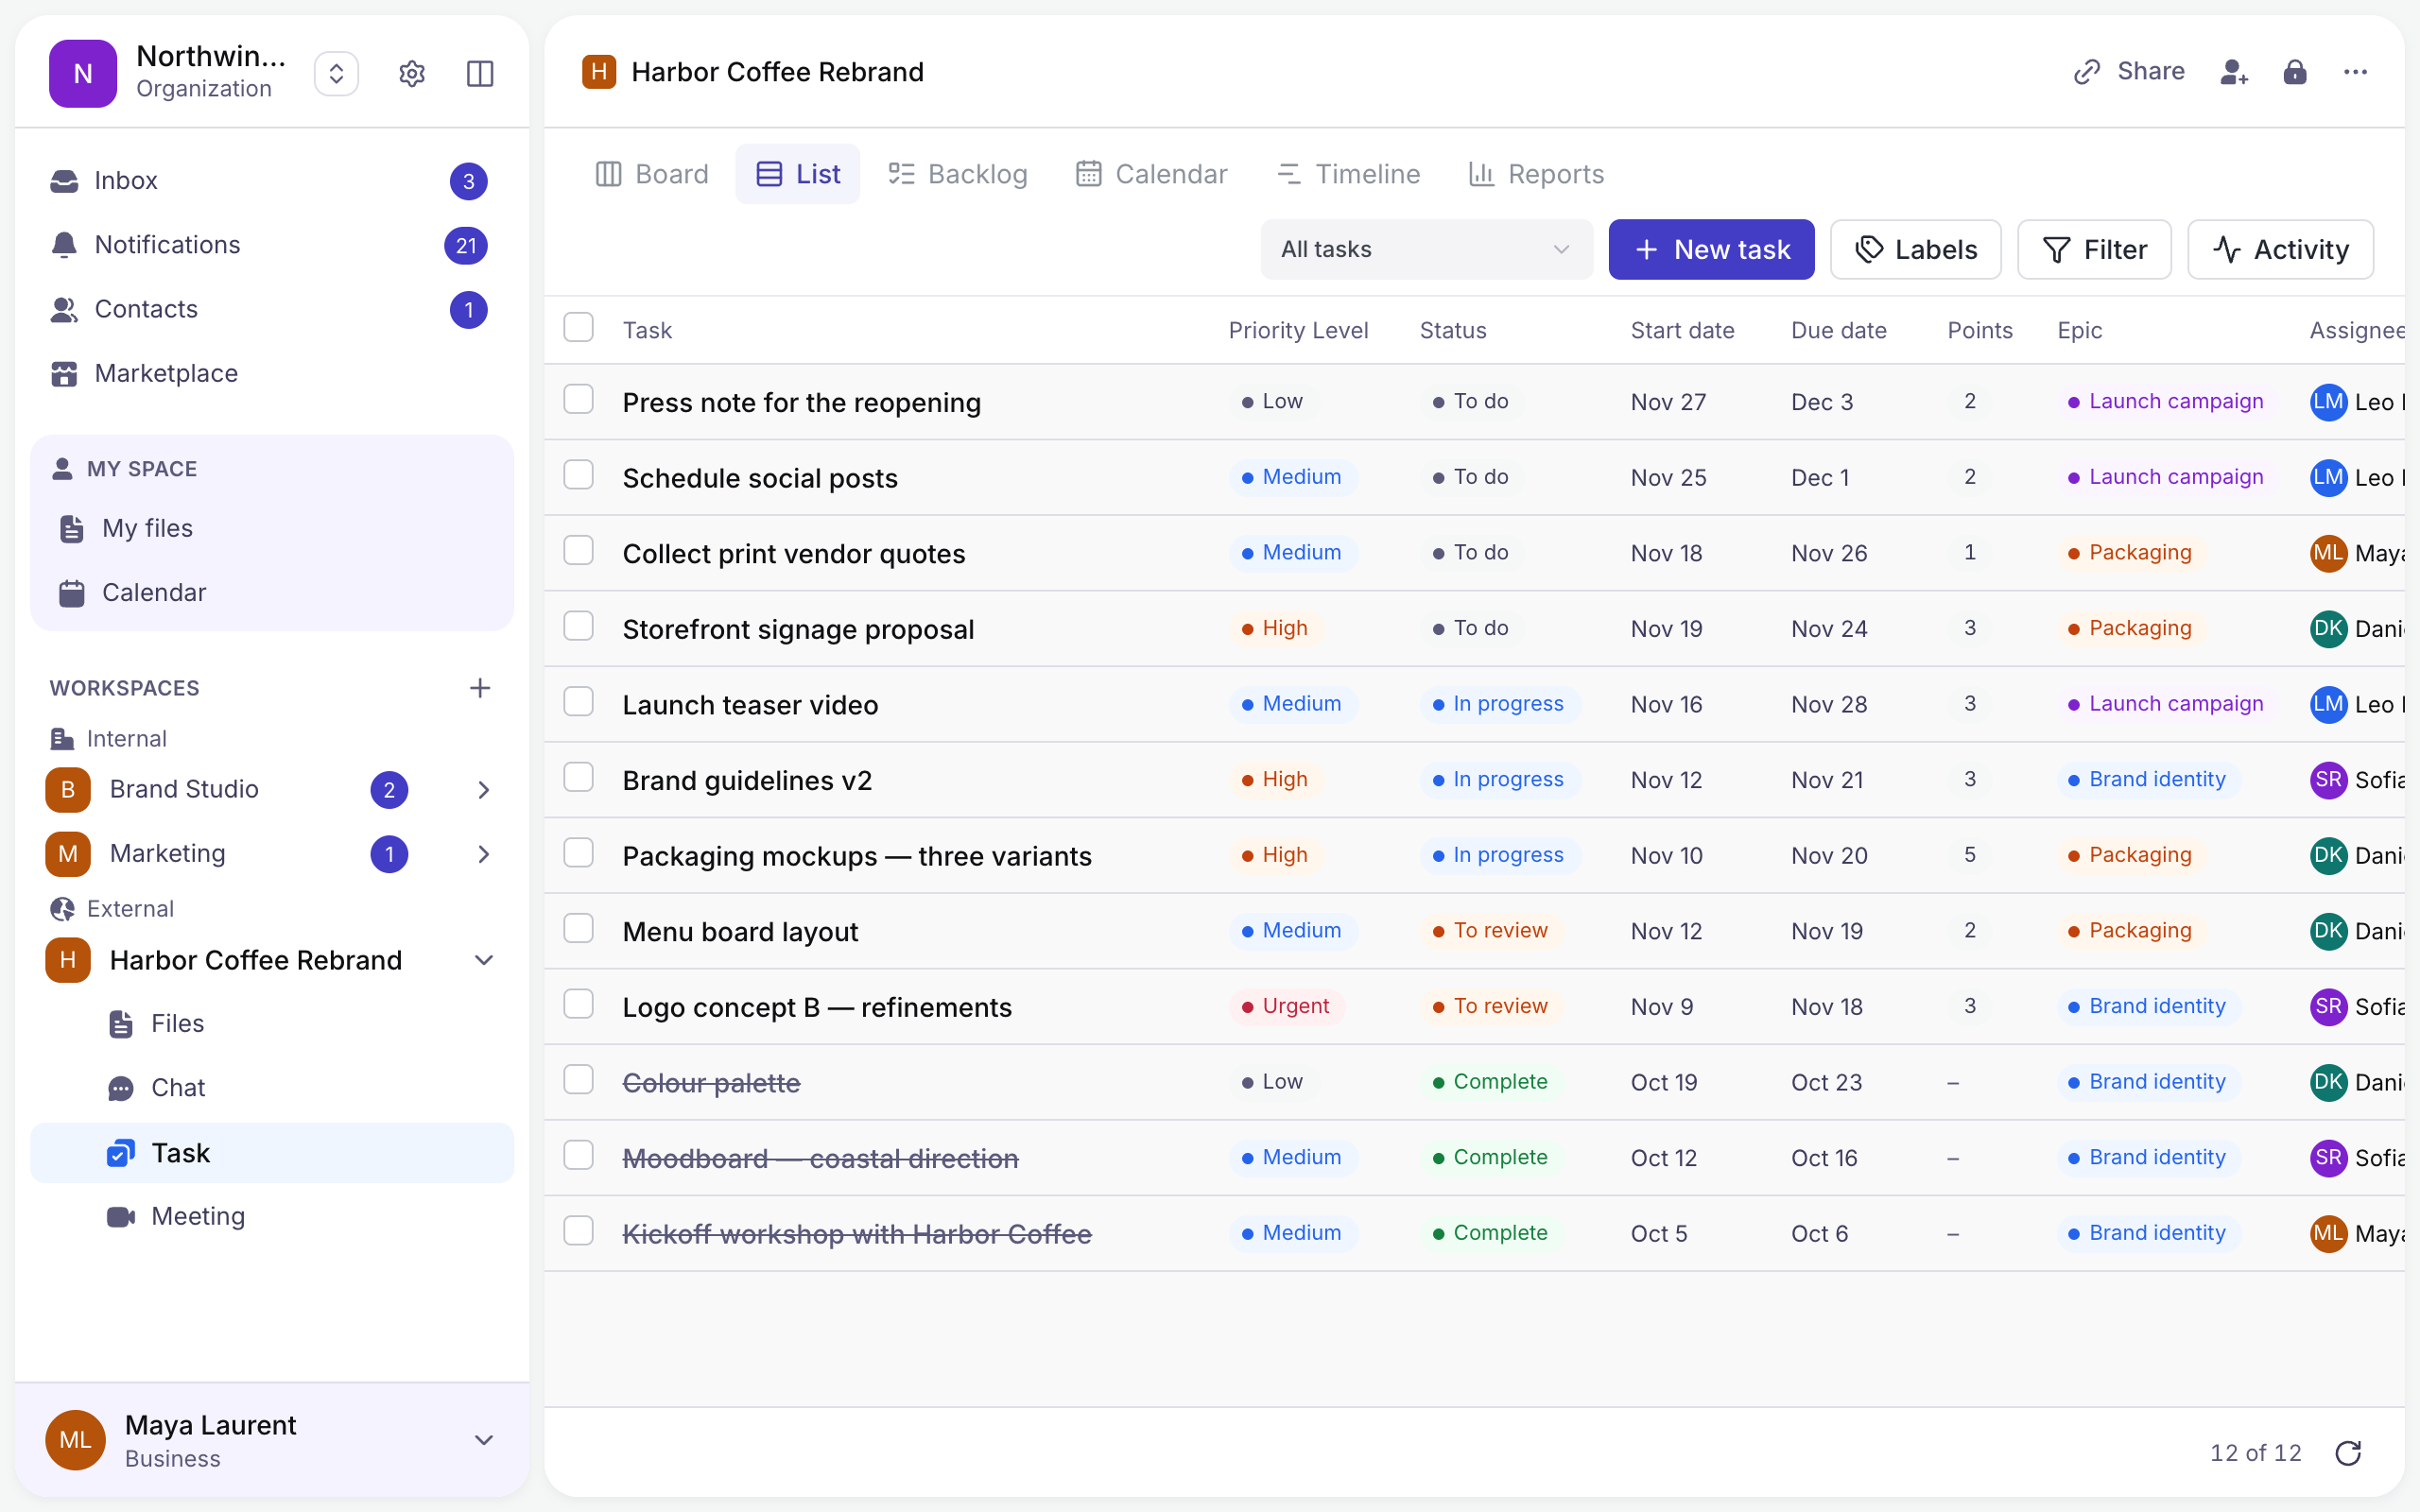
| List | Every task in a table: priority, status, dates, points, epic, assignee. |
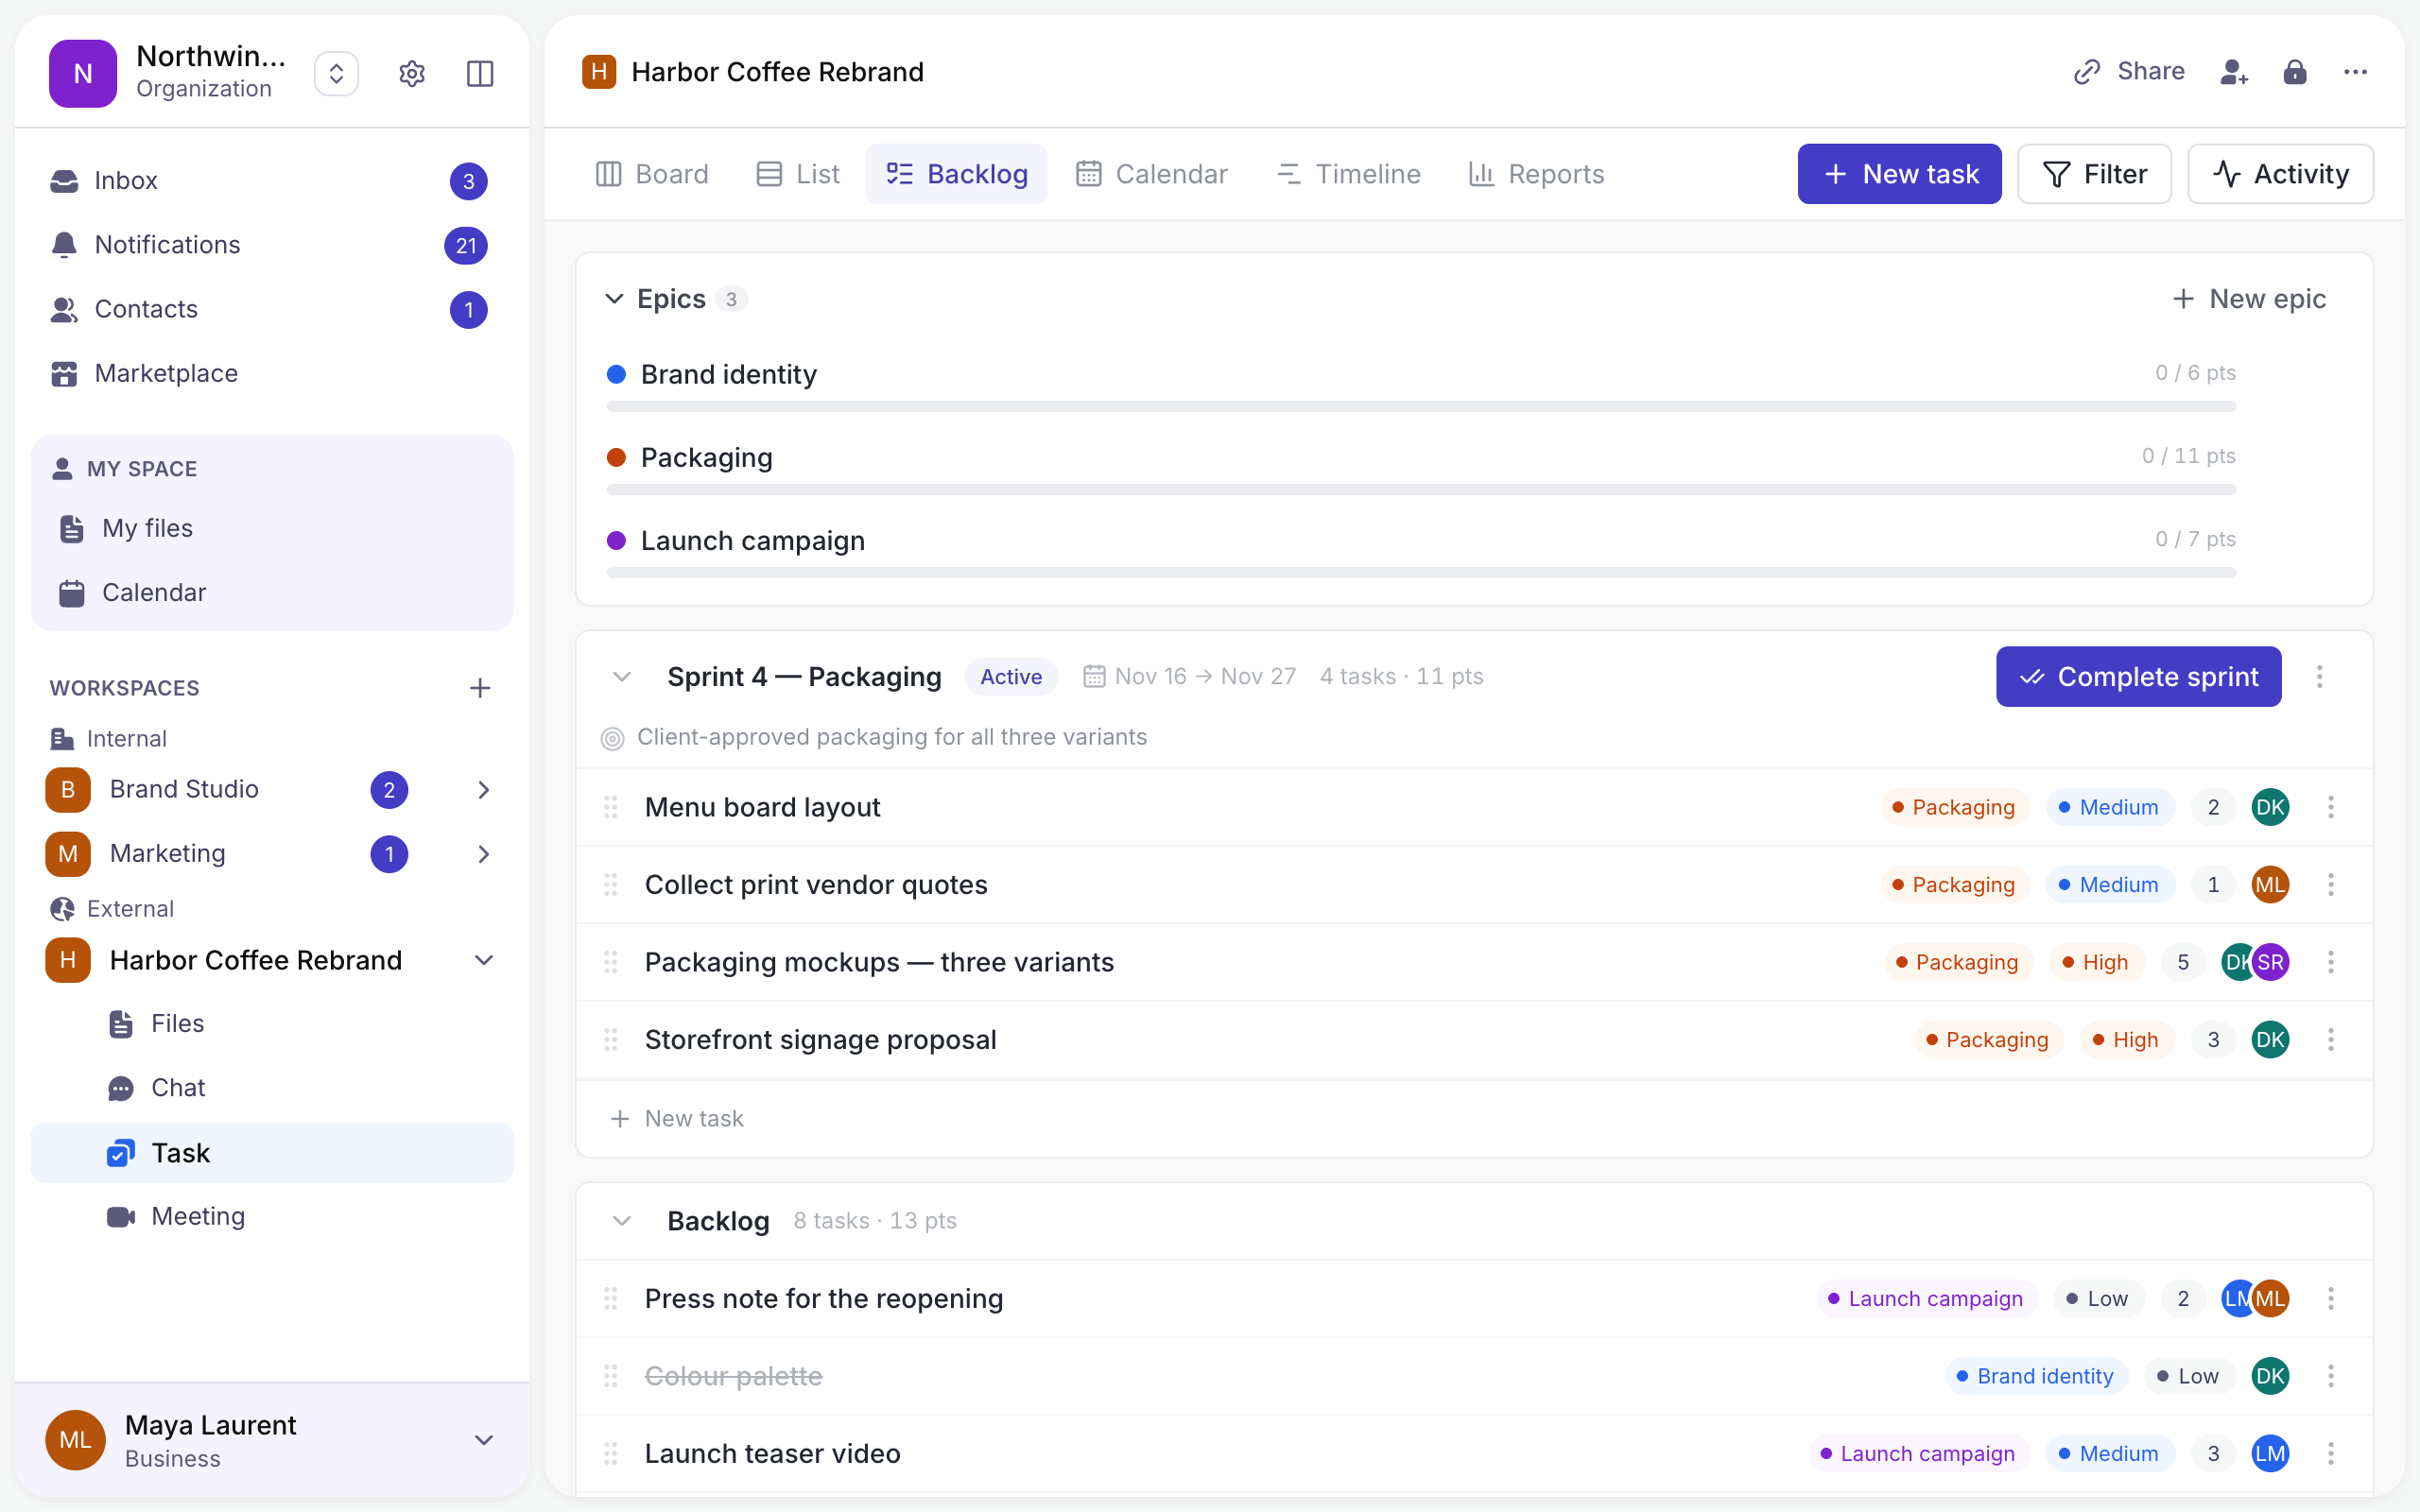
| Backlog | Epics, the current sprint, and what is waiting. |
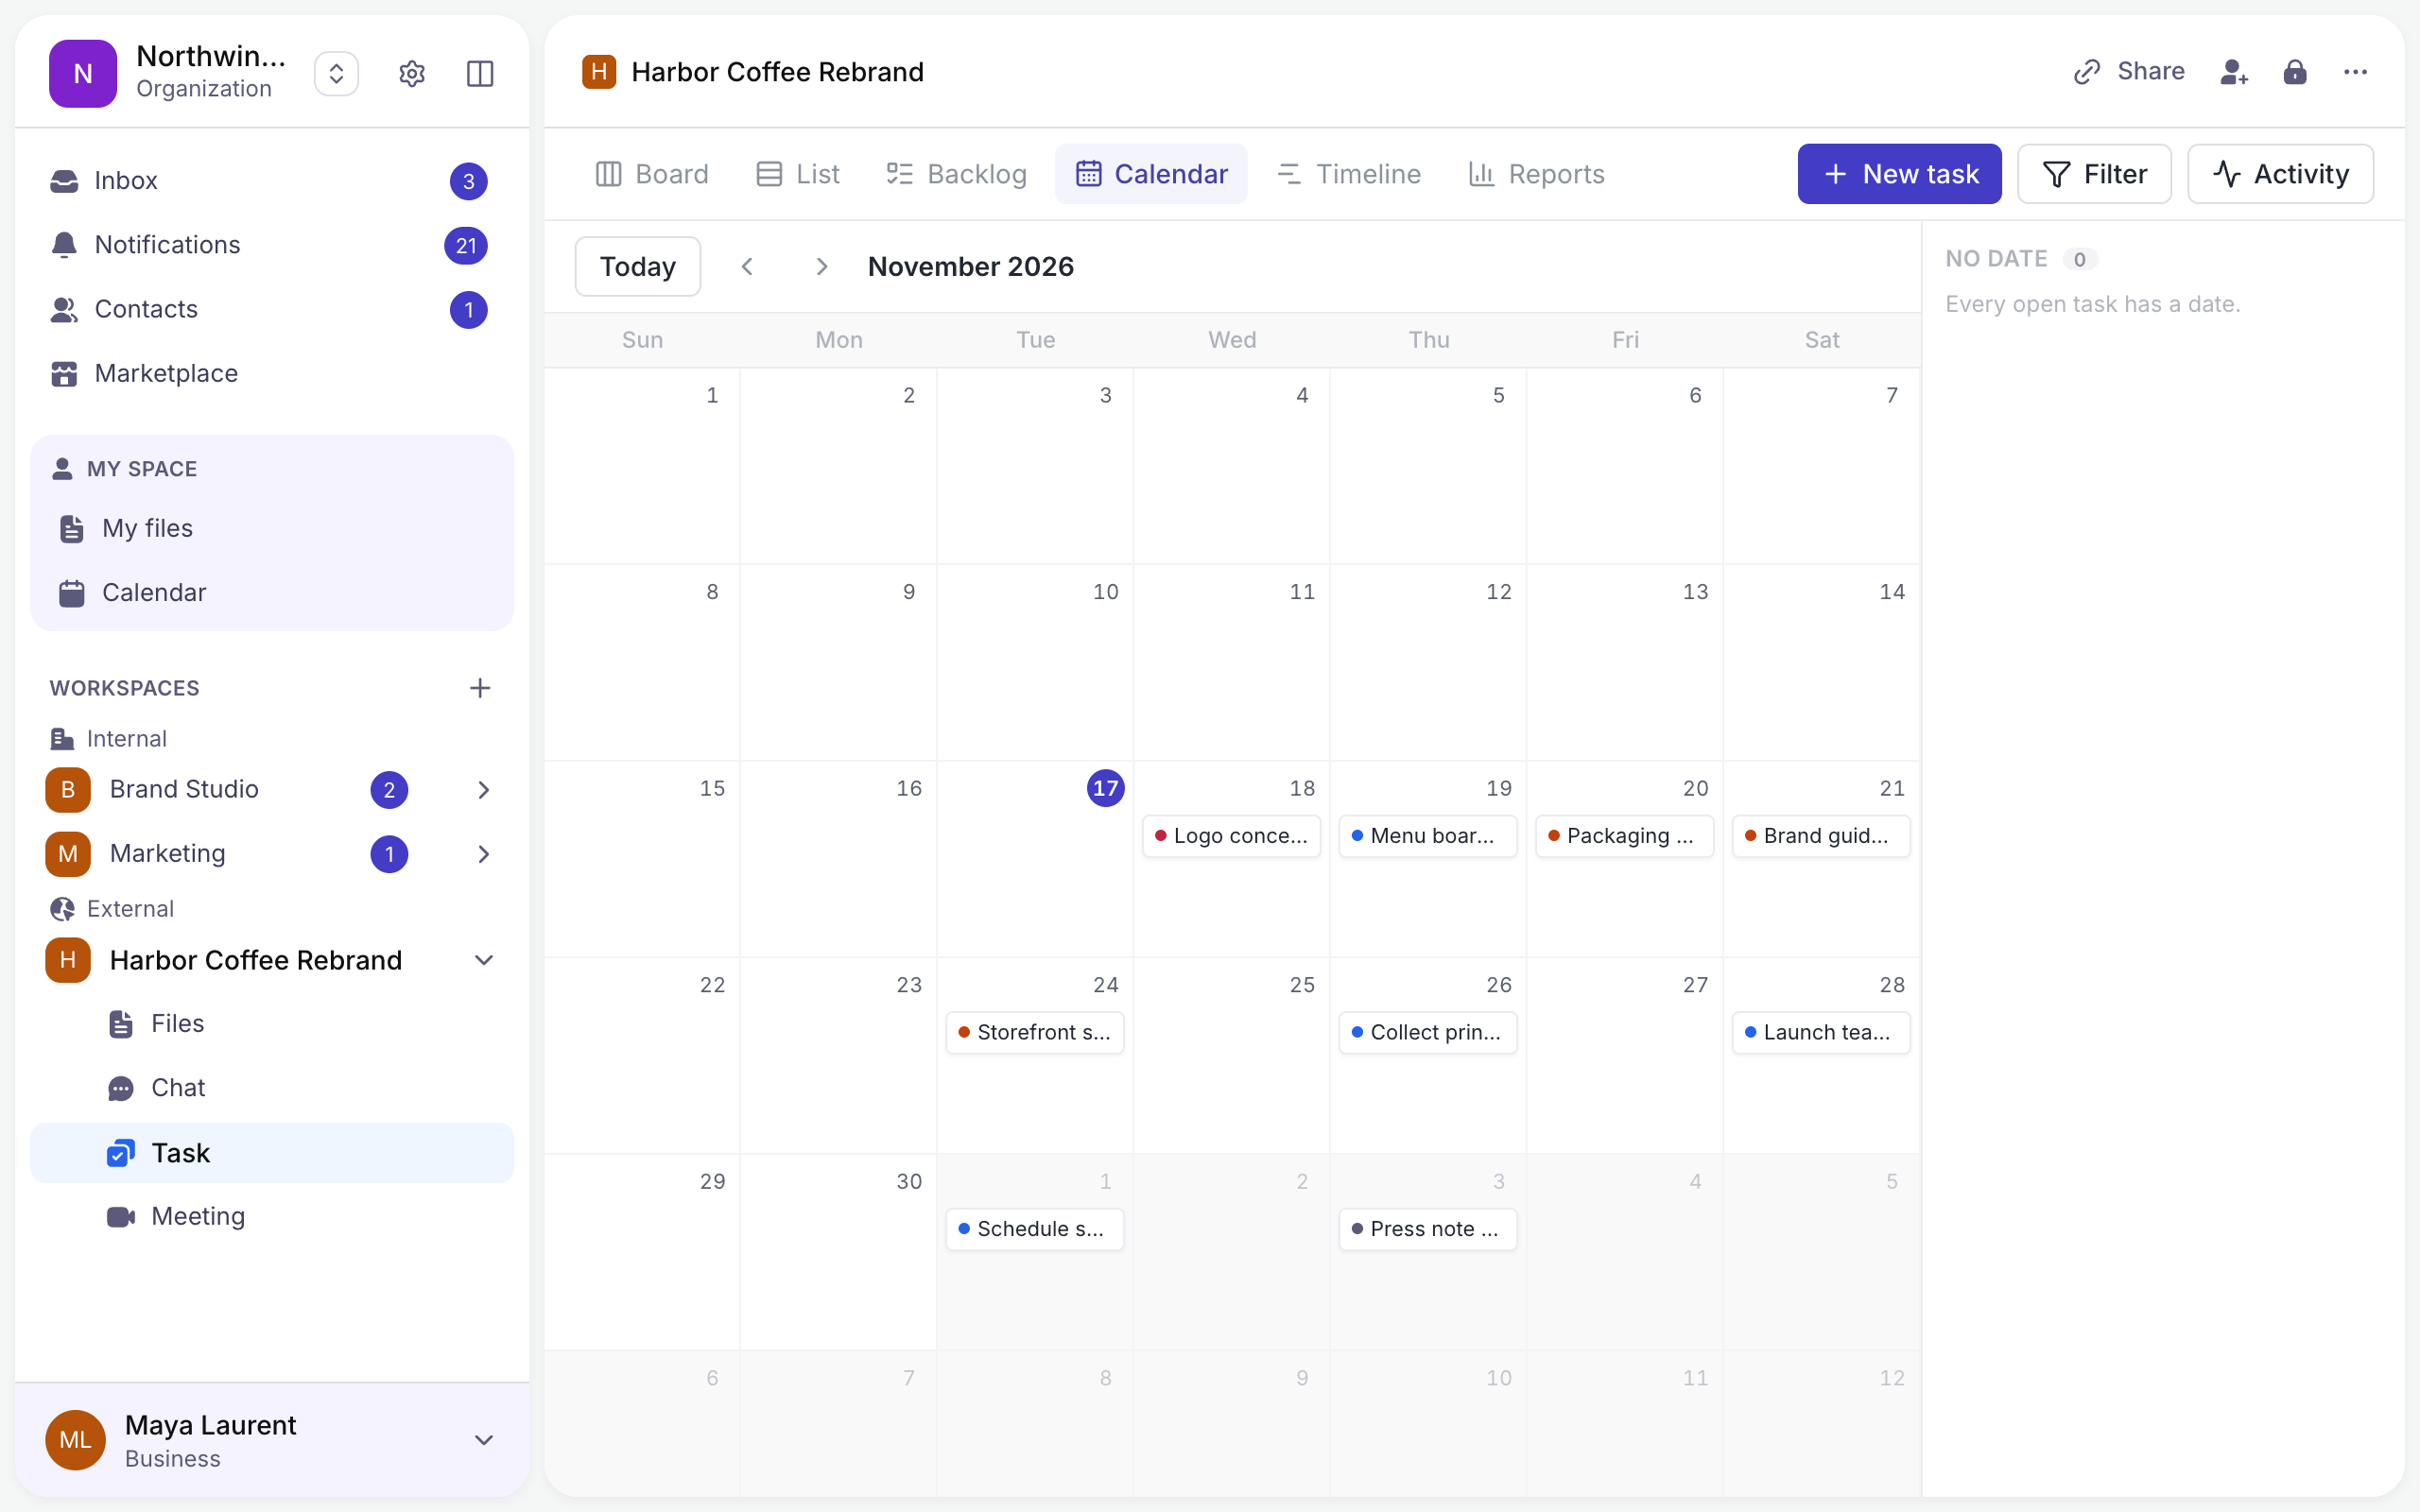
| Calendar | Tasks on their due date. |
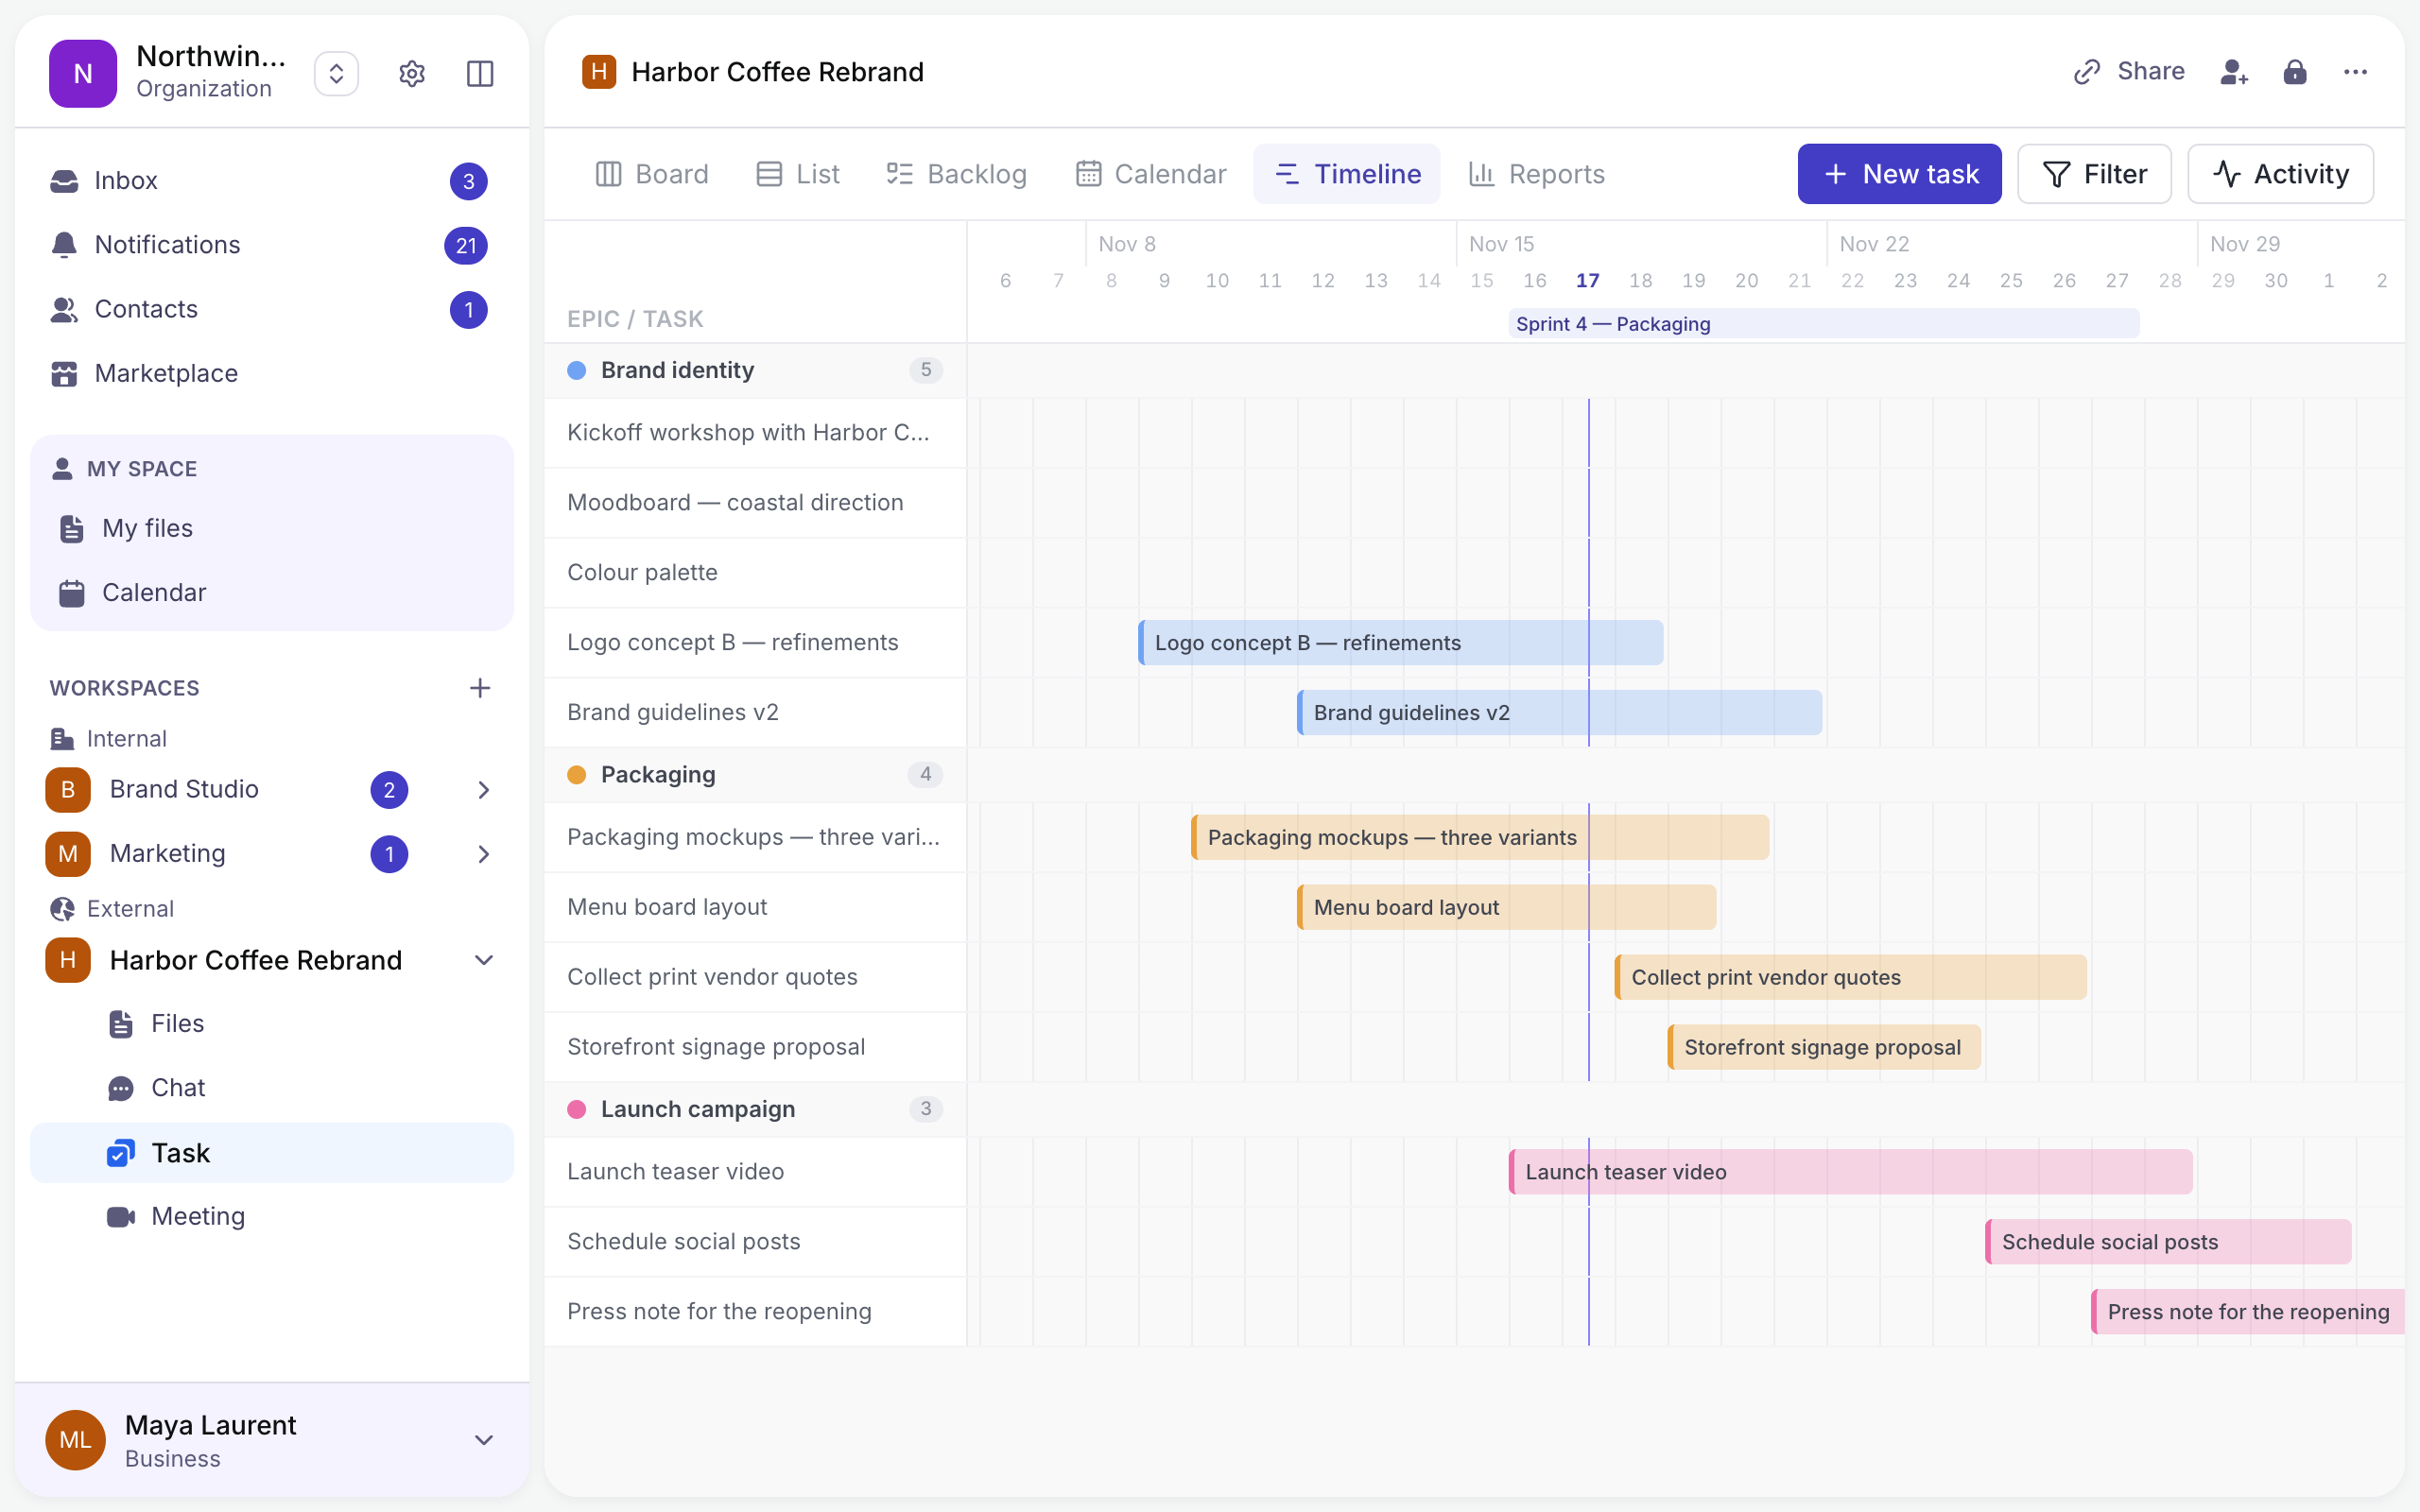
| Timeline | Tasks as bars over time, grouped by epic. |
| Reports | Progress, burndown, velocity and workload. |
1.5.1 Board view
Drag a card to another column to change its status. New task adds a card; Labels, Filter and Activity are at the top right.
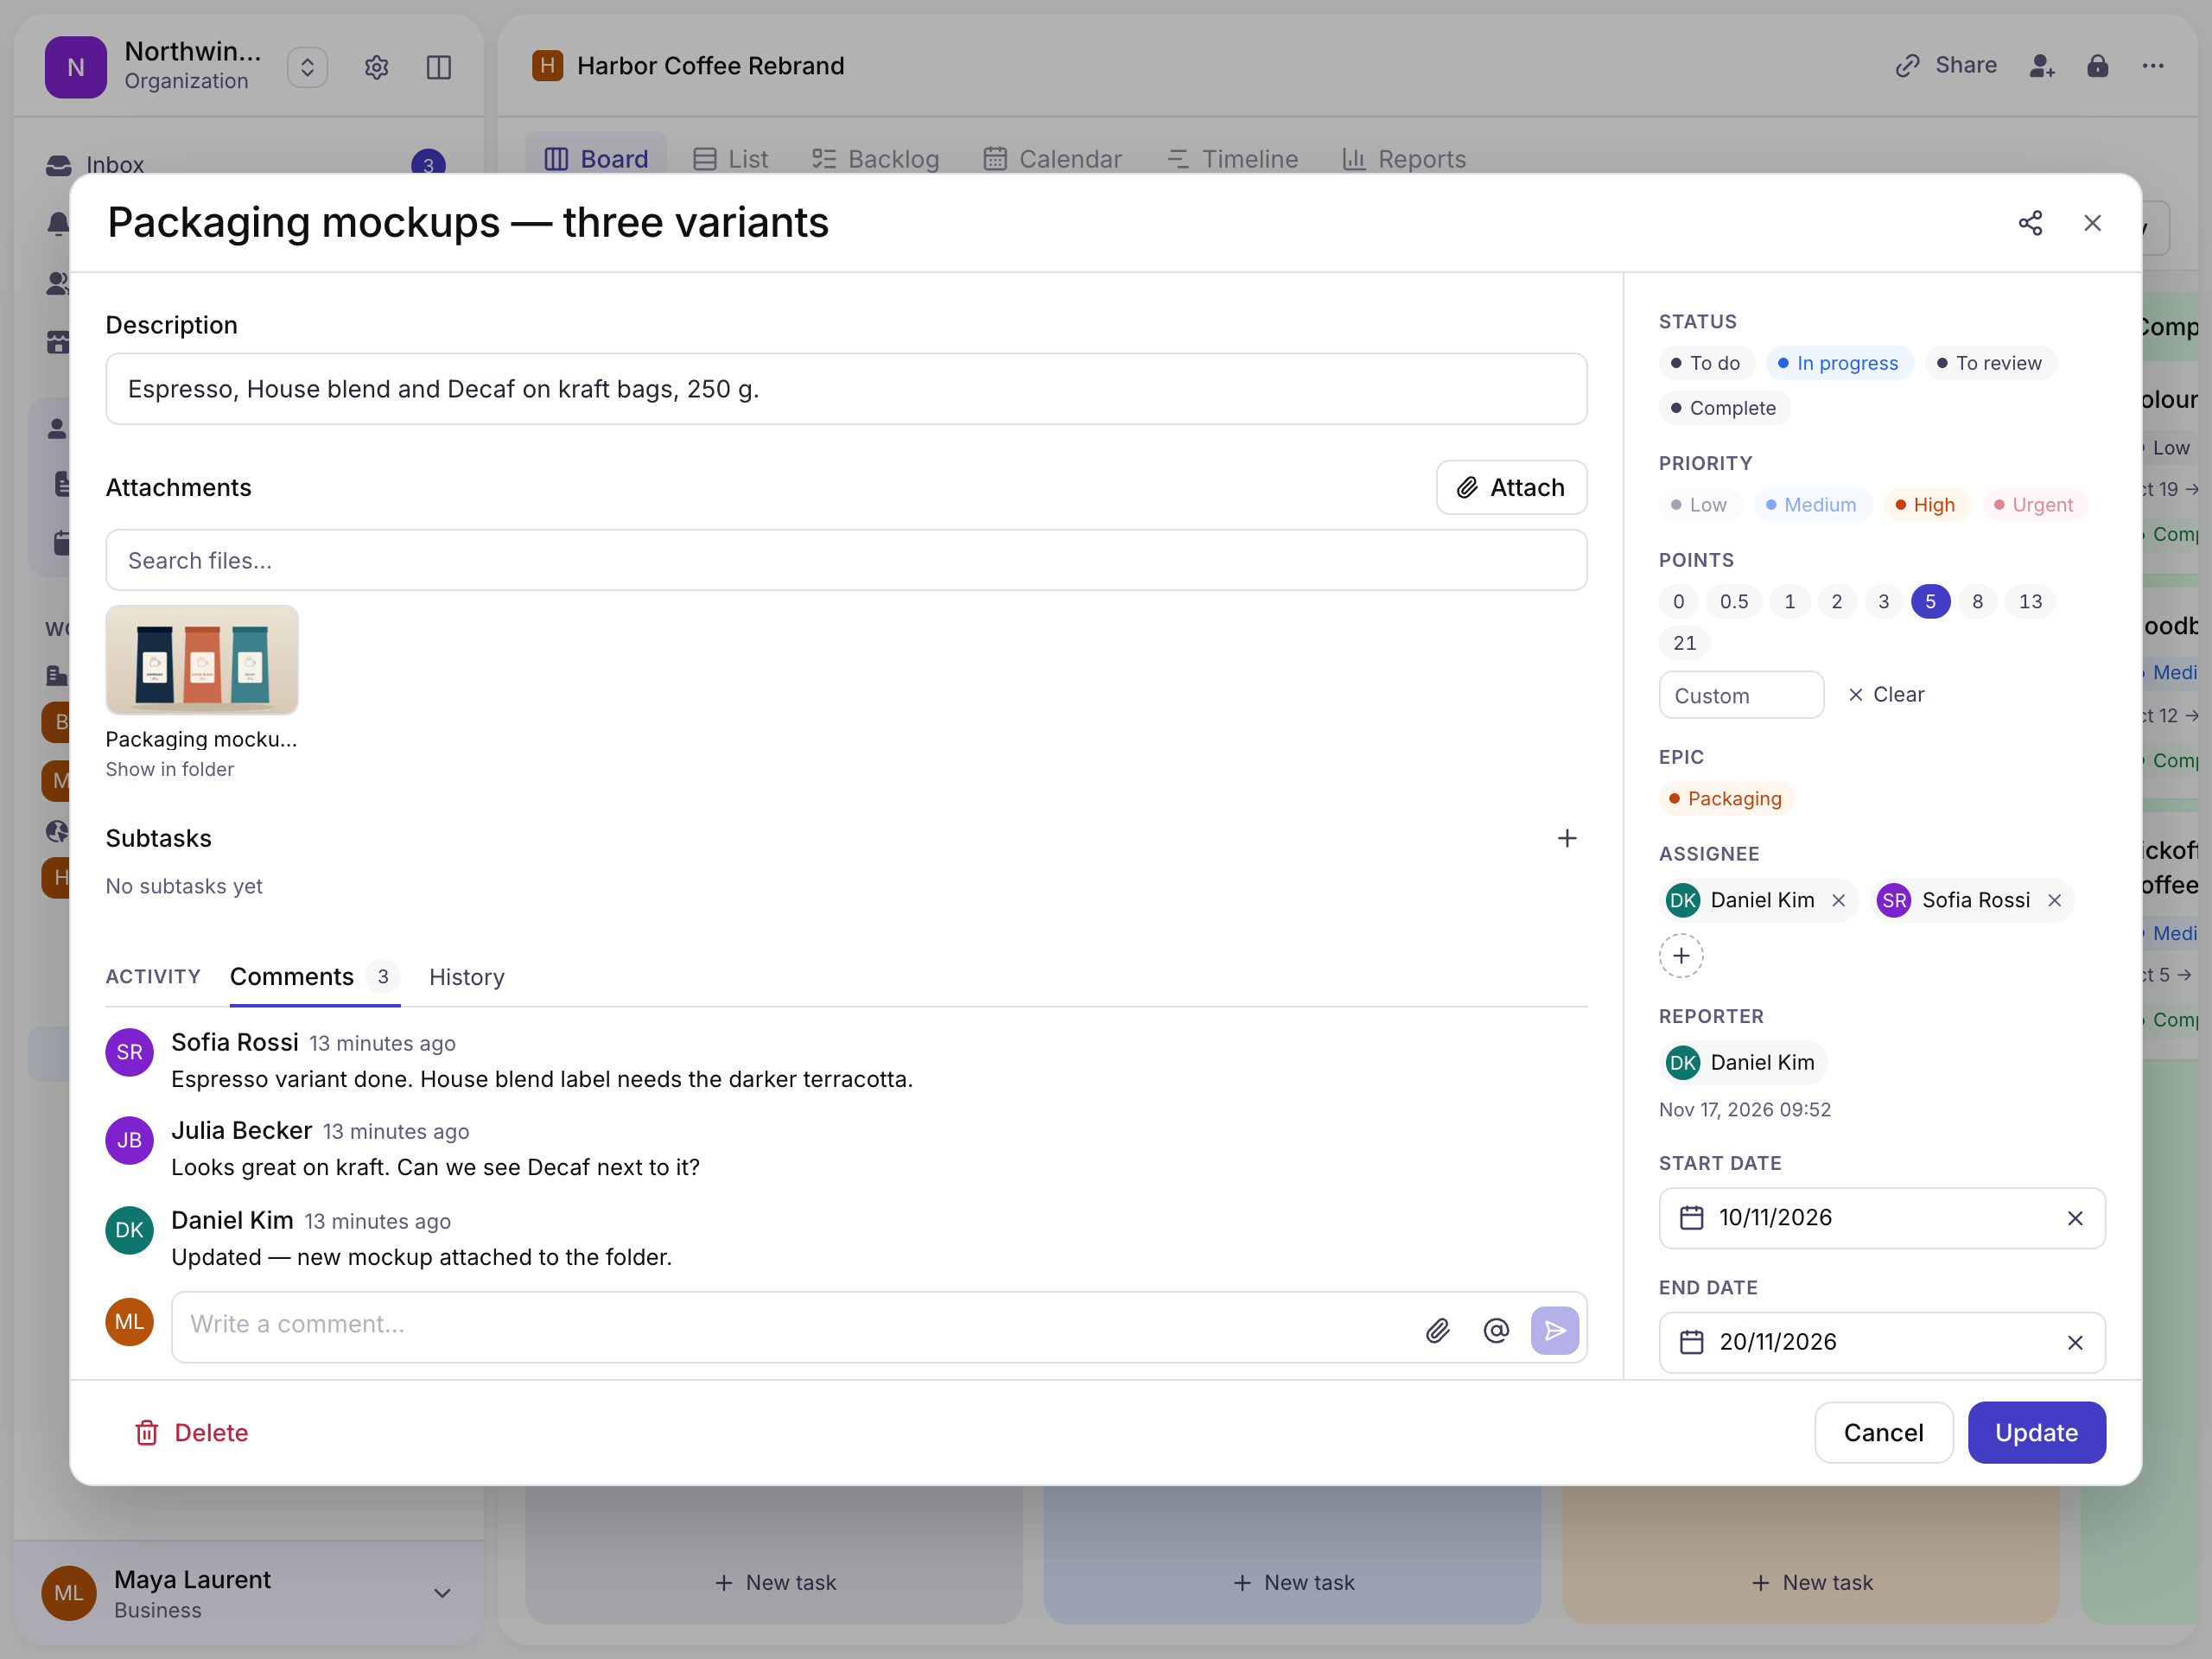
1.5.2 A task
Click a card to open it: description, attachments, subtasks and comments on the left; status, priority, points, epic, assignees and dates on the right.
1.5.3 List view
1.5.4 Backlog
Plan in sprints: group tasks under epics, fill a sprint, start it, and complete it when the work is done.
1.5.5 Calendar view
1.5.6 Timeline view
1.5.7 Reports
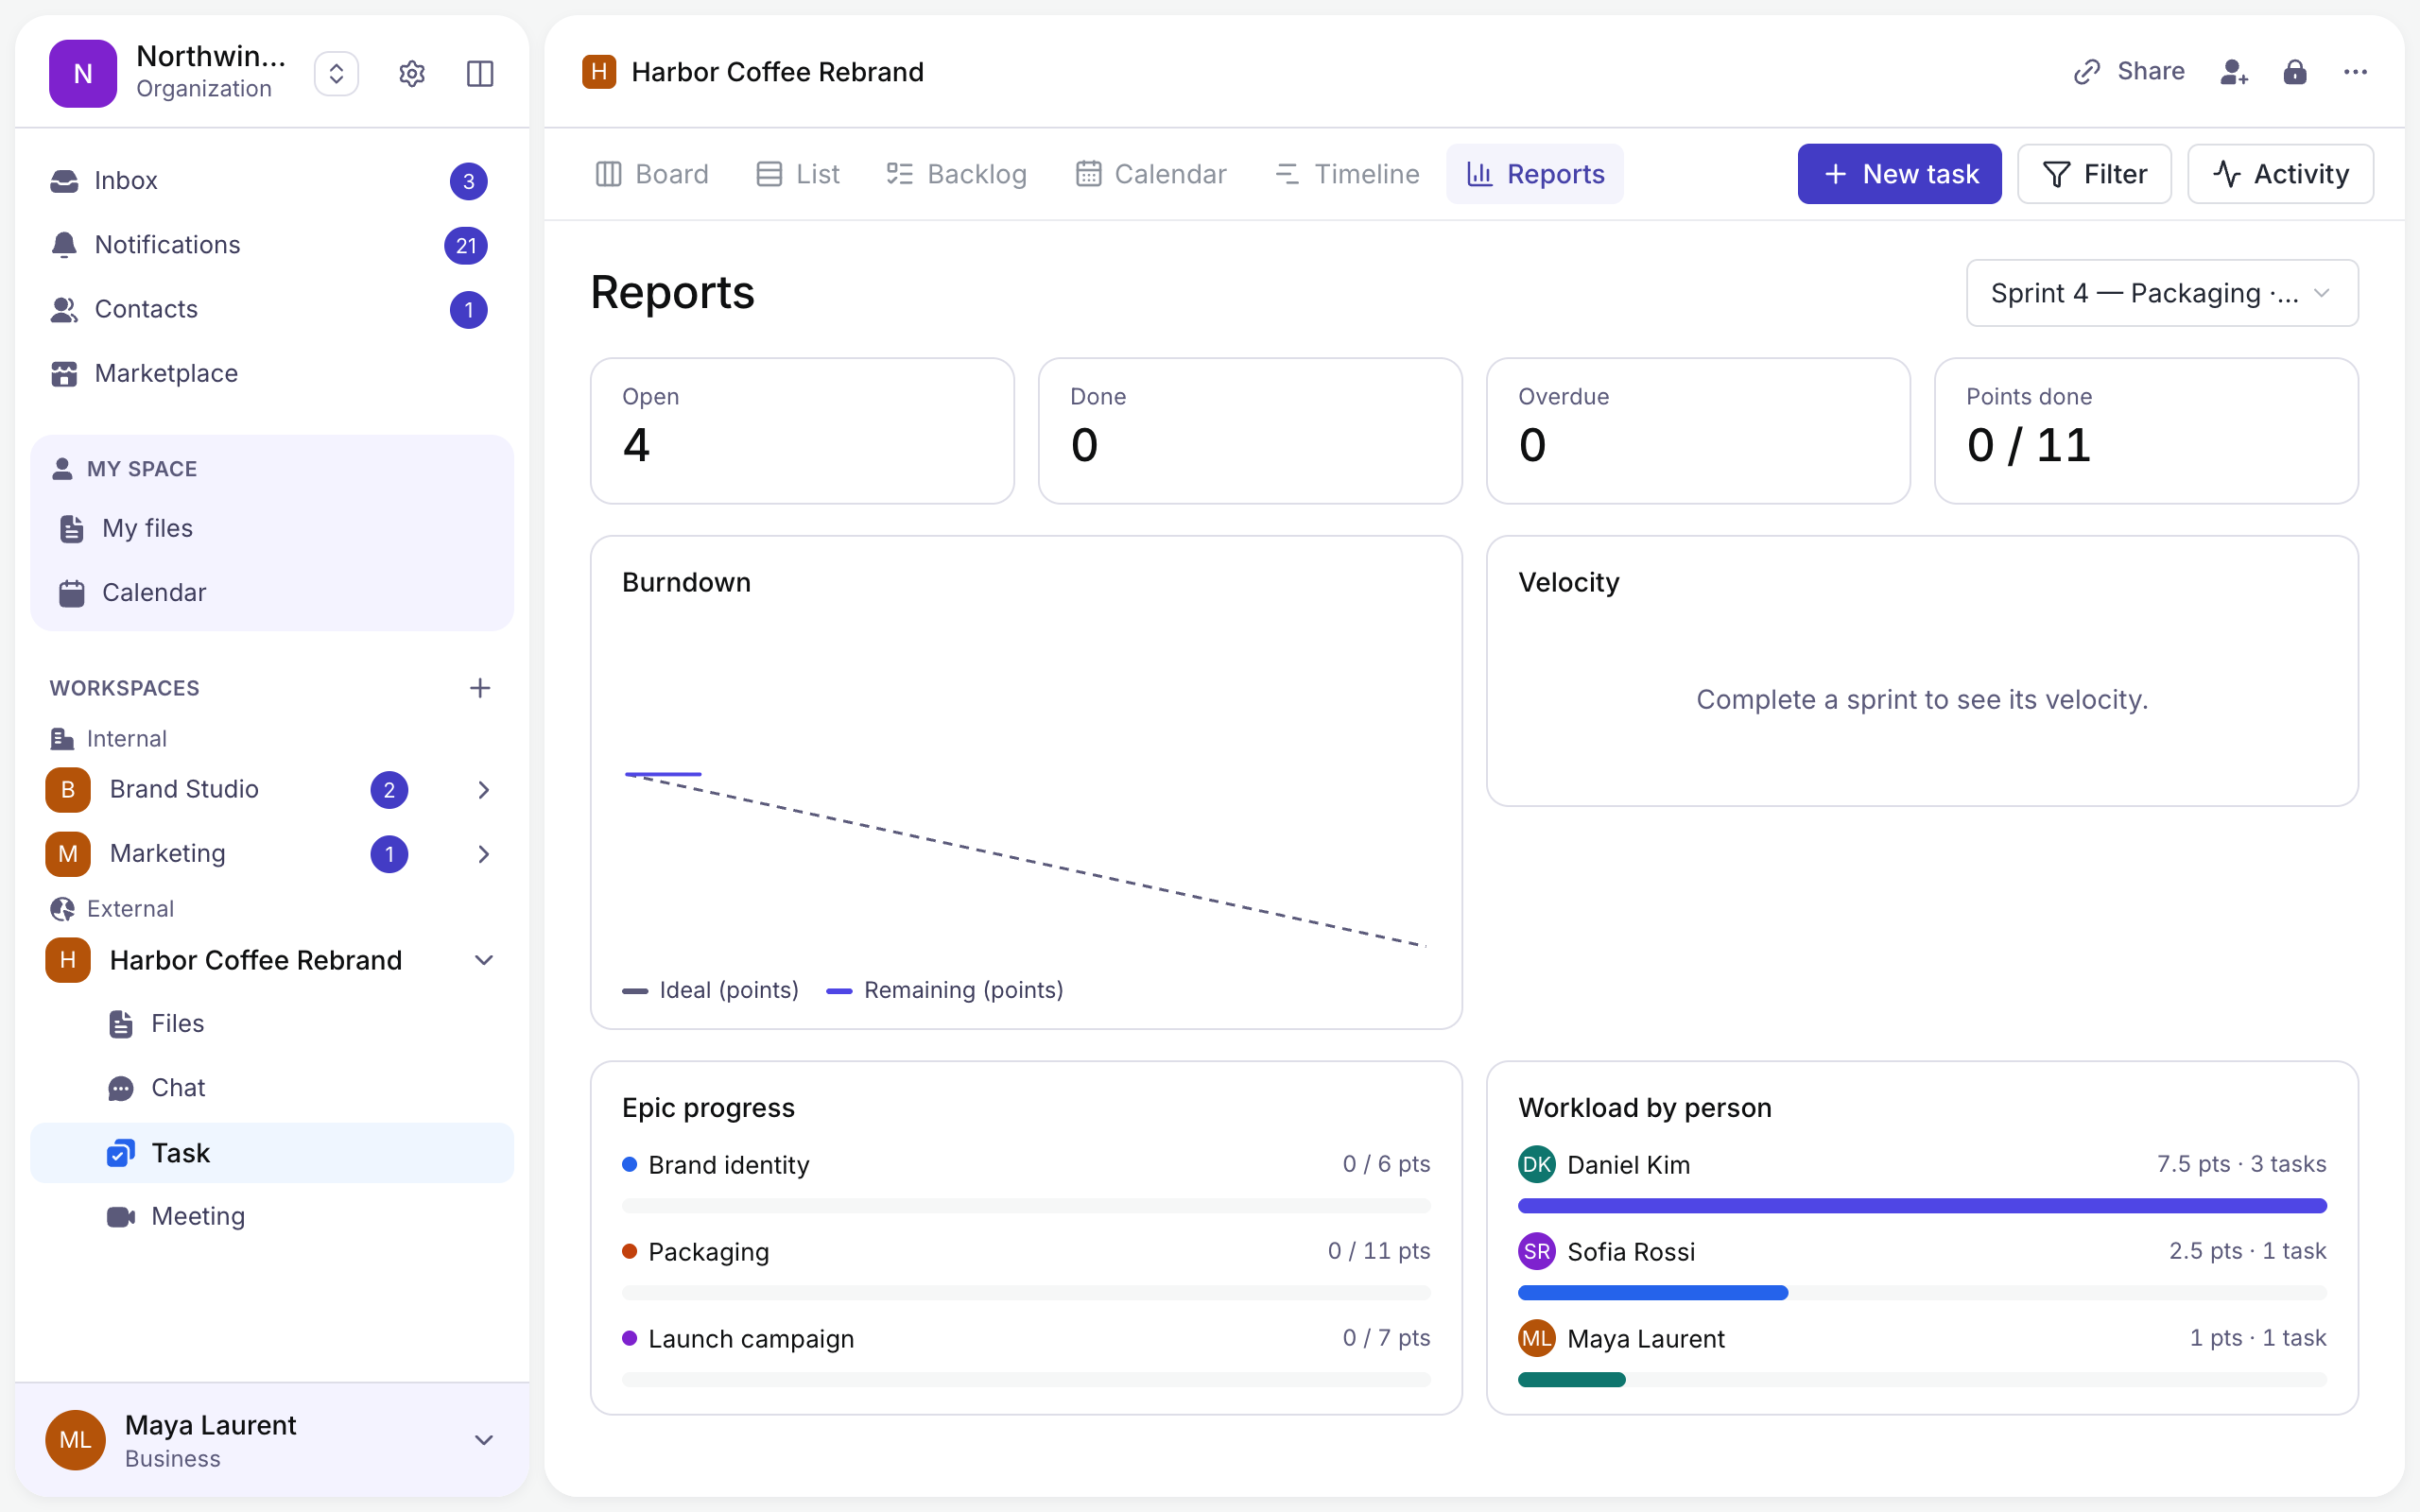
The health of the project at a glance: open, done and overdue tasks, the burndown of the sprint, progress by epic and workload by person.